Neo4j is the world's leading graph database management system, designed for optimized fast management, storage, and traversal of nodes and relationships. It is a high-performance graph store with all the features expected of a mature and robust database, like a friendly query language (Cypher) and ACID transactions.
Apache Hop is a data engineering and data orchestration platform. Hop allows data engineers and data developers to visually design workflows and pipelines to build powerful solutions. No other data engineering platform currently has the integration with Neo4j that Apache Hop offers. The graph functionality in Apache Hop is not limited to just Neo4j: all graph databases that support the OpenCypher language and bolt protocol can be used with the Apache Hop Neo4j functionality.
With the following example, you will learn how to load data to a Neo4j database using Apache Hop. If you do not have access to a Neo4j database, you can consult the Neo4j documentation to run Neo4j desktop locally or in a container, or try Neo4j Aura to run a cloud instance of Neo4j. Alternatively, all of the functionality discussed in this post also works with Memgraph, and should work with AWS Neptune and other OpenCypher-compatible graph databases.
As always, the examples here use a Hop project with environment variables to separate code and configuration in your Hop projects.
Before starting, let’s see our input data and specify nodes and relationships:
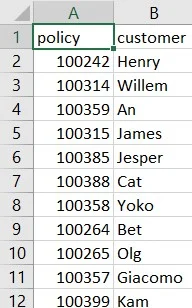
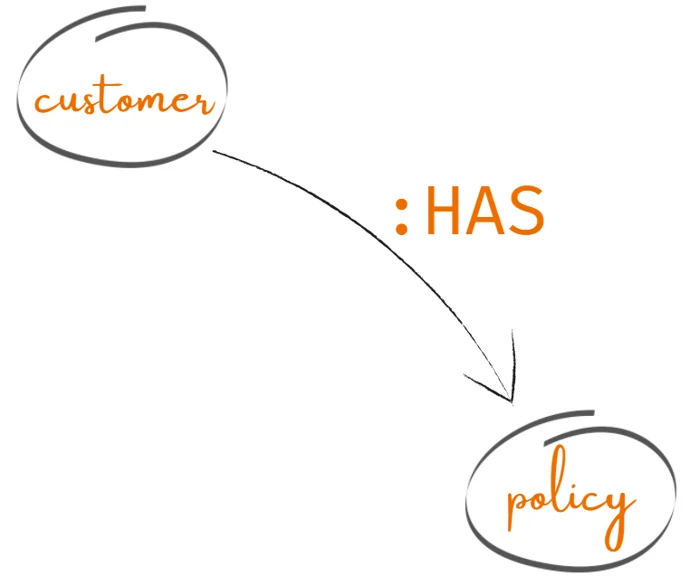
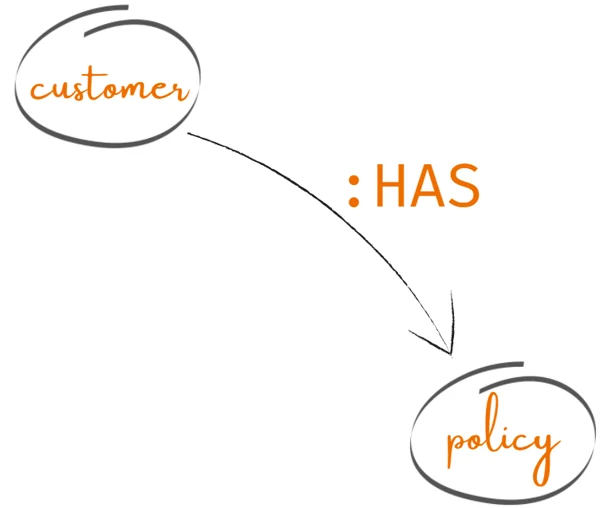
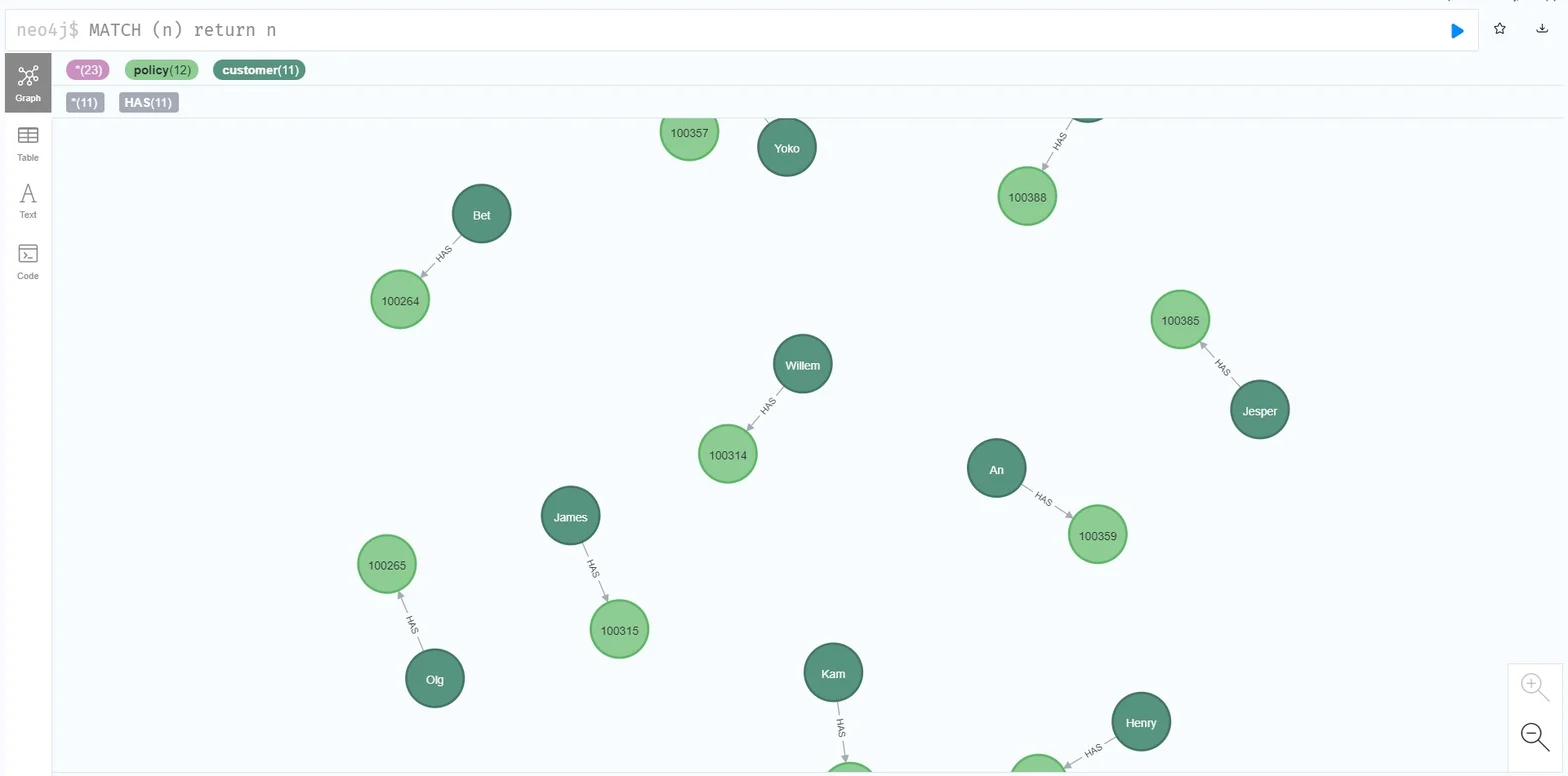
The CSV file we are going to use contains a policy number and each customer's policy. We’ll have two node labels: policy and customer. We'll create as HAS relationship between the customer and the policy nodes. You'll want to use a more descriptive relationship name like HAS_POLICY in real-world scenarios. Graph data modeling is a topic of its own, so we've kept this relationship name as short as possible for brevity here.
Step 1: Create a Neo4j connection
The Neo4j connection, specified on a project level, can be reused across multiple (instances of) a transform or other plugin types.
To create a Neo4j Connection click on the New -> Neo4j Connection option or click on the Metadata -> Neo4j Connection option.
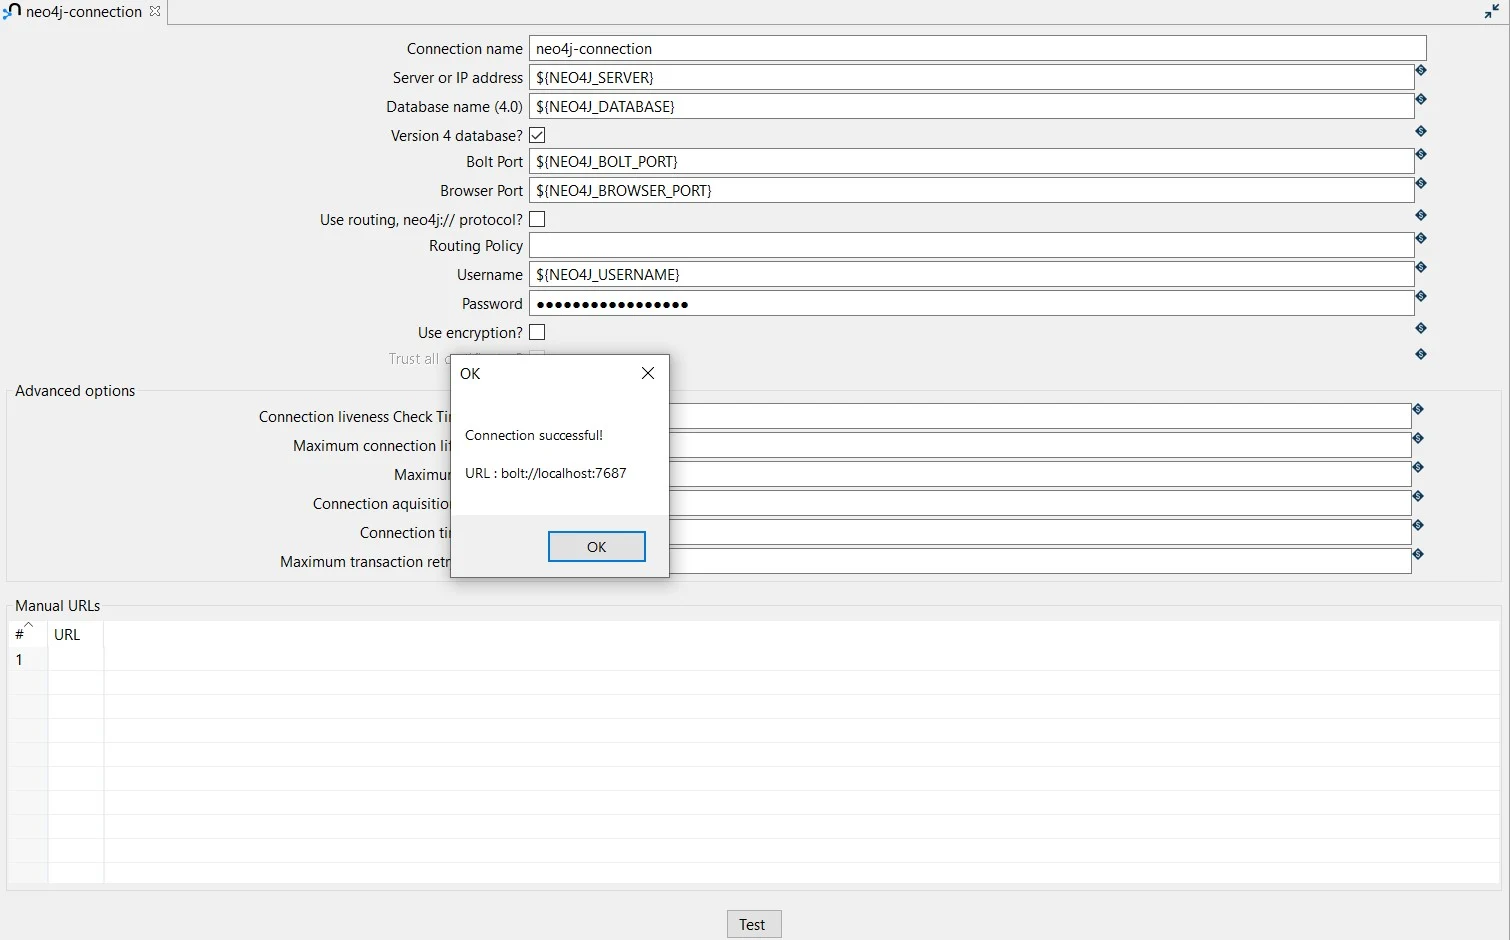
The system displays the New Neo4j Connection view with the following fields to be configured.
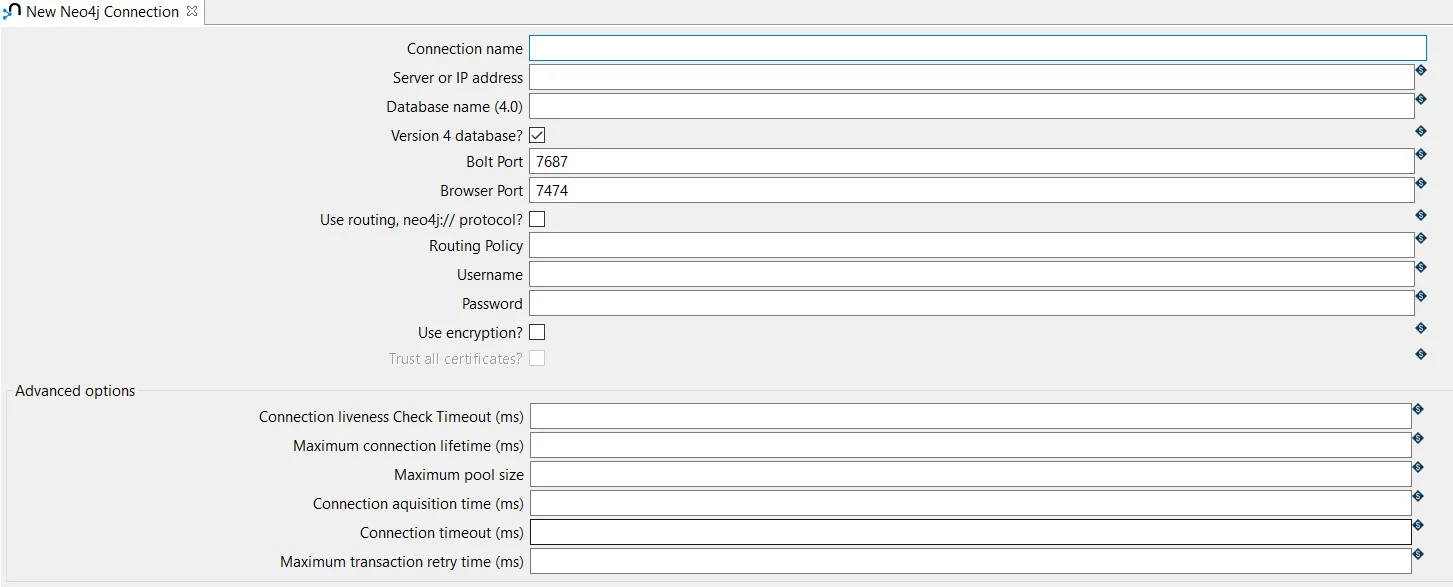
The connection can be configured as in the following example:
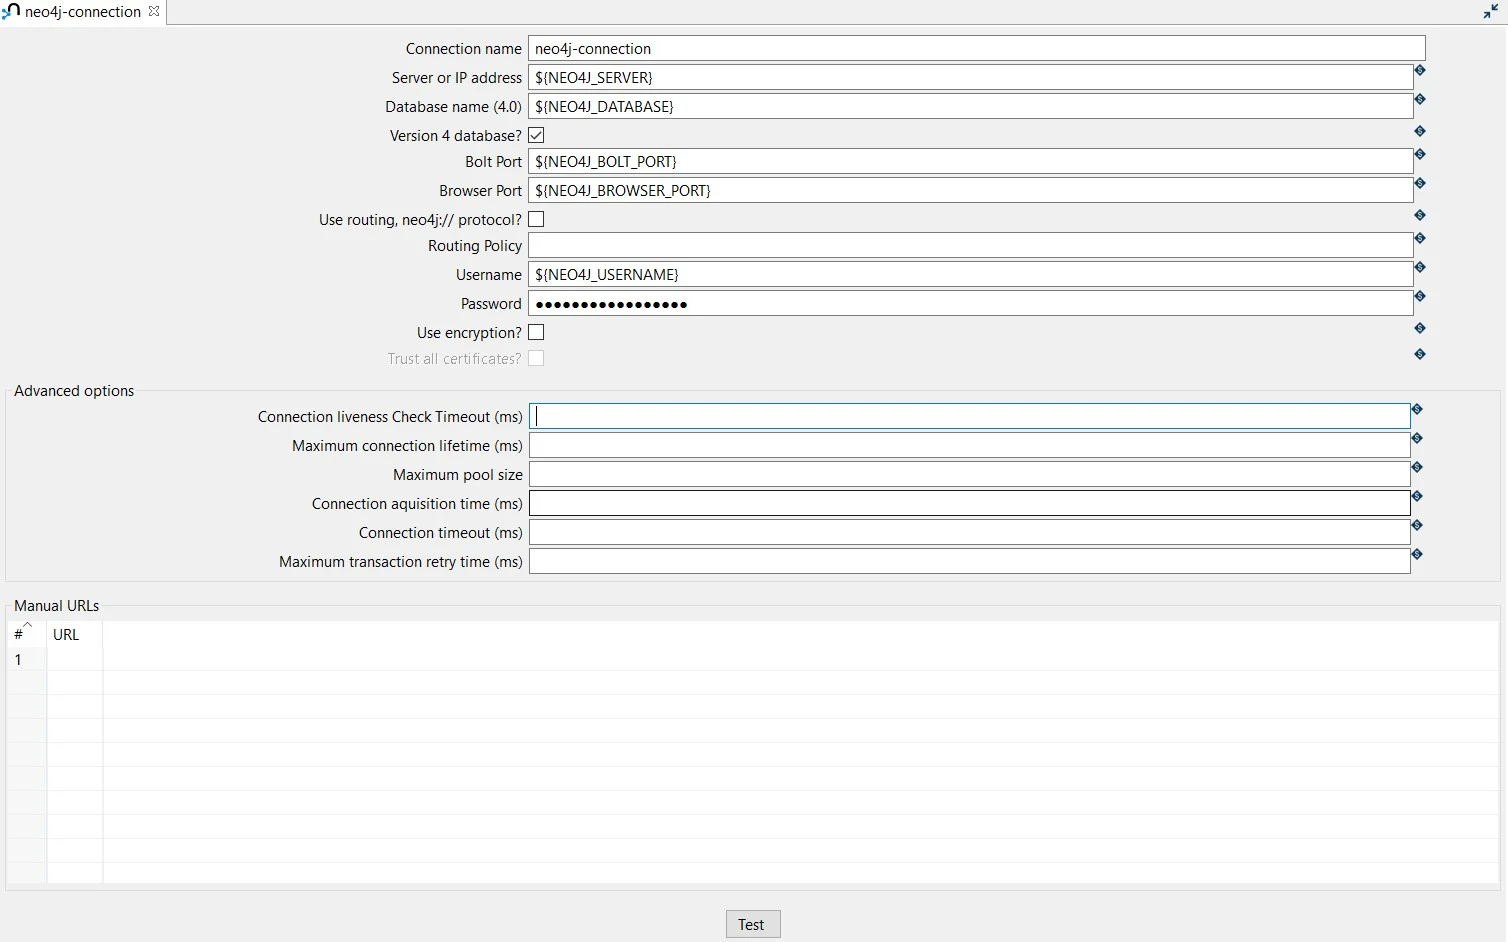
- Connection name: the name of the metadata object (neo4j-connection).
- Server or IP address: the name of the server (${NEO4J_SERVER} = localhost).
- Database name (4.0): the name of the database (${NEO4J_DATABASE} = neo4j).
- Bolt Port: the Bolt port number (${NEO4J_BOLT_PORT} = 7687).
- Browser Port: the Browser port number (${NEO4J_BROWSER_PORT} = 7474)
- Username: specify your username (${NEO4J_USERNAME} = neo4j).
- Password: specify your password (${NEO4J_PASSWORD})
Step 2: Create a pipeline to write nodes
The input, in this case, is the CSV file. We are going to use a CSV input file to read the data.
The CSV file input transform allows you to read data from a delimited file.
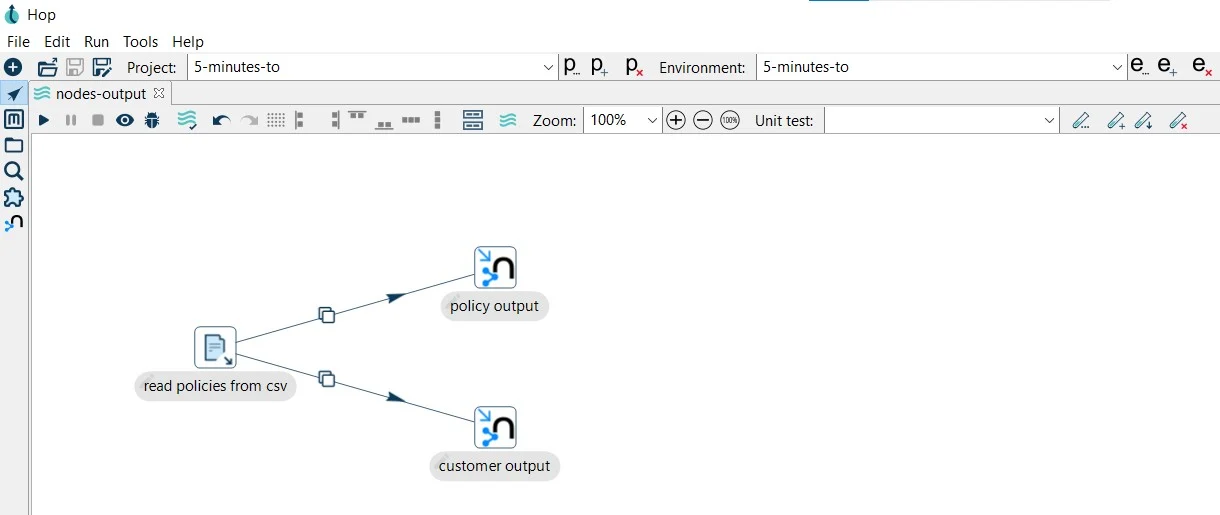
After creating your pipeline (nodes-output.hpl) add a CSV file input transform. Click anywhere in the pipeline canvas, then Search 'csv' -> CSV file input.
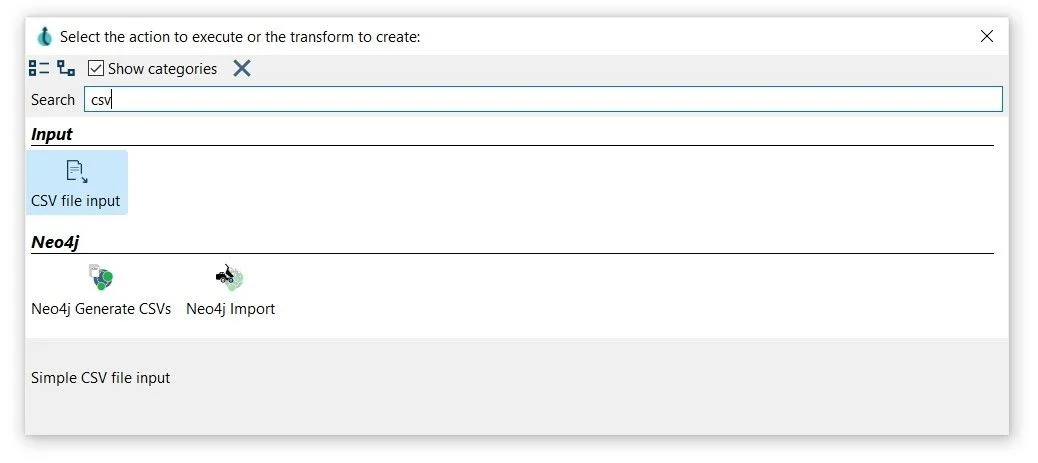
Now it’s time to configure the CSV file input transform. Open the transform and set your values as in the following example:
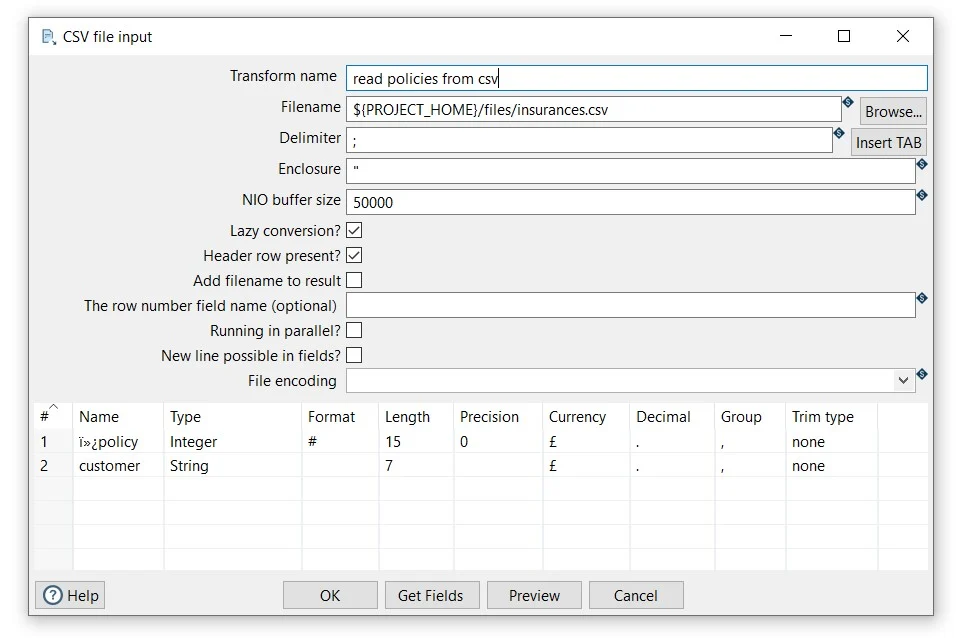
- Transform name: choose a name for your transform, just remember that the name of the transform should be unique in your pipeline (read policies from csv).
- Filename: specify the filename and location of the text file. You can use the PROJECT_HOME variable and add the folder and file name (${PROJECT_HOME}/files/policies.csv).
- Click on the Get Fields button to get the fields from the CSV file and click on the OK button twice to get the fields.
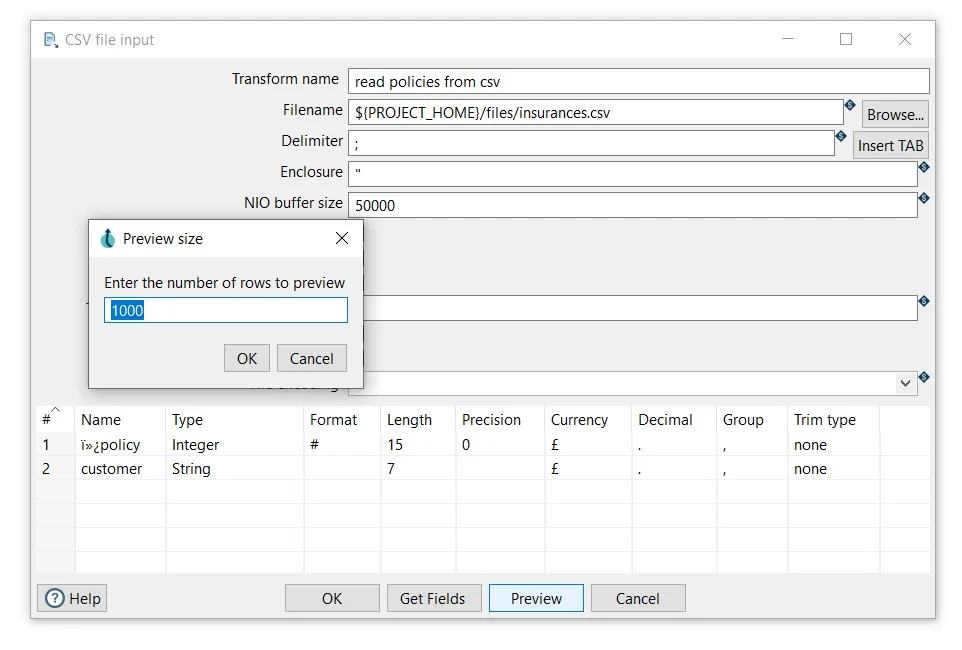
- Click OK to save
Now, we are ready to write the nodes (policies and customers) to the Neo4j database. To do so, we can use the Neo4j Output transform.
The Neo4j Output transform allows you to do high-performance updates in one node, two nodes, or two nodes and a relationship. The transform generates the required Cypher statements with accompanying parameters.
TIP: check the Hop docs for other transforms and actions to interact with your Neo4j database through Hop.
We will use this transform twice, once to write policies and once to write customers. Add a Neo4j Output transform to your pipeline and connect it to the read policies from csv transform.

Now it’s time to configure the Neo4j Output transform. Open the transform and set your values as in the following example: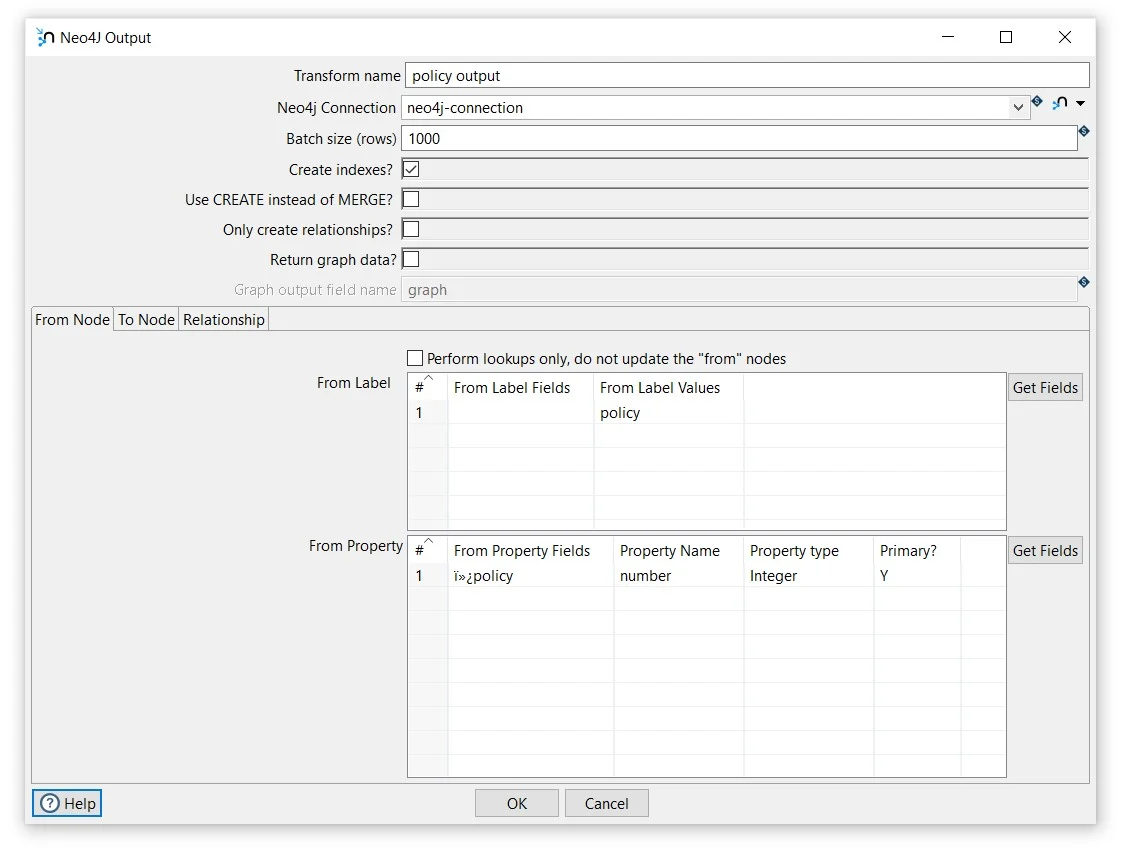
General fields
- Transform name: choose a name for your transform, just remember that the name of the transform should be unique in your pipeline (policy output).
- Neo4j Connection: select the created connection (neo4j-connection).
Tab: From Node
The perform lookups allows you to update or insert nodes and relationships. Nodes and relationships can have properties and the appropriate MERGE statements will be generated based on the information you provided.
Make use of the "Get fields" buttons on the right-hand side of the dialog to prevent you from having to type too much.
Section: From Label
From Label Values: insert the name of the node label to be used (policies).
Section: From Property
From Property Fields: select the field value to be used for the properties (policy).
Property Name: insert the name of the property in the (number).
Property type: select the property type (Integer).
Primary?: specify if the property is primary or not (Y).
- Click OK to save

With this transform, we’ll write the policy nodes in our database. Now, we are ready to do the same for the customer nodes.
Add another Neo4j Output transform to your pipeline and connect it to the read policies from csv transform.
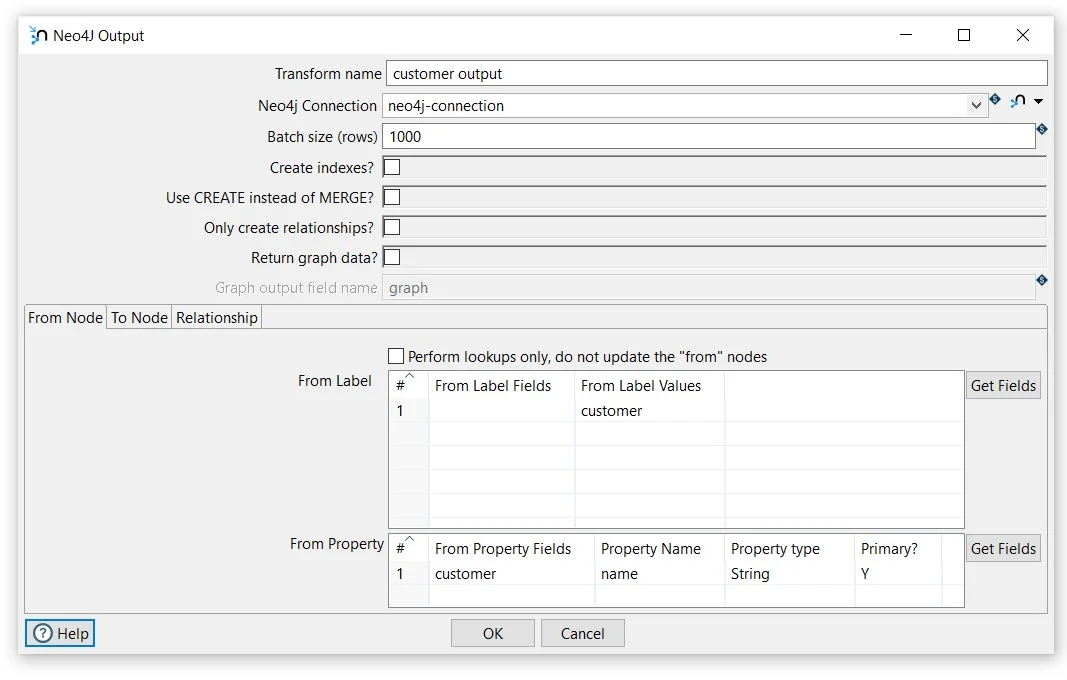
To configure the Neo4j Output transform, open it and set your values as in the following example:
General fields
- Transform name: choose a name for your transform, just remember that the name of the transform should be unique in your pipeline (customer output).
- Neo4j Connection: select the created connection (neo4j-connection).
Tab: From Node
Section: From Label
From Label Values: insert the name of the node label to be used (customer).
Section: From Property
From Property Fields: select the field value to be used for the properties (customer).
Property Name: insert the name of the property in the (name).
Property type: select the property type (String).
Primary?: specify if the property is primary or not (Y).
- Click OK to save
Step 3: Create a pipeline to write relationships
The pipeline we are going to create is similar to the nodes-output.hpl but instead of writing nodes, we’ll write the relationship between our nodes (relationship-output.hpl).
We split the writing of the nodes from the writing of the relationships because relationships are created between nodes, so they must exist first. Therefore the implementation follows the following logic:
- Writing the nodes to Neo4j: policies and customers
- Writing the relationships to Neo4j: HAS
In this case, the relationship HAS, as in the image below:
After creating your pipeline (relationship-output.hpl) add a CSV file input transform. Click anywhere in the pipeline canvas, then Search 'csv' -> CSV file input.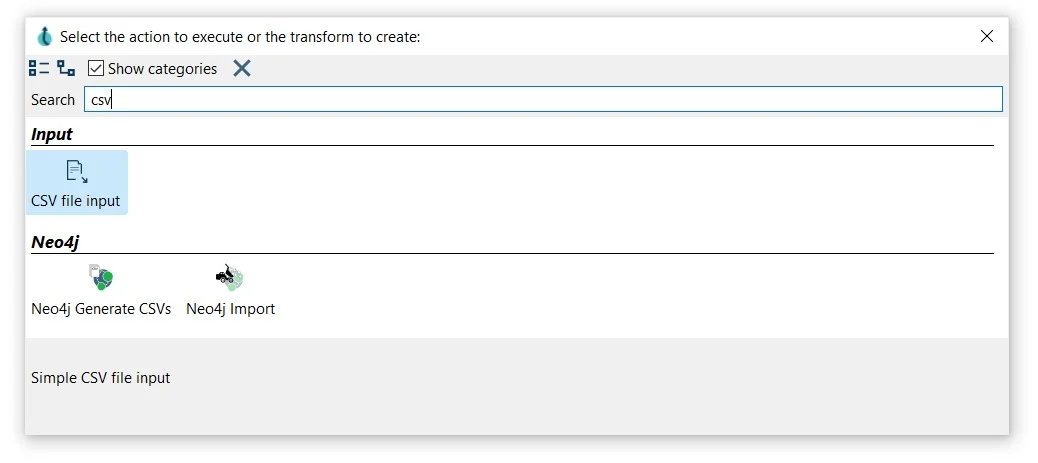
Now it’s time to configure the CSV file input transform. Open the transform and set your values as in the following example:
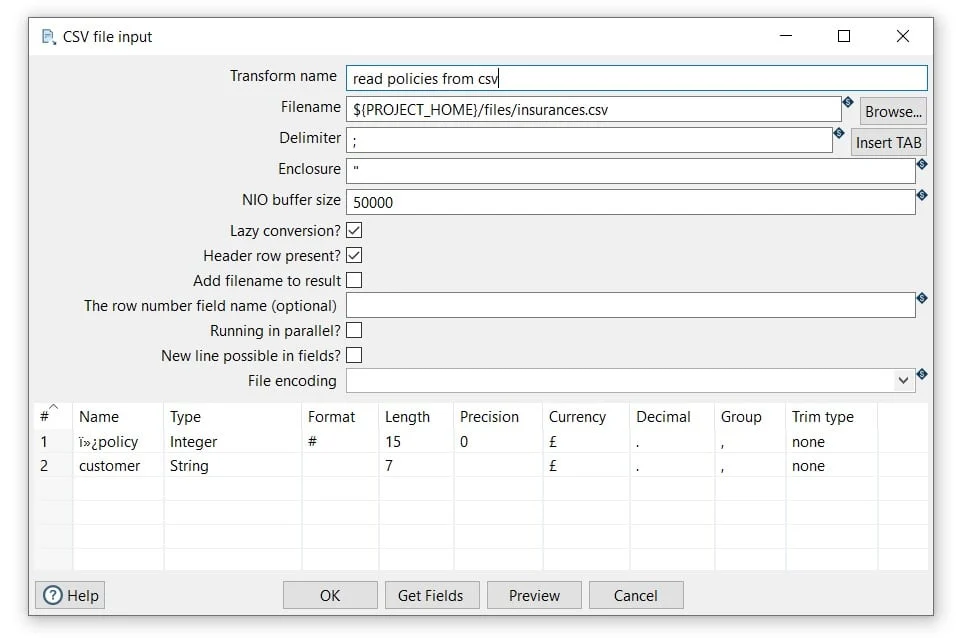
- Transform name: choose a name for your transform, just remember that the name of the transform should be unique in your pipeline (read policies from csv).
- Filename: specify the filename and location of the text file. You can use the PROJECT_HOME variable and add the folder and file name (${PROJECT_HOME}/files/insurances.csv).
- Click on the Get Fields button to get the fields from the CSV file and click on the OK button twice to get the fields.
- Click OK to save
Now, we are ready to write the relationship (HAS) to the Neo4j database. To do so, we can use the Neo4j Output transform.
Add a Neo4j Output transform to your pipeline and connect it to the read policies from csv transform.

Now it’s time to configure the Neo4j Output transform. Open the transform and set your values as in the following example:
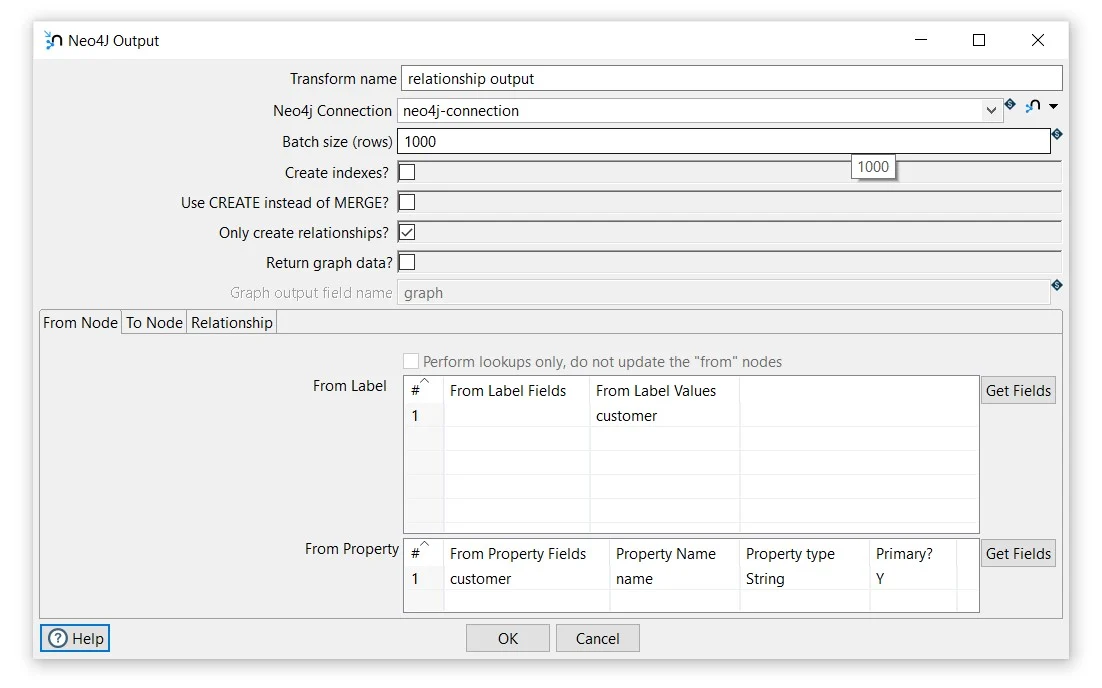
General fields
- Transform name: choose a name for your transform, just remember that the name of the transform should be unique in your pipeline (relationship output).
- Neo4j Connection: select the created connection (neo4j-connection).
Tab: From Node
Section: From Label
From Label Values: insert the name of the node label to be used (customer).
Section: From Property
From Property Fields: select the field value to be used for the properties (customer).
Property Name: insert the name of the property in the (name).
Property type: select the property type (String).
Primary?: specify if the property is primary or not (Y).
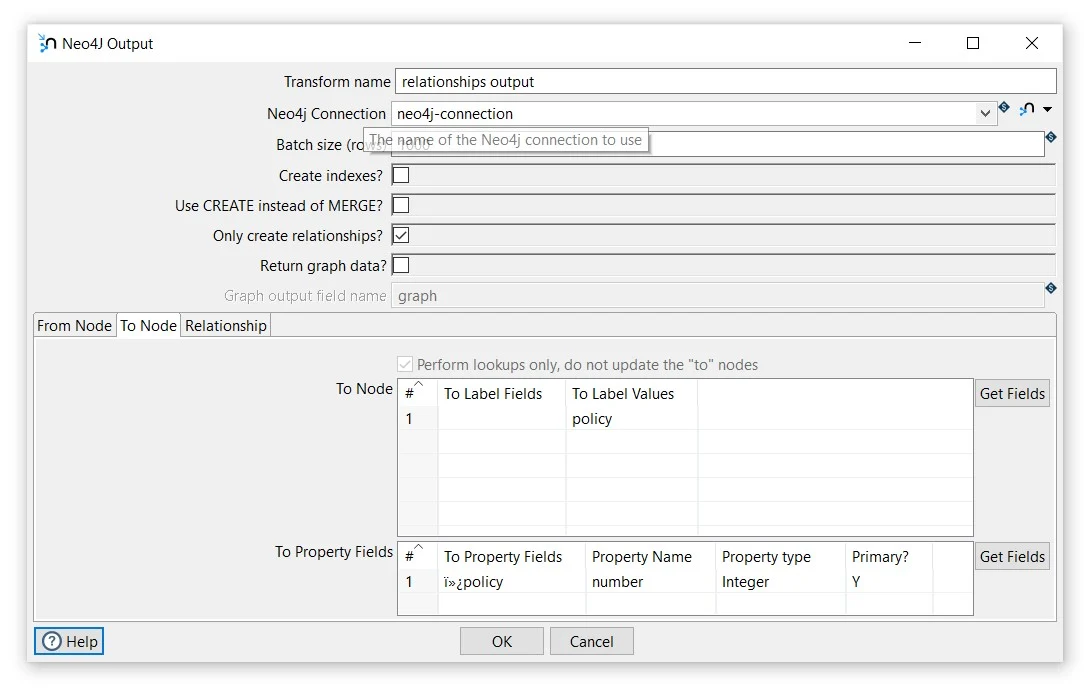
Tab: To Node
Section: To Node
From Label Values: insert the name of the node label to be used (customer).
Section: To Property Fields
From Property Fields: select the field value to be used for the properties (customer).
Property Name: insert the name of the property in the (name).
Property type: select the property type (String).
Primary?: specify if the property is primary or not (Y).
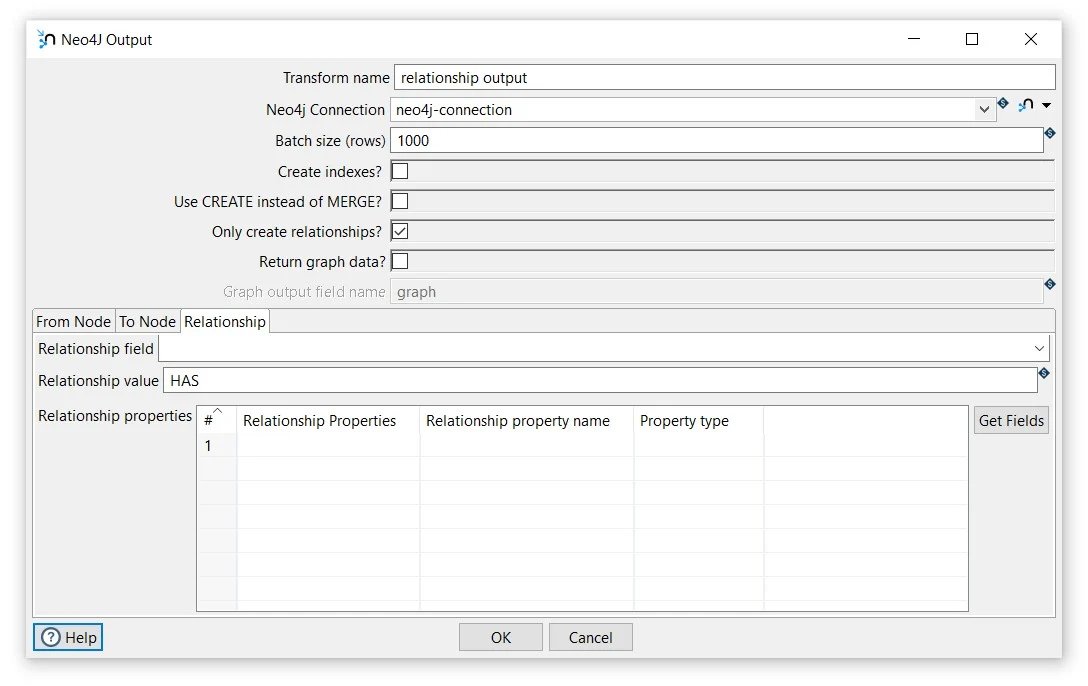
Tab: Relationship
Relationship value: insert the name of the relationship (HAS).
- Click OK to save

Step 4: Create workflow to run your pipelines
So far we have 2 pipelines:
- nodes-output.hpl writes the policies and customers nodes to the Neo4j database.
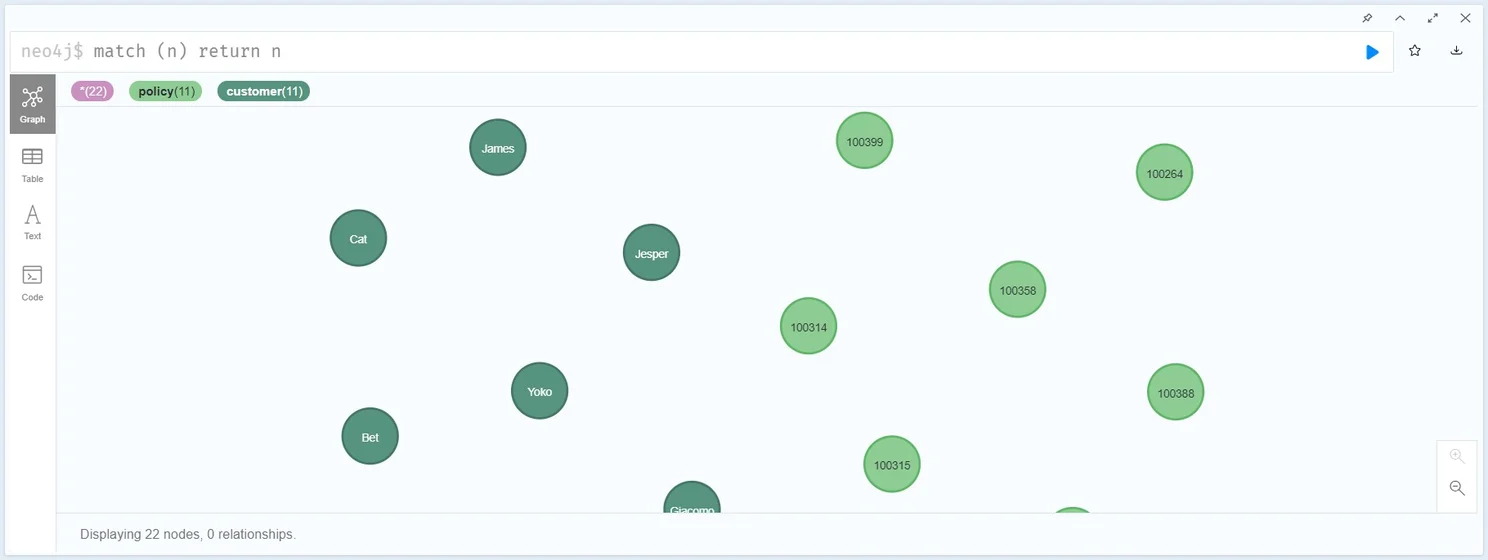
- relationship-output.hpl writes the relationship HAS between the pair of nodes customers and policies to the Neo4j database.
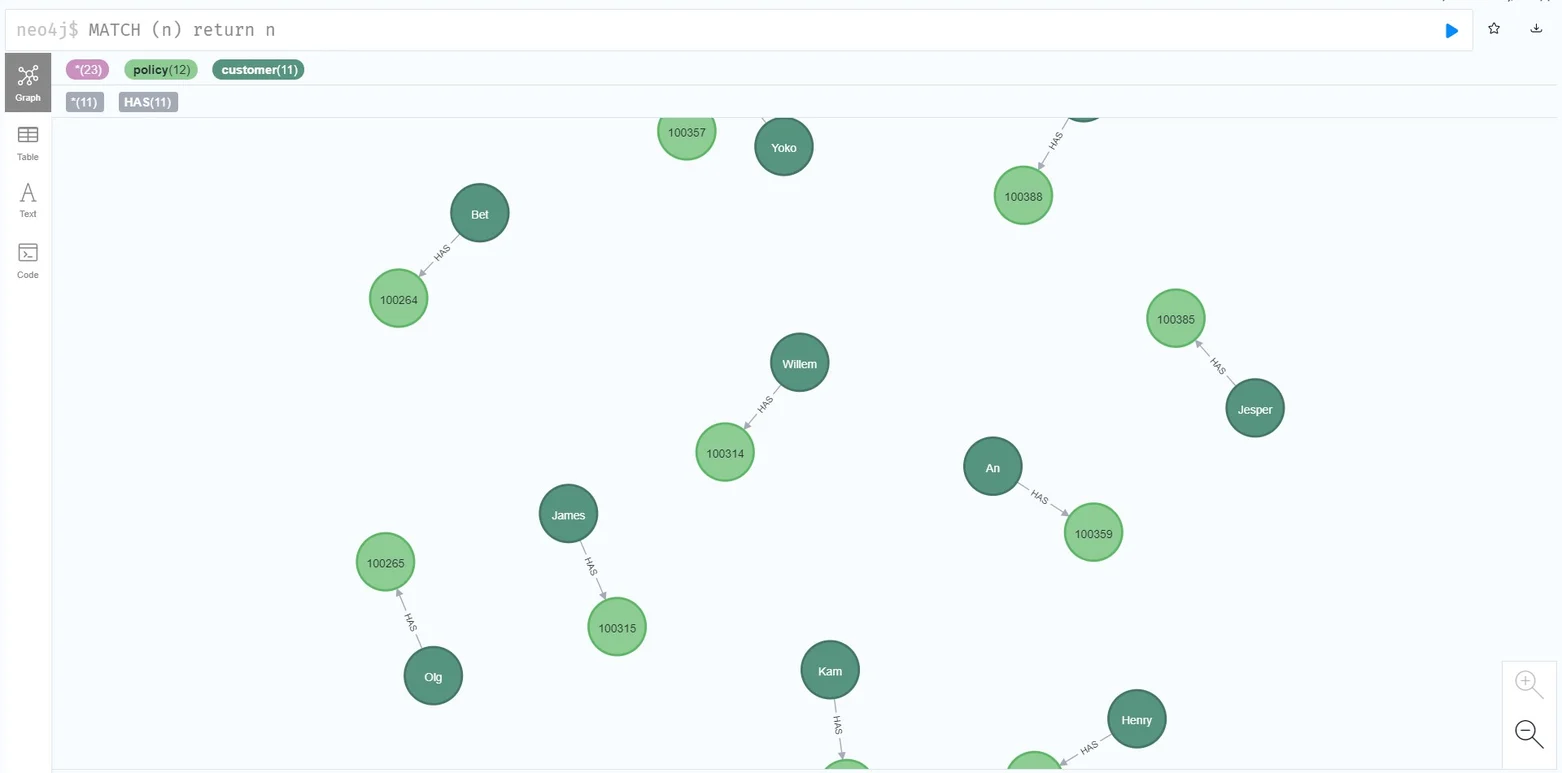
Now, we need to run the nodes-output.hpl pipeline and then, the relationship-output.hpl. How? By using the Pipeline action in our workflow.
The Pipeline action runs a previously defined pipeline within a workflow. This action is the access point from your workflow to your ETL activity (pipeline).
After creating your workflow add a Pipeline action and connect it to the Start action.

Let’s configure the Pipeline as follows:
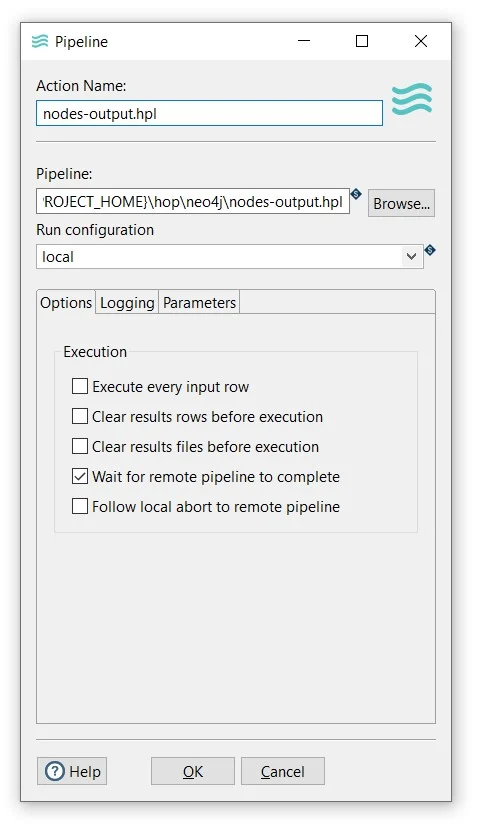
- Action Name: you can use the pipeline name as the action name (nodes-output.hpl).
- Pipeline: specify the filename and location of the pipeline. You can use the PROJECT_HOME variable and add the folder and pipeline name (${PROJECT_HOME}\hop\nodes-output.hpl).
- Run configuration: specify a run configuration to control how the pipeline is executed (local).
- Click OK to save
Similar to the previous one, add another Pipeline action and connect it to the nodes-output.hpl action.

Then, configure the pipeline execution:
- Action Name: the pipeline name (relationship-output.hpl).
- Pipeline: the folder and pipeline name (${PROJECT_HOME}\hop\relationship-output.hpl).
- Run configuration: a run configuration (local).
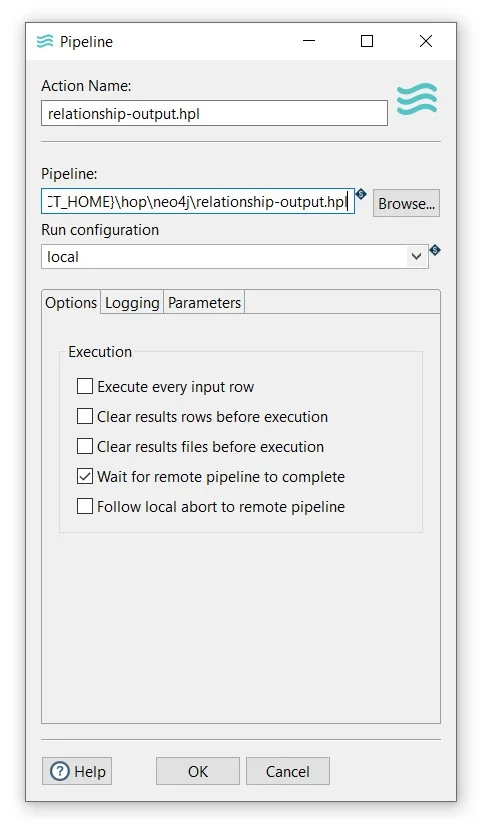
- Click OK to save and save the workflow.
Add a Success action and connect it to the last pipeline:

Finally, run your workflow by clicking on the Run -> Launch option:
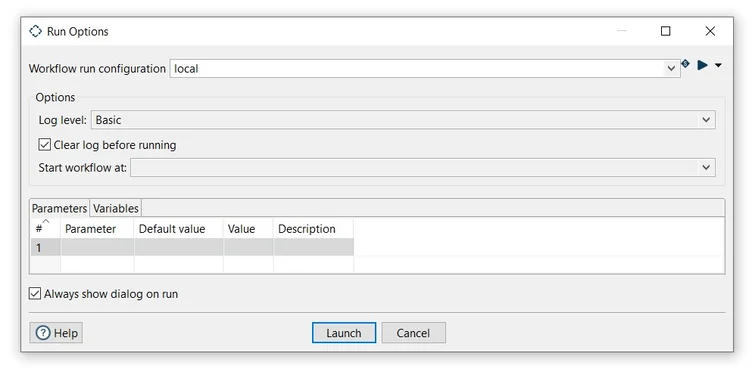
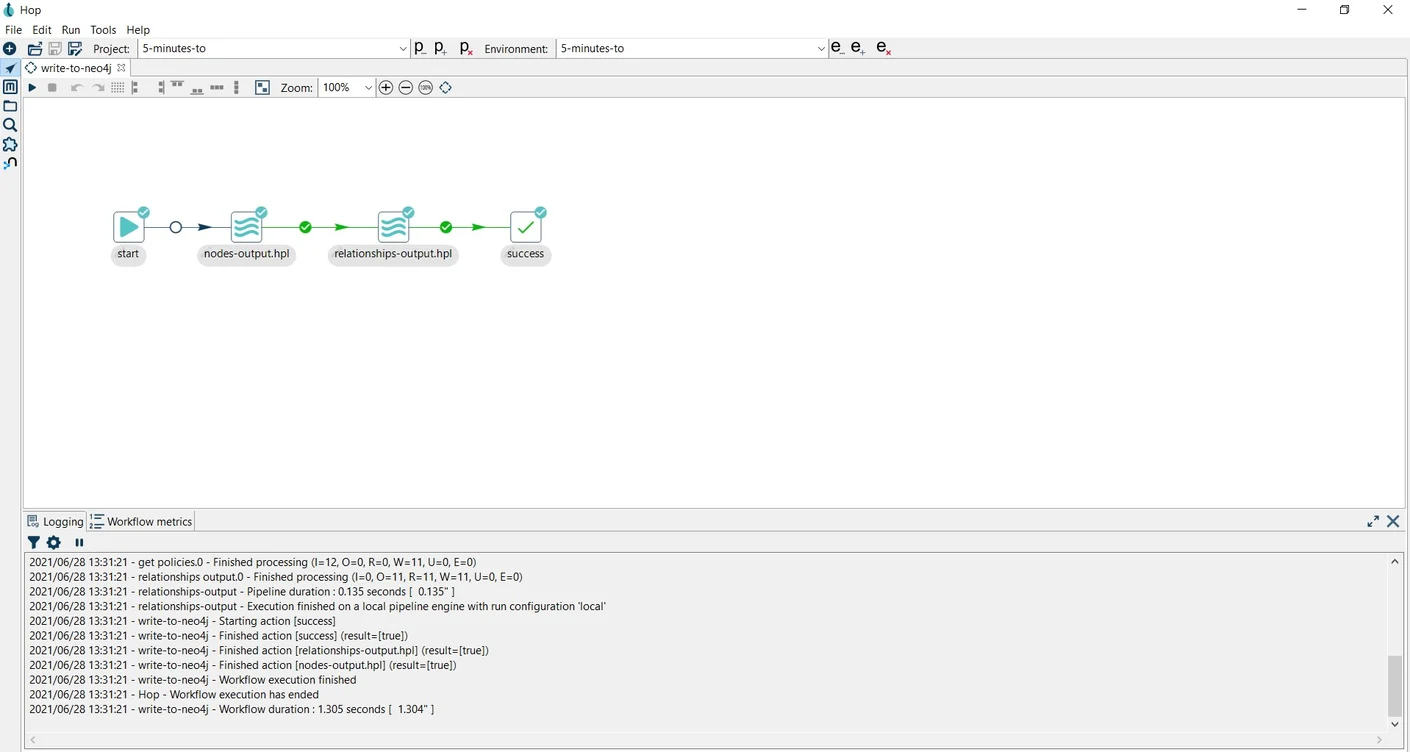
Verify the loaded data in your Neo4j database.
You can find the samples in 5-minutes-to github repository.
Next steps
You have now built a very simple graph and loaded data to it with the Neo4j Output transform. For a more advanced graph, check out the neo4j/beers-wikipedia-graph.hwf workflow in the samples project that comes with your Apache Hop installation.
This sample workflow will scrape the Wikipedia Belgian beers list and load it to a graph database, and is an Apache Hop implementation of Rik Van Bruggen's famous beer graph.
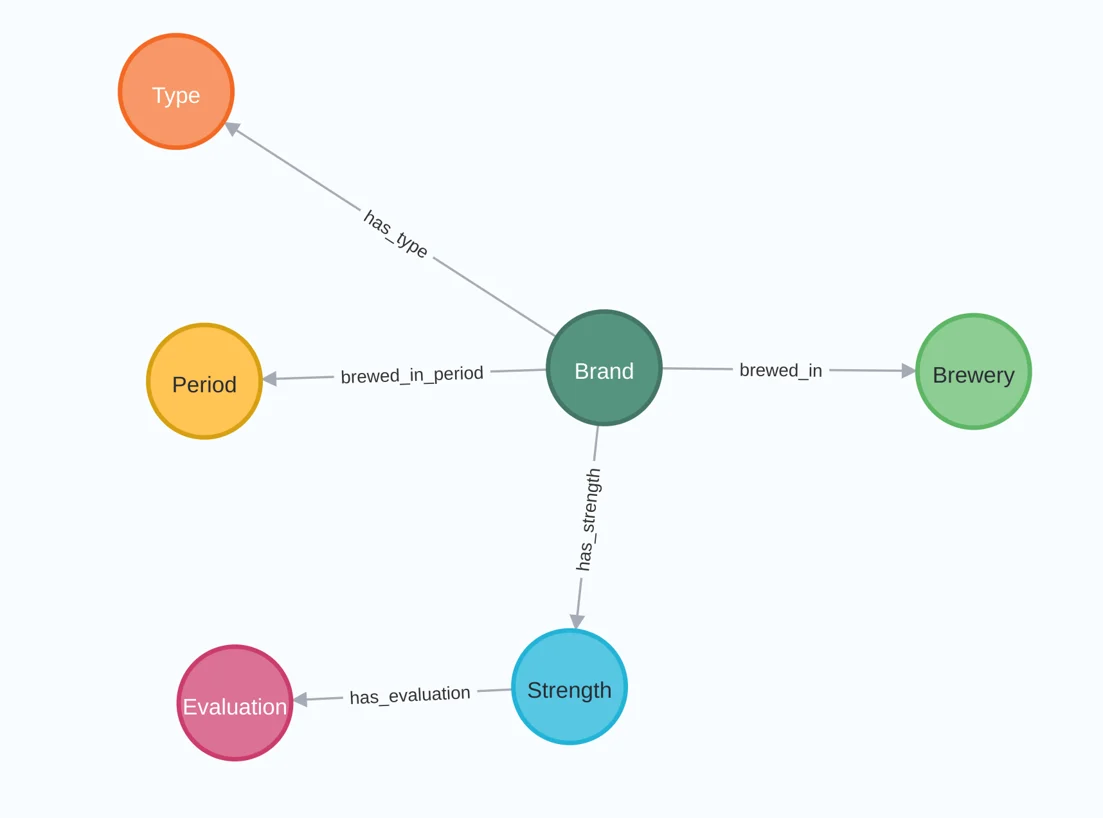
Reach out if you want to find more about Apache Hop and graphs in general or Neo4j or Memgraph specifically, or if you'd like to discuss how we can help you to build a successful graph data platform with Apache Hop.
Transform your data integration strategy today!
Discover Putki, deploy, optimize, and scale your projects efficiently.