Hey everyone! Welcome to the first blog post of our "Build & deploy" series where we dive into the world of Apache Hop. Today, we're going to start from the very beginning—installing Apache Hop, creating your first project, and setting up your first environment.
What you’ll learn in this post
- How to install Apache Hop on Windows, Linux, or MacOS.
- Steps to create your first Apache Hop project.
- Setting up your project environment for development and deployment.
Installation guide: setting up Apache Hop
Apache Hop is designed to be easy to set up across various operating systems, whether you're on Windows, Linux, or MacOS.
Supported operating systems:
- Windows 7 or higher
- Linux (x86_64, ARM)
- MacOS
Tip: Before installing, ensure you have a Java Runtime Environment installed on your system.
Java runtimes:
- Oracle Java Runtime
- Microsoft OpenJDK
- OpenJDK
Steps to install Apache Hop
- Download Apache Hop: Head over to the Apache Hop website and download the latest version.
- Unzip the file: Once downloaded, unzip the file to a location of your choice.
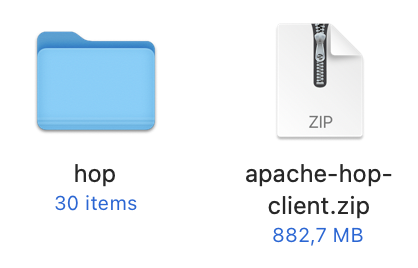
- Navigate to the directory: Navigate to your newly unzipped Apache Hop directory. Here, you'll find everything you need to start using Hop.

Command overview
- hop-gui.bat (Windows) / hop-gui.sh (Linux, MacOS): Launches the Hop graphical interface.
hop-gui.bat
./hop-gui.sh
- hop-run.bat (Windows) / hop-run.sh (Linux, MacOS): Runs workflows or pipelines from the command line.
hop-run.bat
./hop-run.sh
- hop-server.bat (Windows) / hop-server.sh (Linux, MacOS): Starts a Hop Server instance.
hop-server.bat
./hop-server.sh
Creating your first project
Now that you’ve got Apache Hop up and running, it’s time to create your first project.
Step-by-step guide:
- Open Hop GUI: Start by launching the Hop GUI. Go to your hop installation folder and run the command.
- Create a new project:
- Go to the "Project" menu.

- Select "Add a new project".

- Name your project—let's call it "my-hop-project".
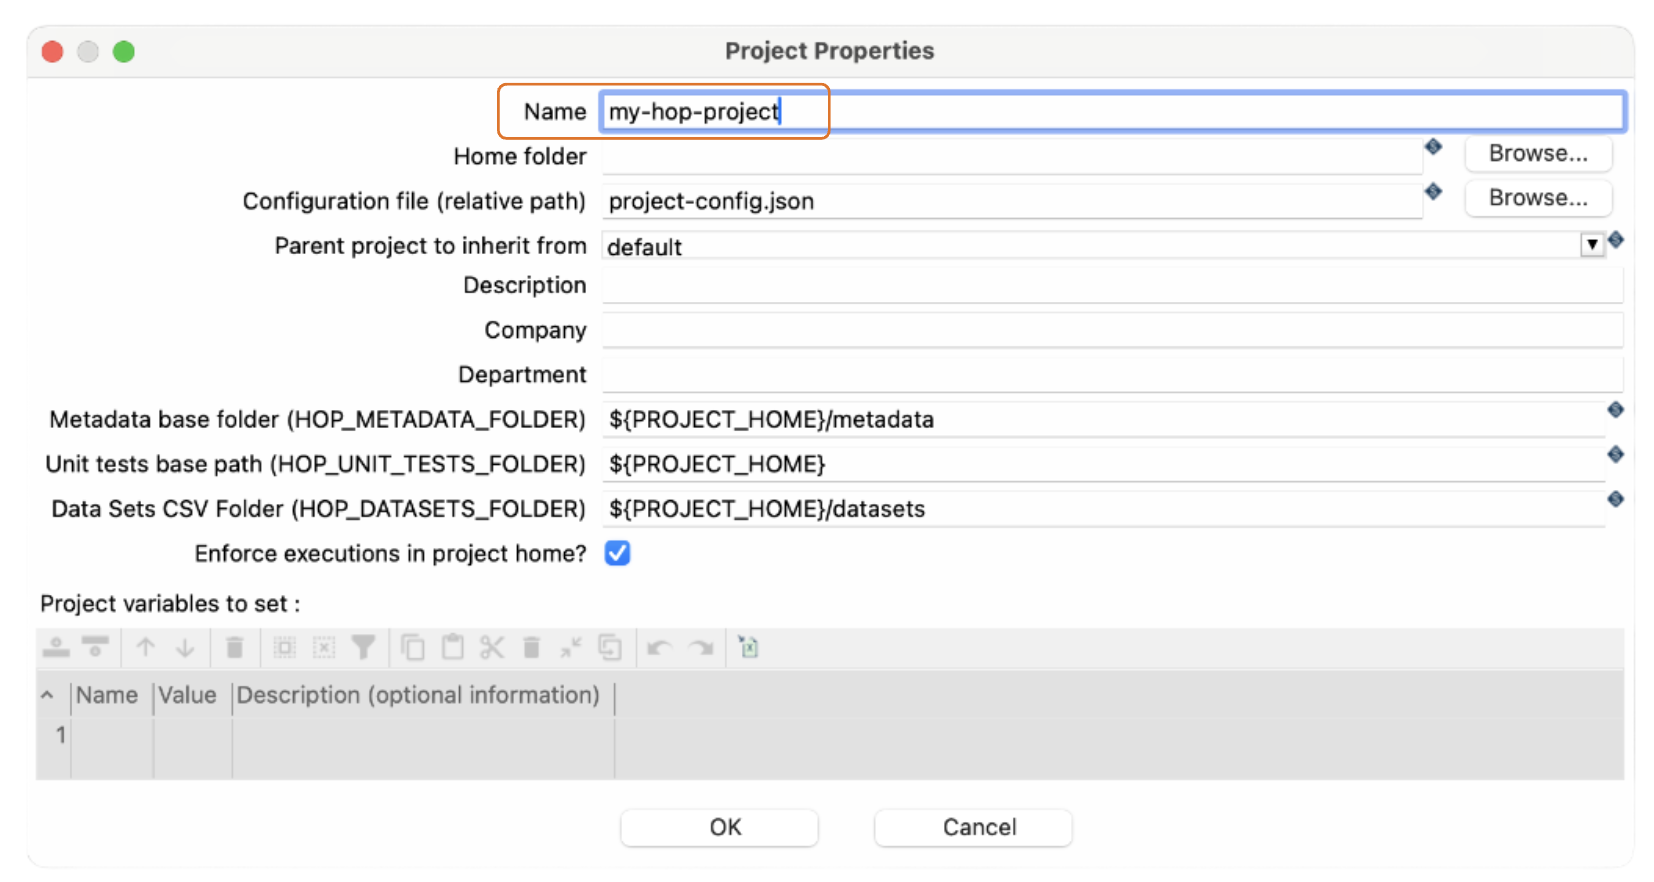
- Go to the "Project" menu.
- Set up project home directory:
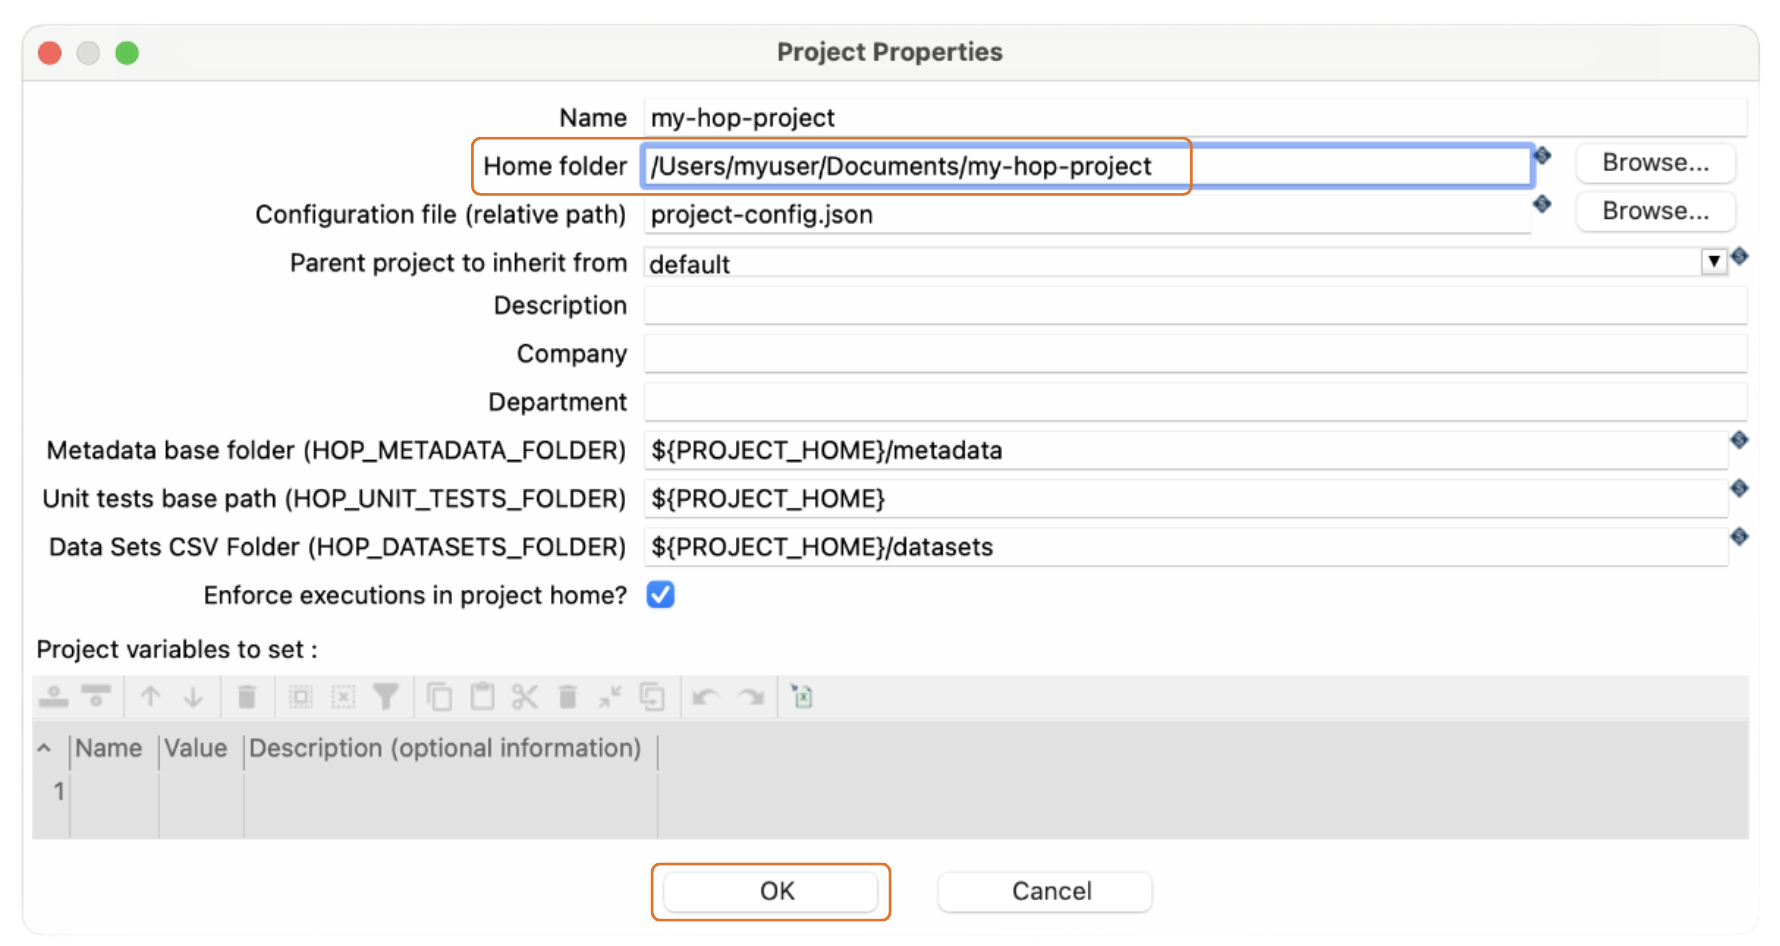
- After naming your project, you’ll need to set up a project home directory. This is where all your project files will be stored.
- Choose a directory on your system, and then click OK.
hop-gui.bat
./hop-gui.sh
Project setup recap:
- Project menu: Add a new project.
- Project name: Choose a meaningful name (e.g., my-hop-project).
- Home directory: Set up the project home directory.
Setting up your first environment
With your project in place, Hop GUI will allow you to create a project lifecycle environment.
This helps manage different phases of your project from Development to Testing to Production.
What is an environment in Apache Hop?
In Apache Hop, an environment describes the stage your project is in, such as Development, Test, or Production. It also defines the configuration files you want to use, specific variables, and other environment-specific settings.
Step-by-step guide:
- Create your first environment:
- Name your environment—for example, "dev-env".
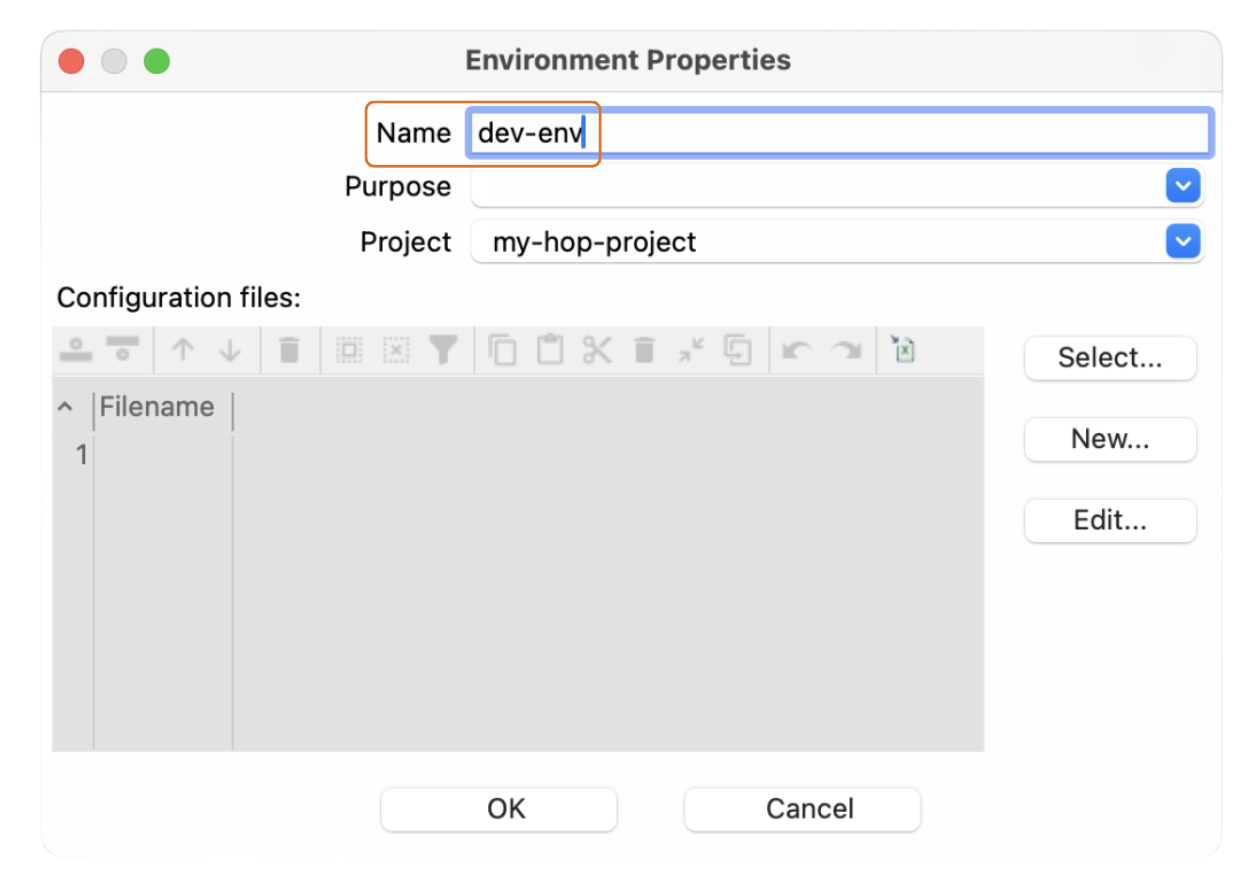
- Specify the phase (e.g., Development or Testing).
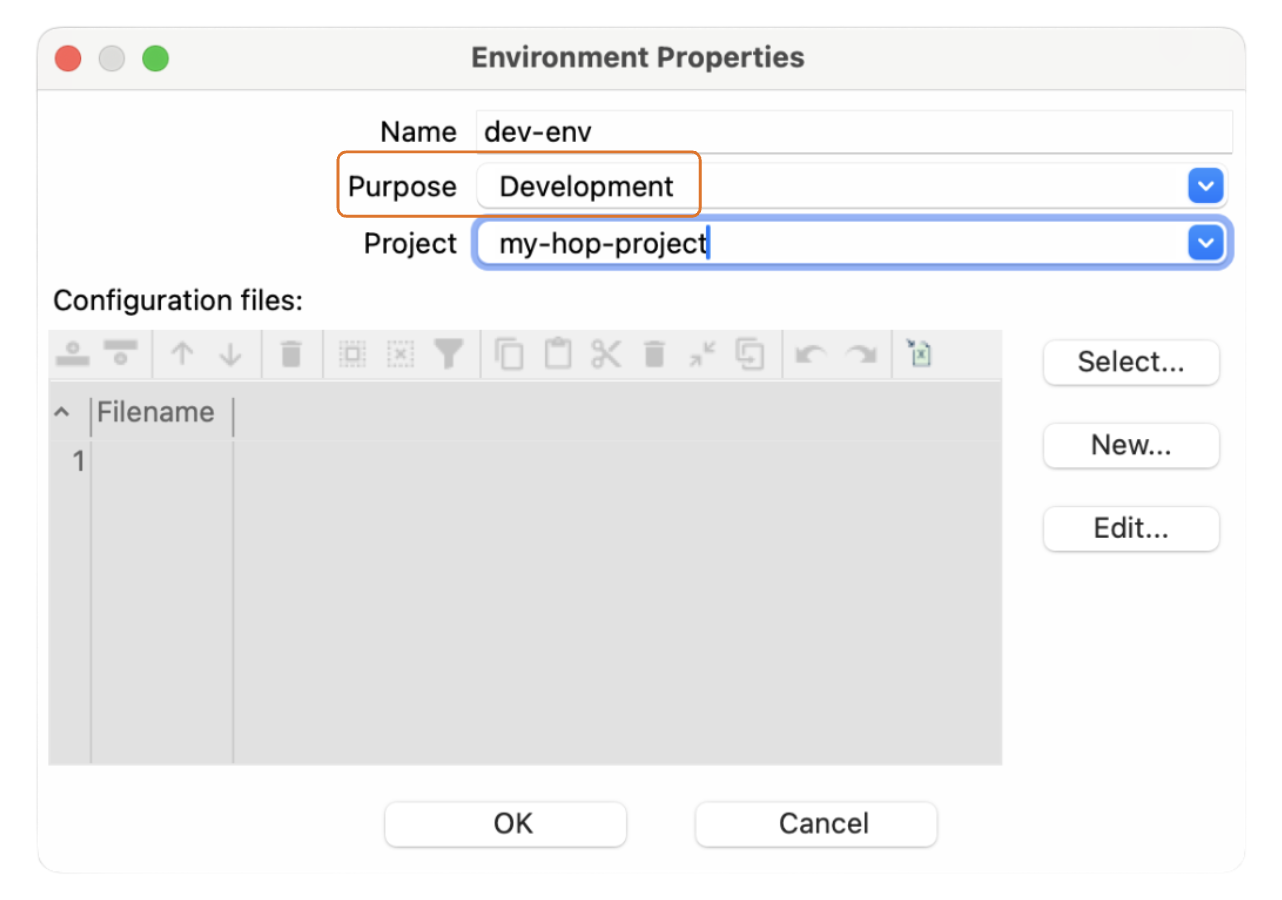
- Choose or create the configuration files that define environment-specific variables.
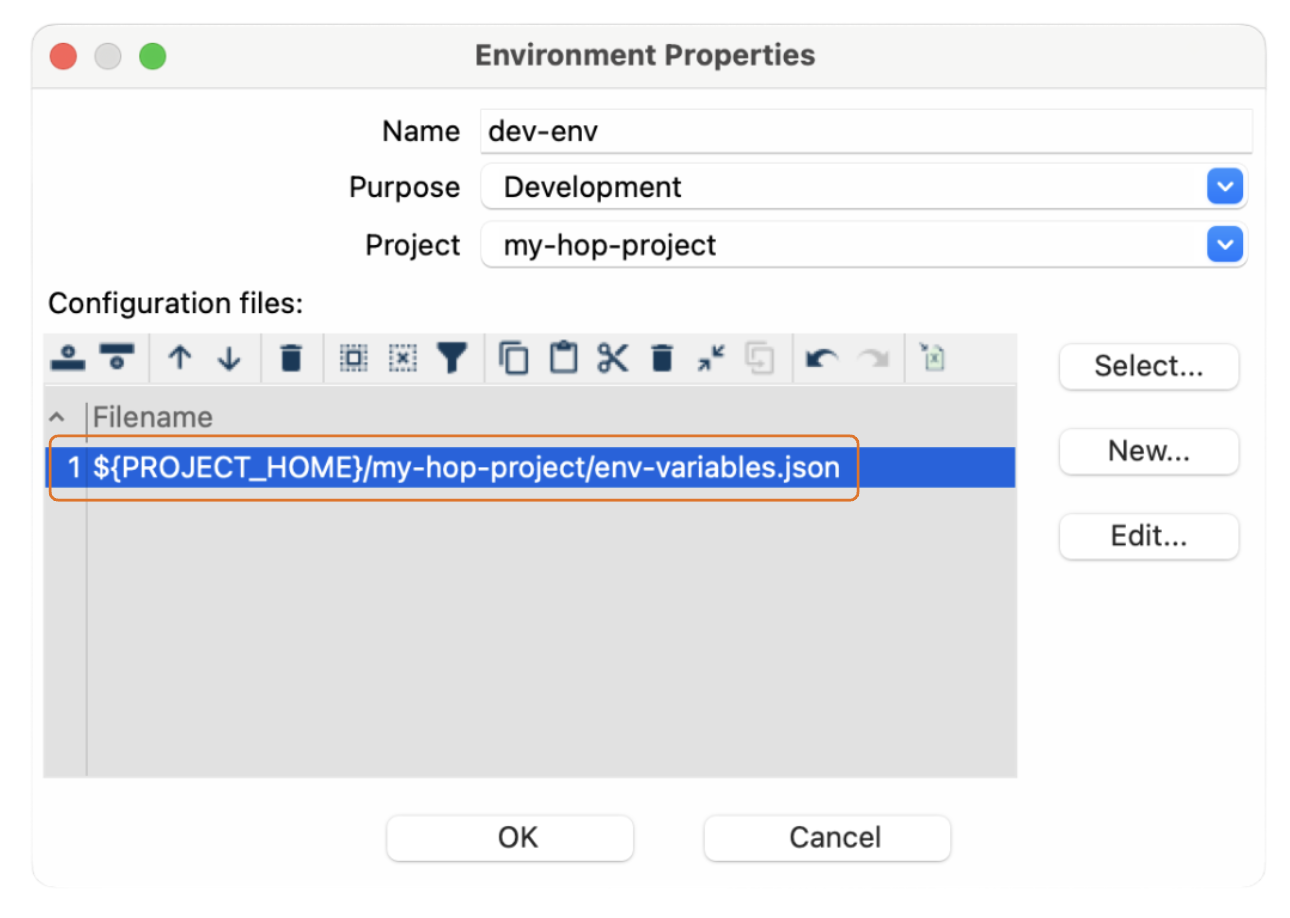
- Name your environment—for example, "dev-env".
- Link environment to project:
- Notice that the new environment is linked to your project, "my-hop-project".
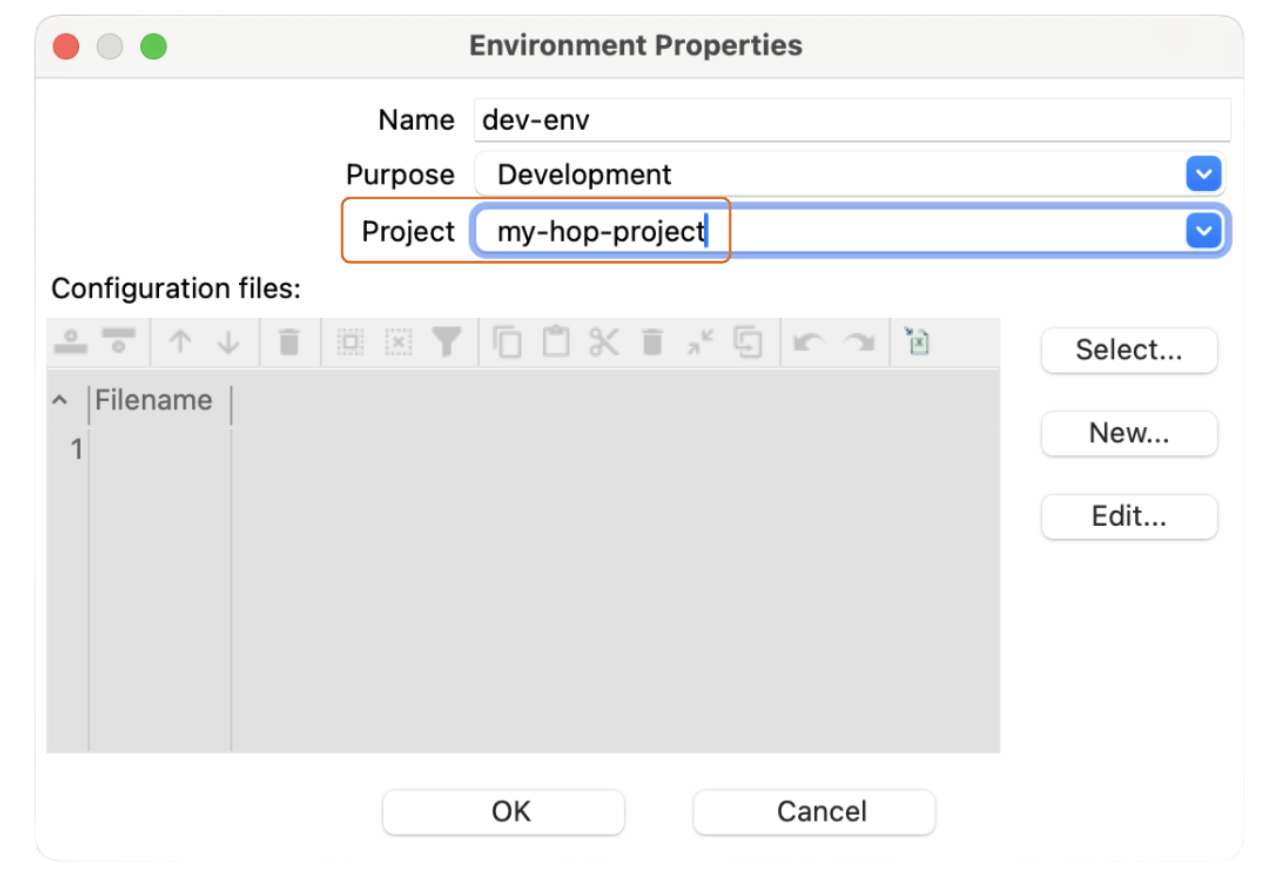
- Notice that the new environment is linked to your project, "my-hop-project".
Key notes before moving forward
- Environment files: Essentially JSON files that store your configuration settings.
- File management: You can select, create, and edit these environment files directly.
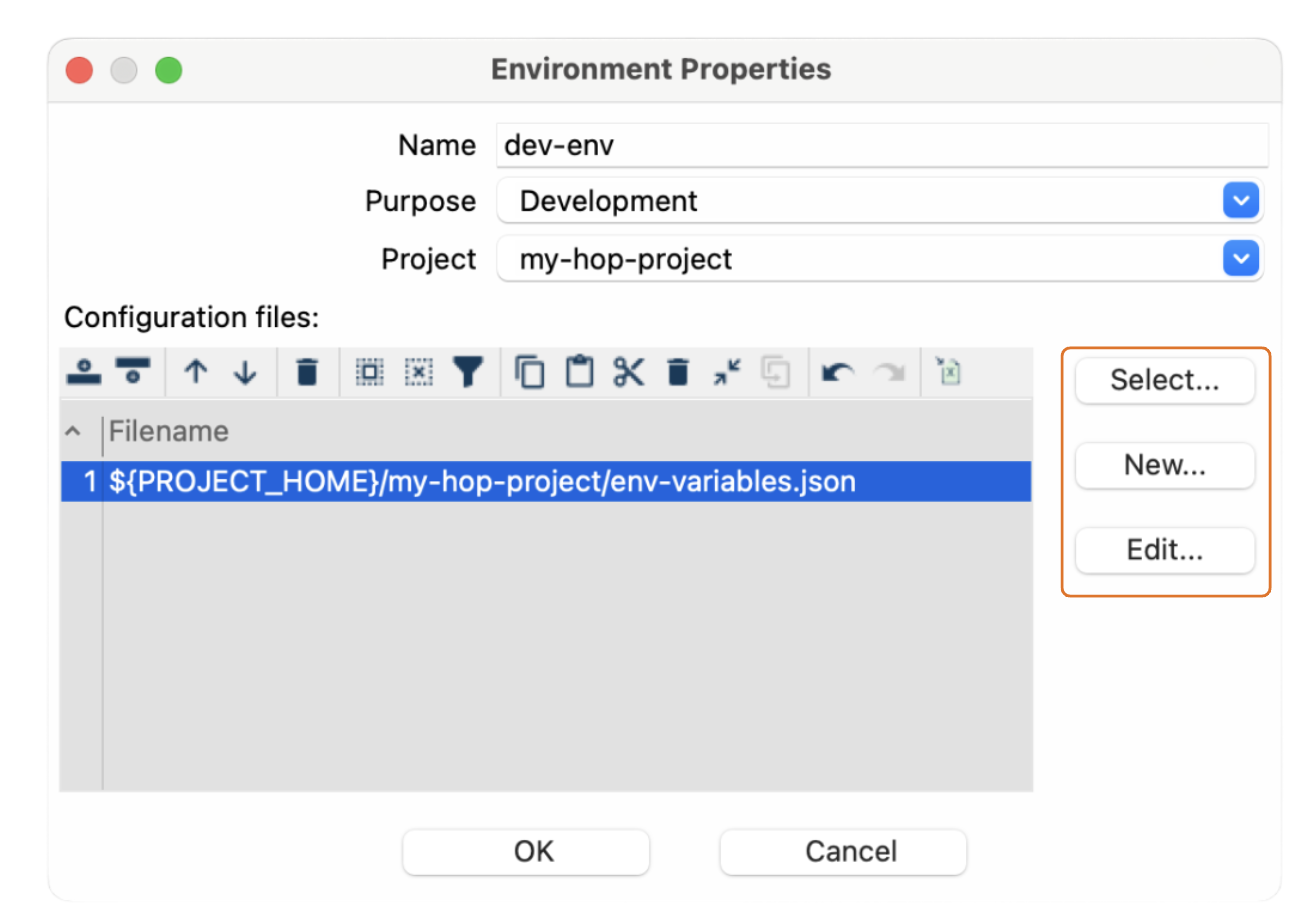
- If the file doesn’t exist, Hop will prompt you to create it.
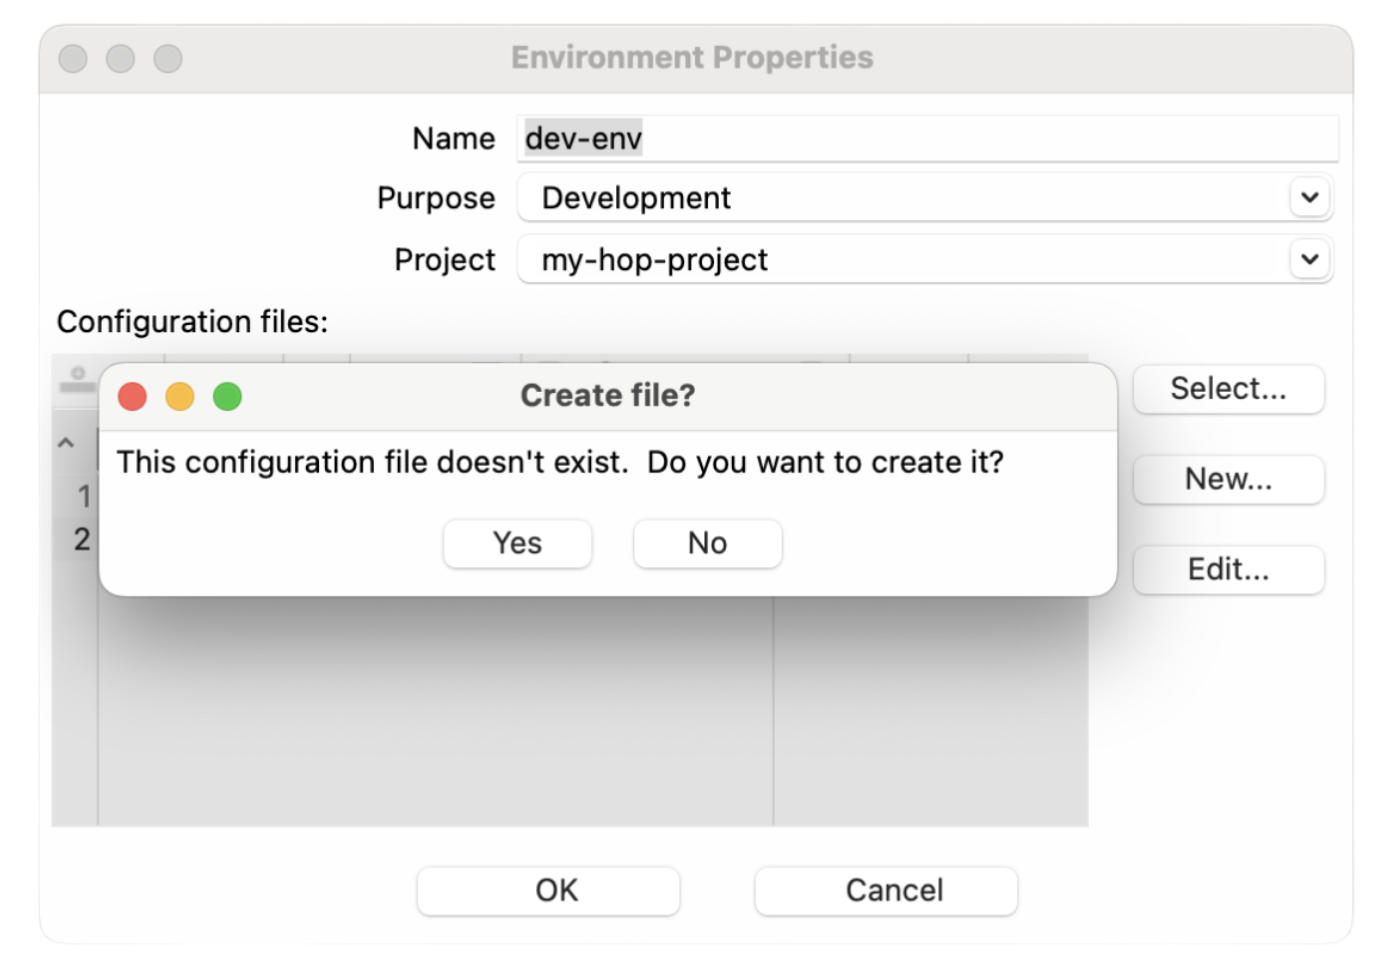
- If the file doesn’t exist, Hop will prompt you to create it.
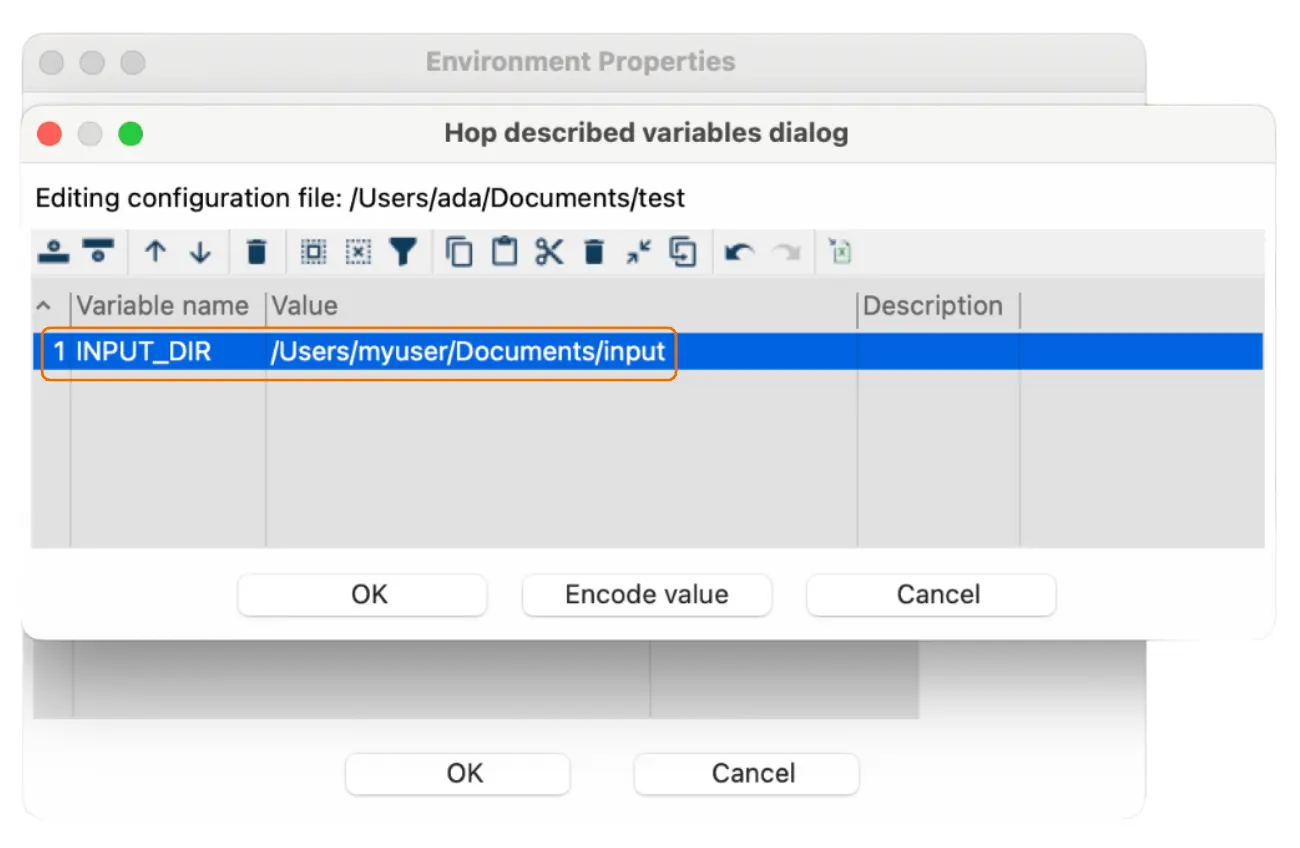
- Defining variables: Within your environment files, define variables (e.g., INPUT_DIR) to specify paths or other settings unique to the environment.
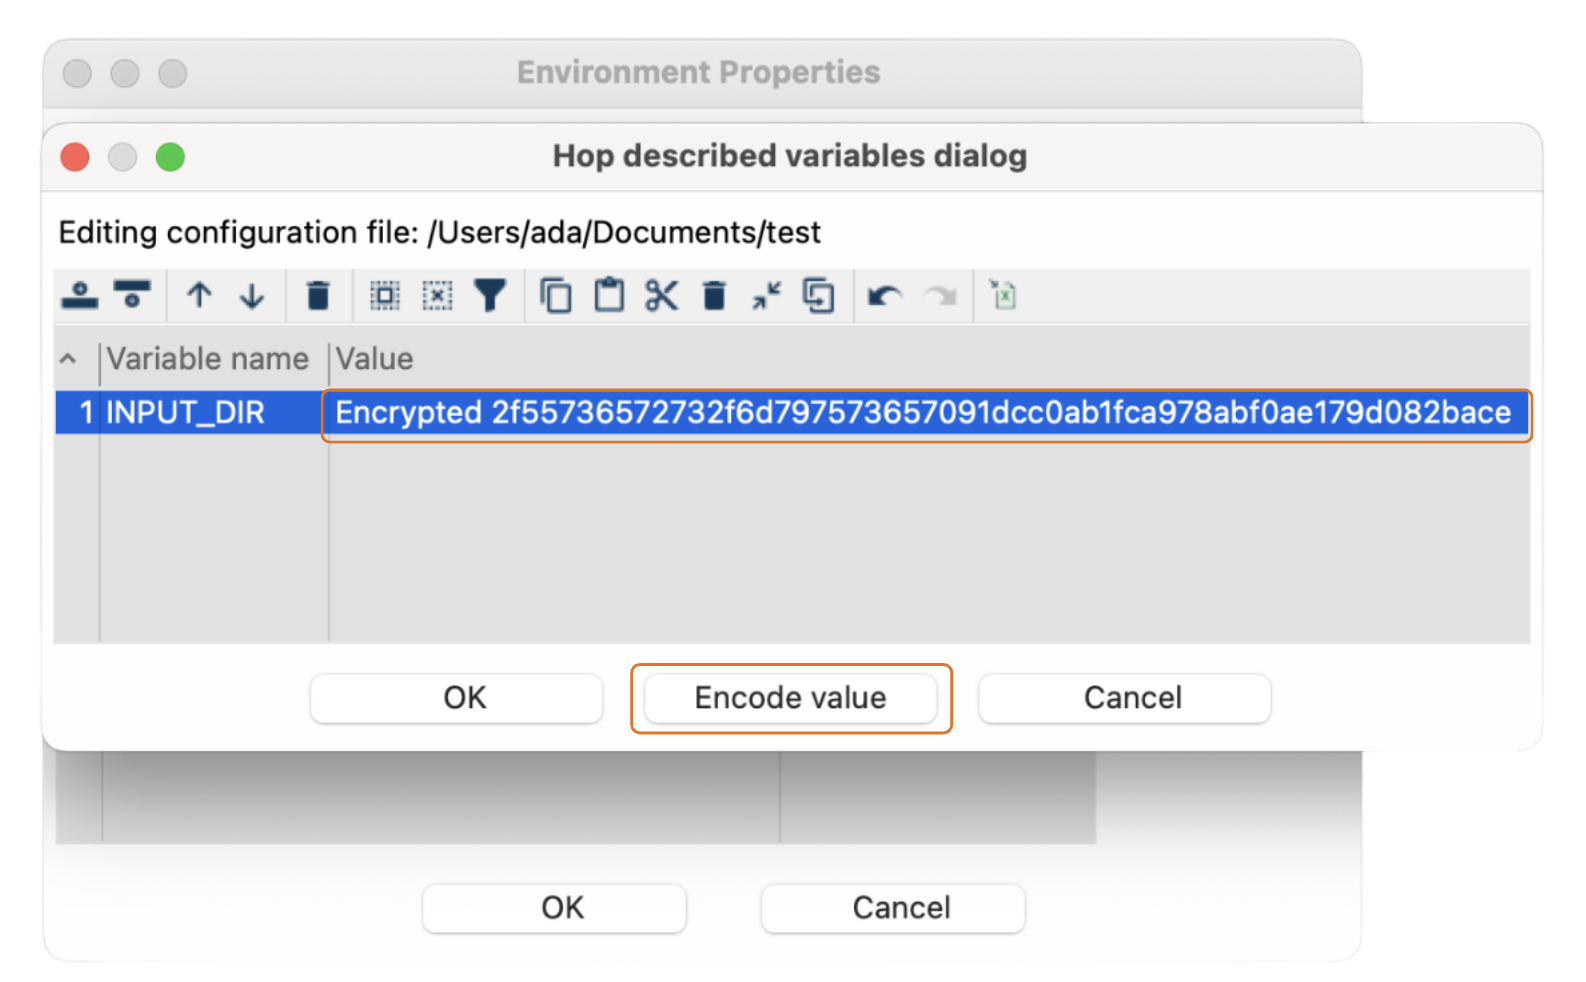
- Security: You can encrypt the values of your variables for added security.
Adding additional environments
To create another environment, follow these steps:
- Go to the "Environment" menu in the Hop GUI.

- Click on the "Add new environment" button.

- Name your environment: For example, "test-env".
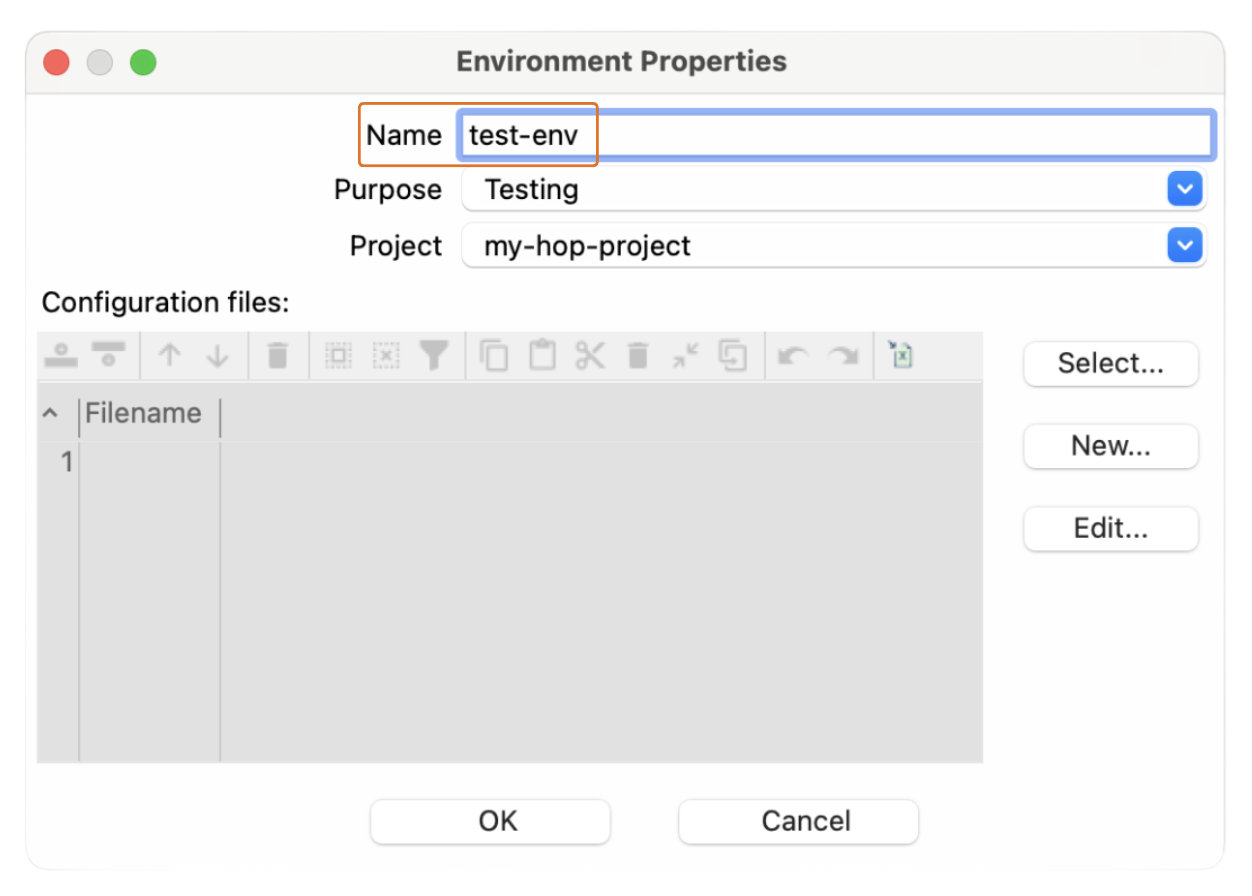
- Specify the phase: Choose the appropriate phase like Testing.
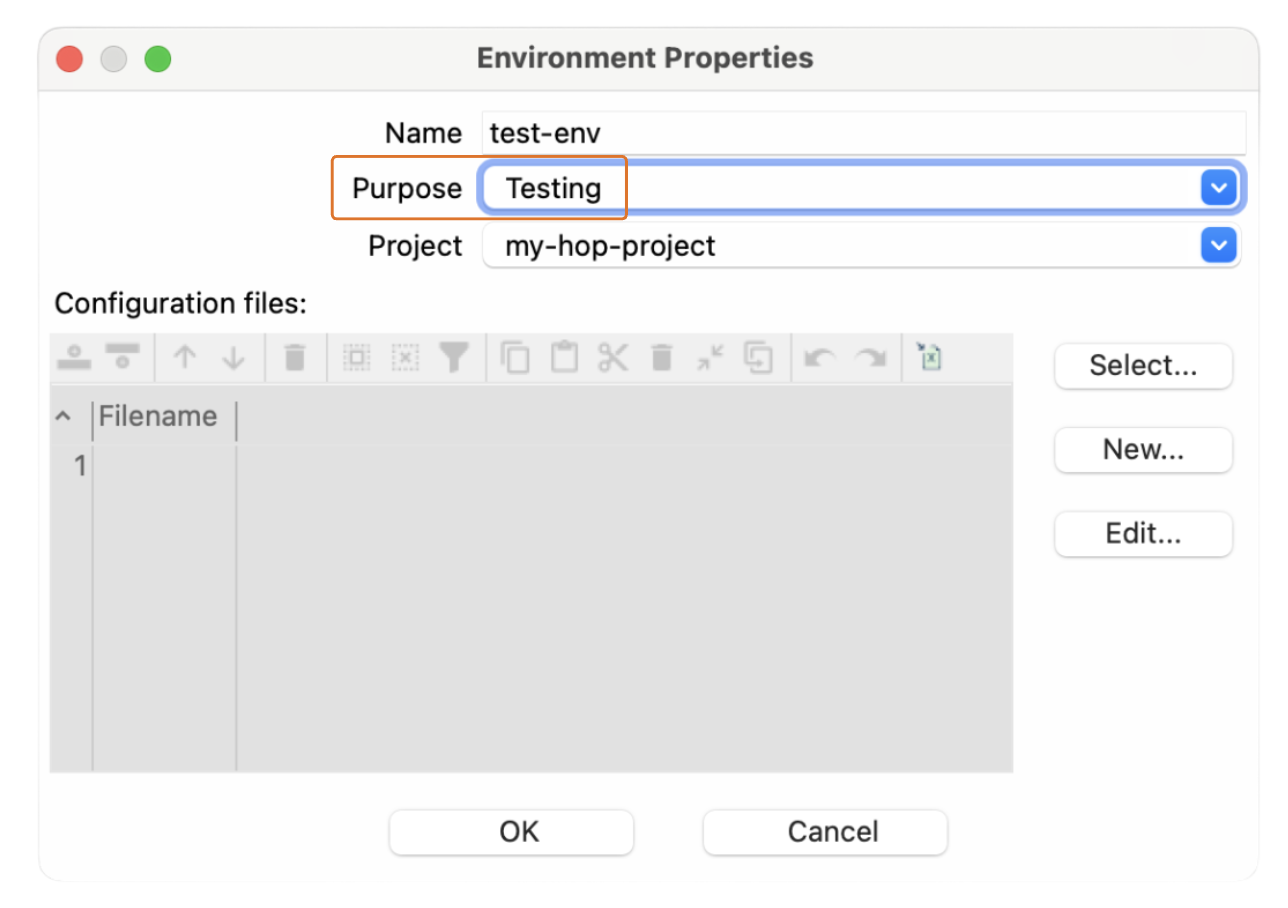
- Configuration files: Choose or create configuration files.
Environment setup recap:
- Add a New Environment: Via the main toolbar.
- Name: Choose a descriptive name (e.g., "dev-env").
- Link to Project: Link it to your project ("my-hop-project").
- Define the Phase: Development, Test, Production.
- Configuration Files: Optional, but recommended.
Remember that if you don't have configuration files ready, Apache Hop allows you to create them directly in the setup process.
What’s next?
And that’s it! You’ve successfully installed Apache Hop, created your first project, and set up your environment. In the next post, we’ll dive into developing your first pipelines and workflow, so be sure to stay tuned for that.
Don't miss the video below for a step-by-step walkthrough of the entire process!
Stay connected
If you have any questions or run into issues, contact us and we’ll be happy to help.