Hey everyone! Welcome back to our "Build & deploy" series! In this post, we're tackling an essential topic for every Apache Hop user: how to upgrade your Apache Hop version without losing your configurations.
In this guide, we'll walk you through the steps to safely upgrade while preserving all your custom settings and existing pipelines/workflows. Let’s dive in!
Introduction
Imagine this situation: you’re using the latest Apache Hop version and have already set up your first project with environment files, connections, and other metadata objects. A new Apache Hop version is available, and you want to upgrade without losing your configurations.
How do you do that? The recommended best practice is to set up a system environment variable HOP_CONFIG_FOLDER that will contain the path to the hop/config/ folder.

Why use HOP_CONFIG_FOLDER?
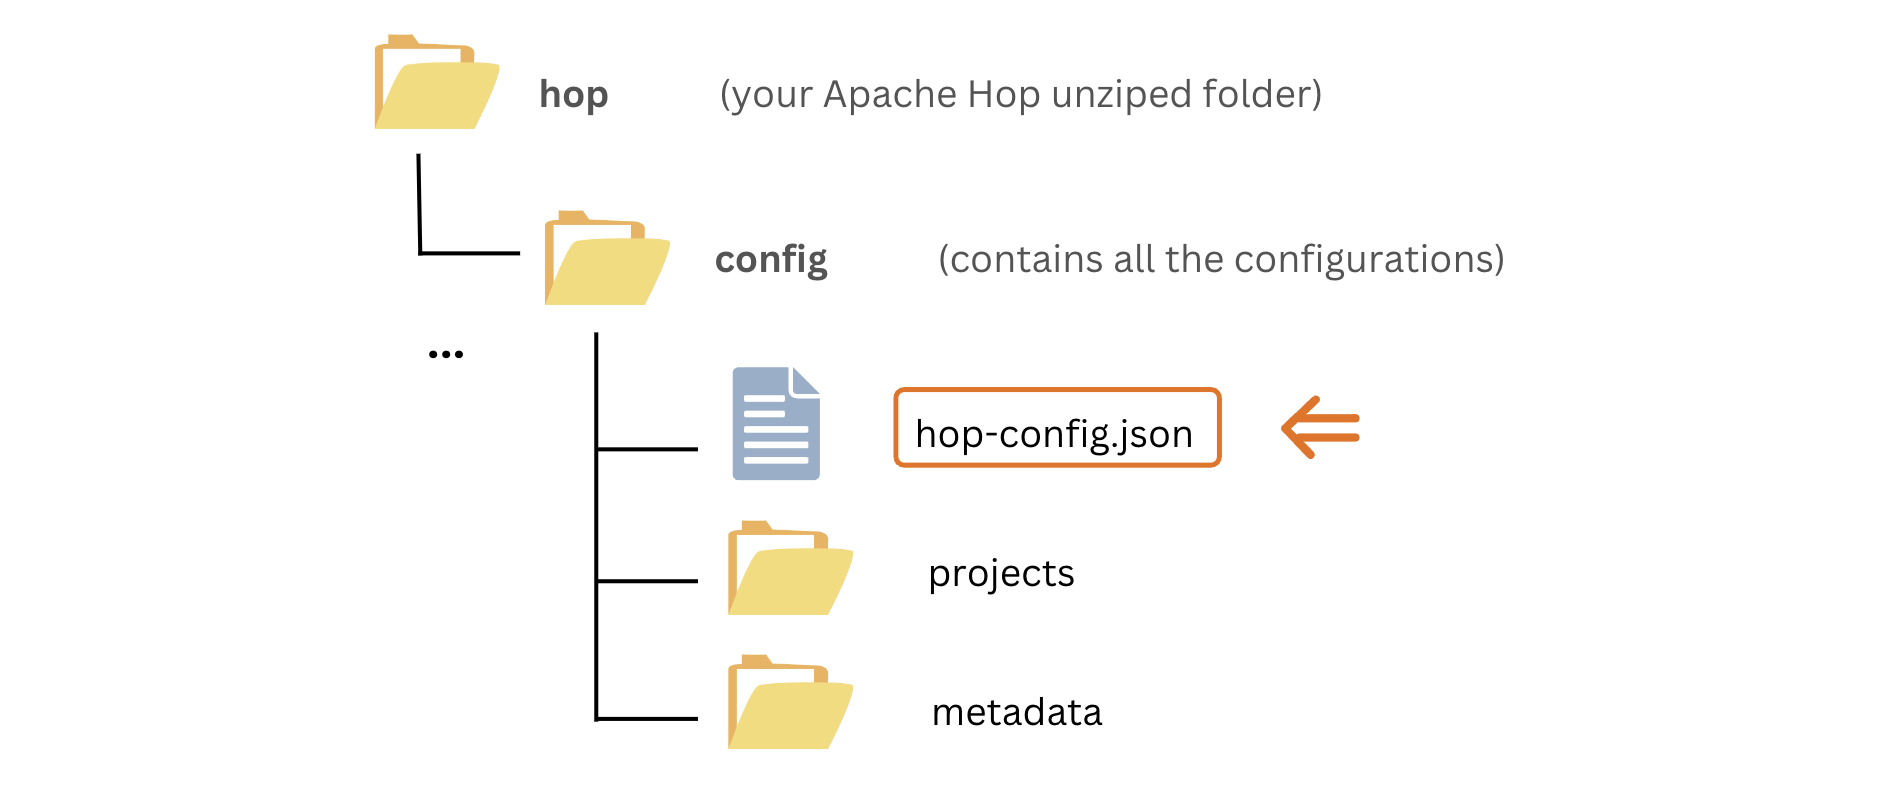
When you install Hop, the hop/config/ folder contains the hop-config.json file, the default installation projects, and the metadata folder. The hop-config.json file includes configuration settings for Apache Hop, such as system variables, GUI properties, and project-specific configurations.
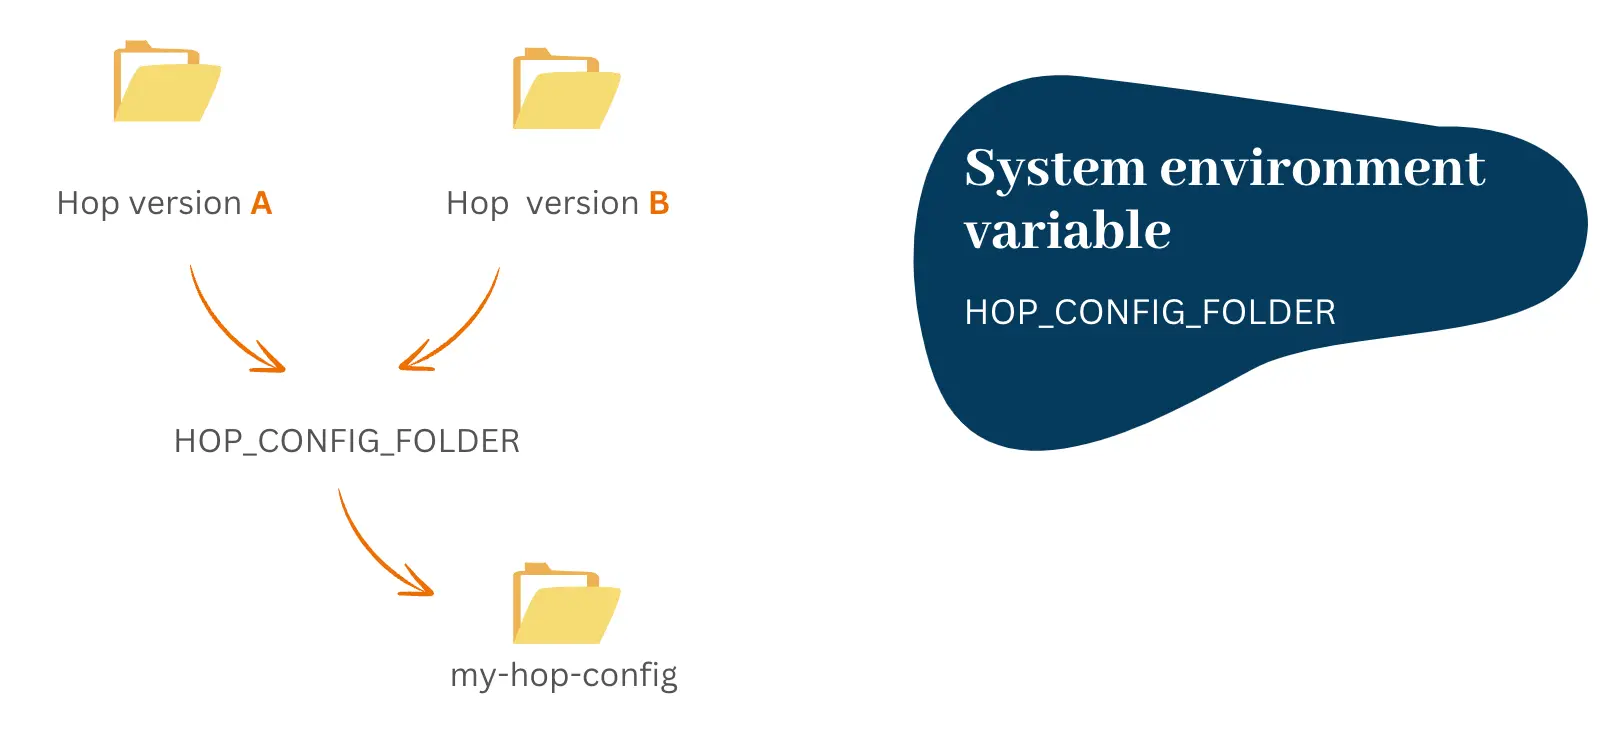
By creating a system variable for the config folder, you can have your config folder separated from your Hop installation so when you upgrade to a new version you don’t lose your configurations.
Step-by-step upgrade process
To keep your configuration independent of the installed Hop version, you need to set the value of the HOP_CONFIG_FOLDER system environment variable to the folder that contains the hop/config/ folder.
Set up system environment variables
For Windows users:
- Search for "Environment Variables" in the Start menu and select "Edit the system environment variables."

- Click on the "Environment Variables" button.
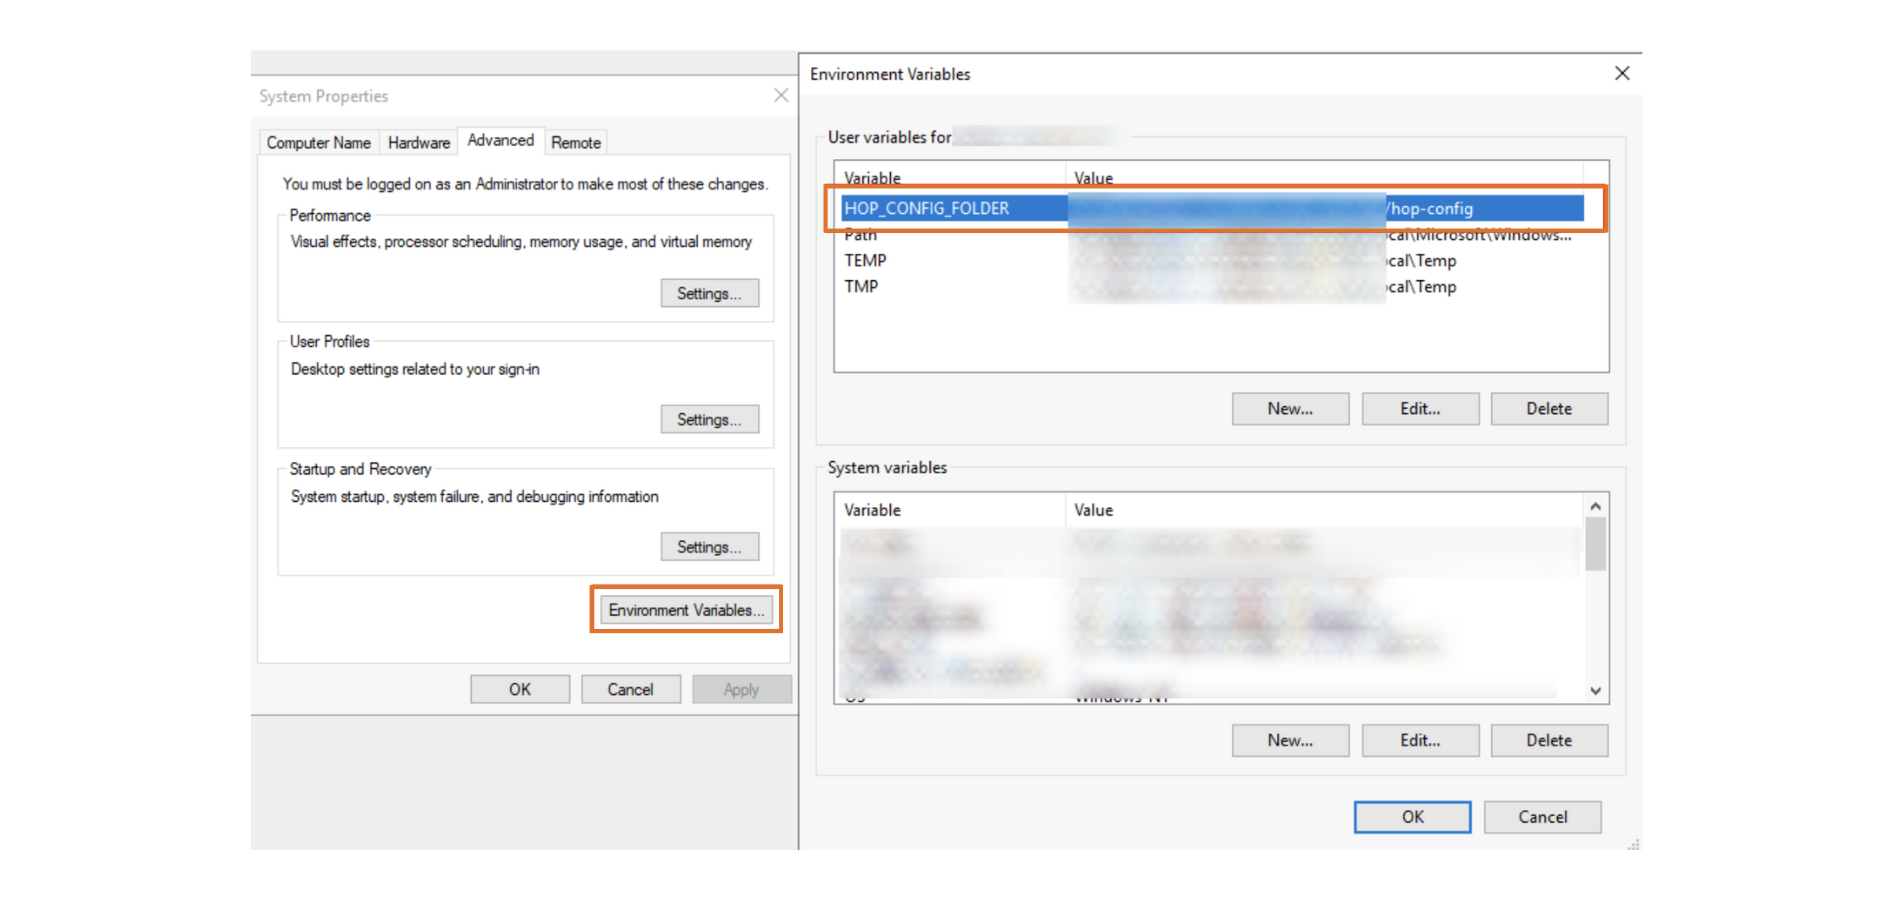
- Add a new user variable named HOP_CONFIG_FOLDER and set its value to the path where you want to store your Apache Hop configuration (e.g., C:\hop-config).
For MacOS / Linux users:
- Open your terminal and edit your shell configuration file (~/.bashrc, ~/.zshrc).
Determine your shell
First, identify which shell you are using. Open your terminal and run:
echo $SHELL
This will typically return something like /bin/bash or /bin/zsh.
Locate or create your shell configuration file
- For zsh (Z Shell): The configuration file is ~/.zshrc.
- For bash (Bourne Again Shell): The configuration file is ~/.bashrc.
Open the configuration file
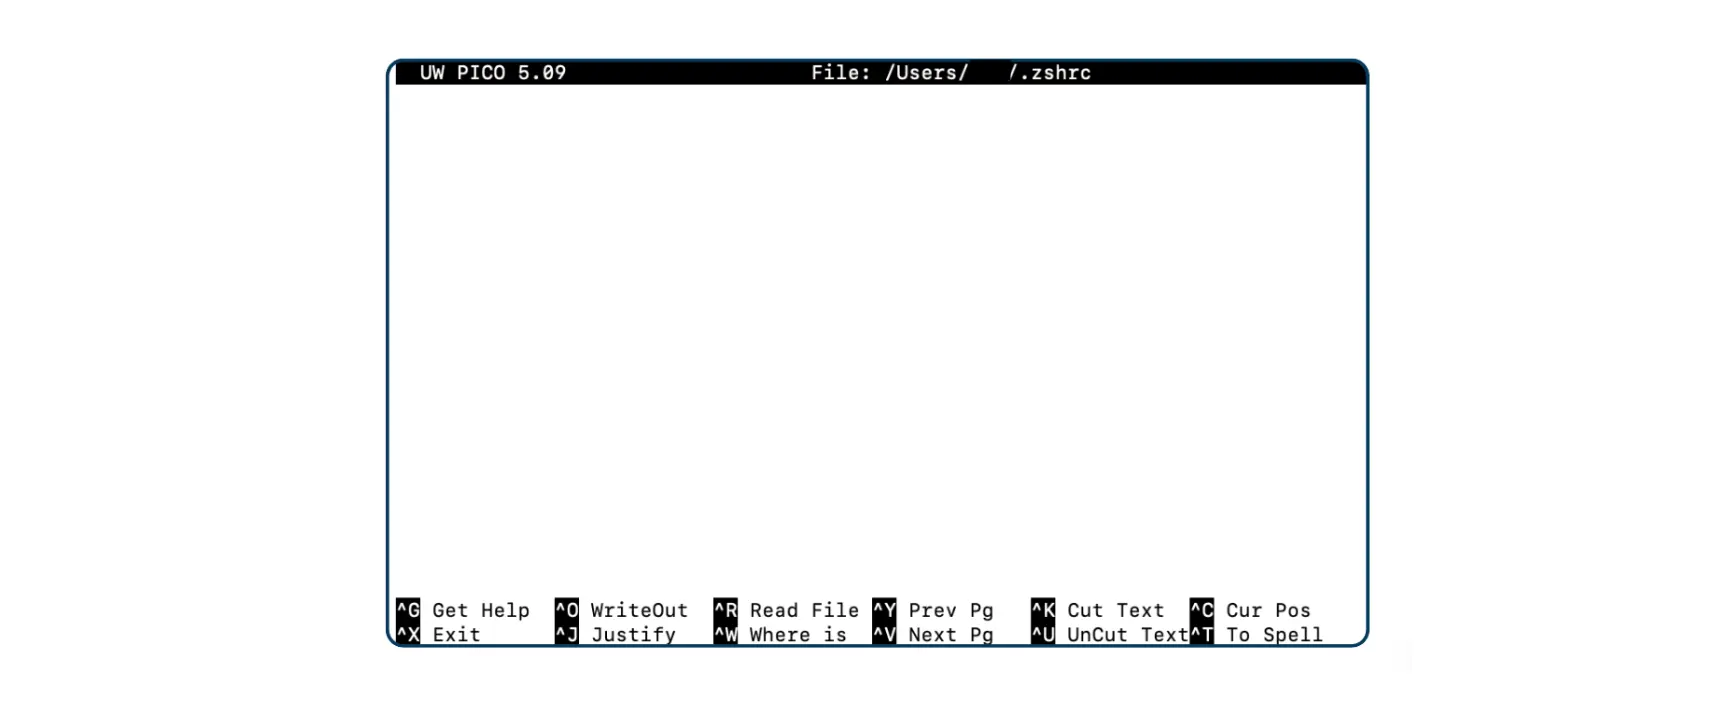
In the following example, we use /bin/zsh. Open ~/.zshrc using the command of your preference:
nano ~/.zshrc
Add the system environment variable
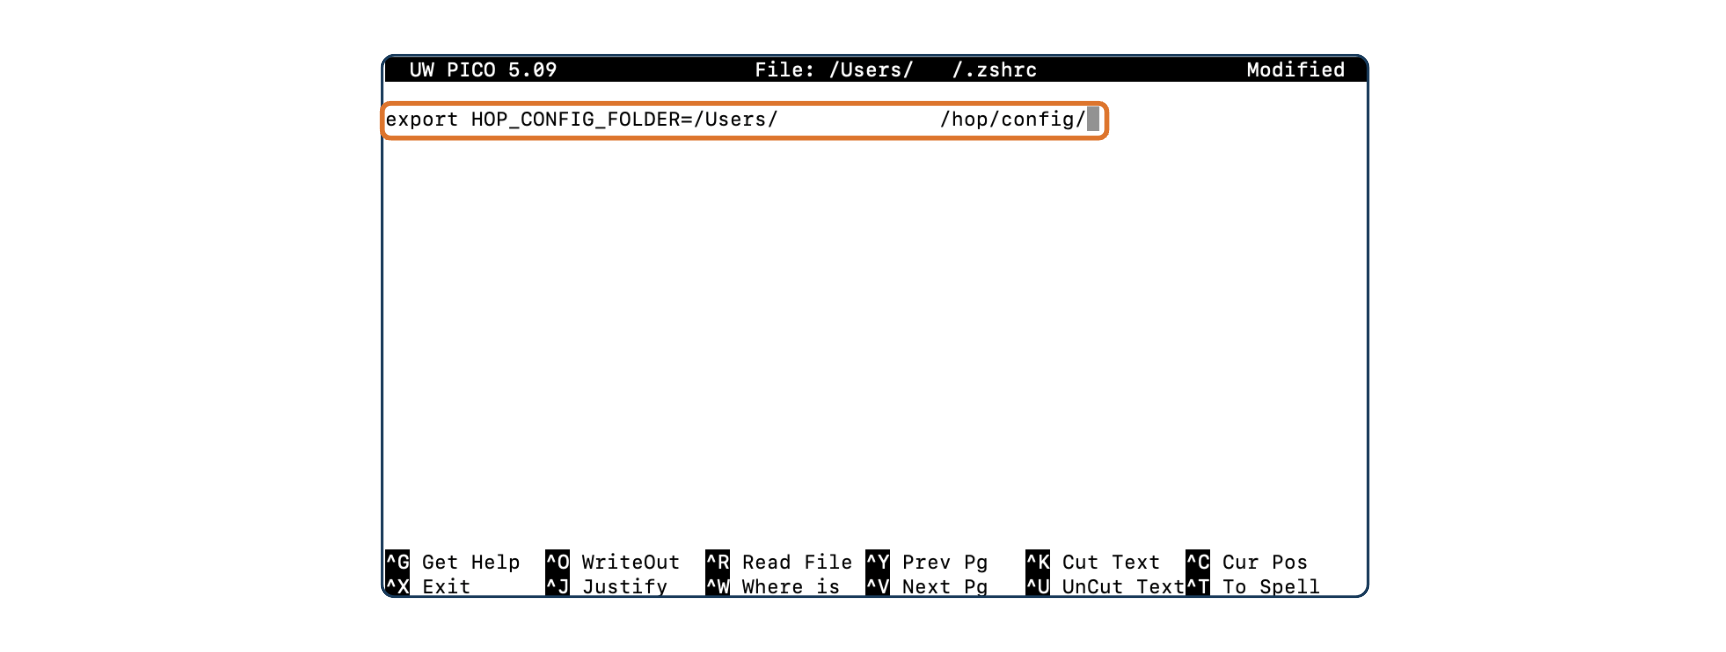
Add the following line to your configuration file:
export HOP_CONFIG_FOLDER=<YOUR_PREFERRED_PATH_TO_HOP_CONFIG_FOLDER>
Save the file and exit
- Press Ctrl + X to exit.
- Press Y to confirm the changes.
- Press Enter to save.
Apply the changes
After saving the file, apply the changes by running:
source ~/.zshrc
Download and install the new Apache Hop version
- Download and unzip the new Apache Hop version.
- When you open the Hop GUI in the new version, the "default" project will be selected by default.

- But your configured project will be in the projects list.

- Selecting your project will also display the current environment.

Conclusion
You have successfully upgraded Apache Hop without losing any of your configurations. This method ensures that all your environment files, connections, and other metadata objects are preserved, making the upgrade process smooth and efficient.
Apart from the HOP_CONFIG_FOLDER variable, there are some other important environment variables that can be configured:
- HOP_AUDIT_FOLDER: Set this variable to a valid path on your machine to store Hop’s audit information, such as recently opened files per project and zoom size settings.
- HOP_PLUGIN_BASE_FOLDERS: This variable points Hop to a comma-separated list of folders where additional plugins are located, and when used, it overrides the default plugins folder unless it is included in the list.
- HOP_SHARED_JDBC_FOLDERS: Set this variable to a comma-separated list of folders containing JDBC drivers; if you change this from the default lib/jdbc, ensure you include the default folder path to maintain access to the default drivers.
Don't miss the video below for a step-by-step walkthrough of the entire process!
Stay connected
If you have any questions or run into issues, contact us and we’ll be happy to help.
