Hey everyone! Welcome back to our Build & deploy series. In this post, we're going to take a deeper dive into Apache Hop by building two essential pipelines and executing them in a workflow.
Before diving into this tutorial, make sure you’ve completed Part 1 of our "Build & deploy" series. In Part 1, we cover the installation of Apache Hop, setting up your first project, and configuring your environment—essential steps before moving forward with building and executing the pipelines in this post.
What you’ll learn in this post
- Build two data pipelines in Apache Hop for data cleaning, transformation, and aggregation.
- Create a workflow to execute pipelines sequentially.
- Learn to use various Hop transforms and manage workflow execution.
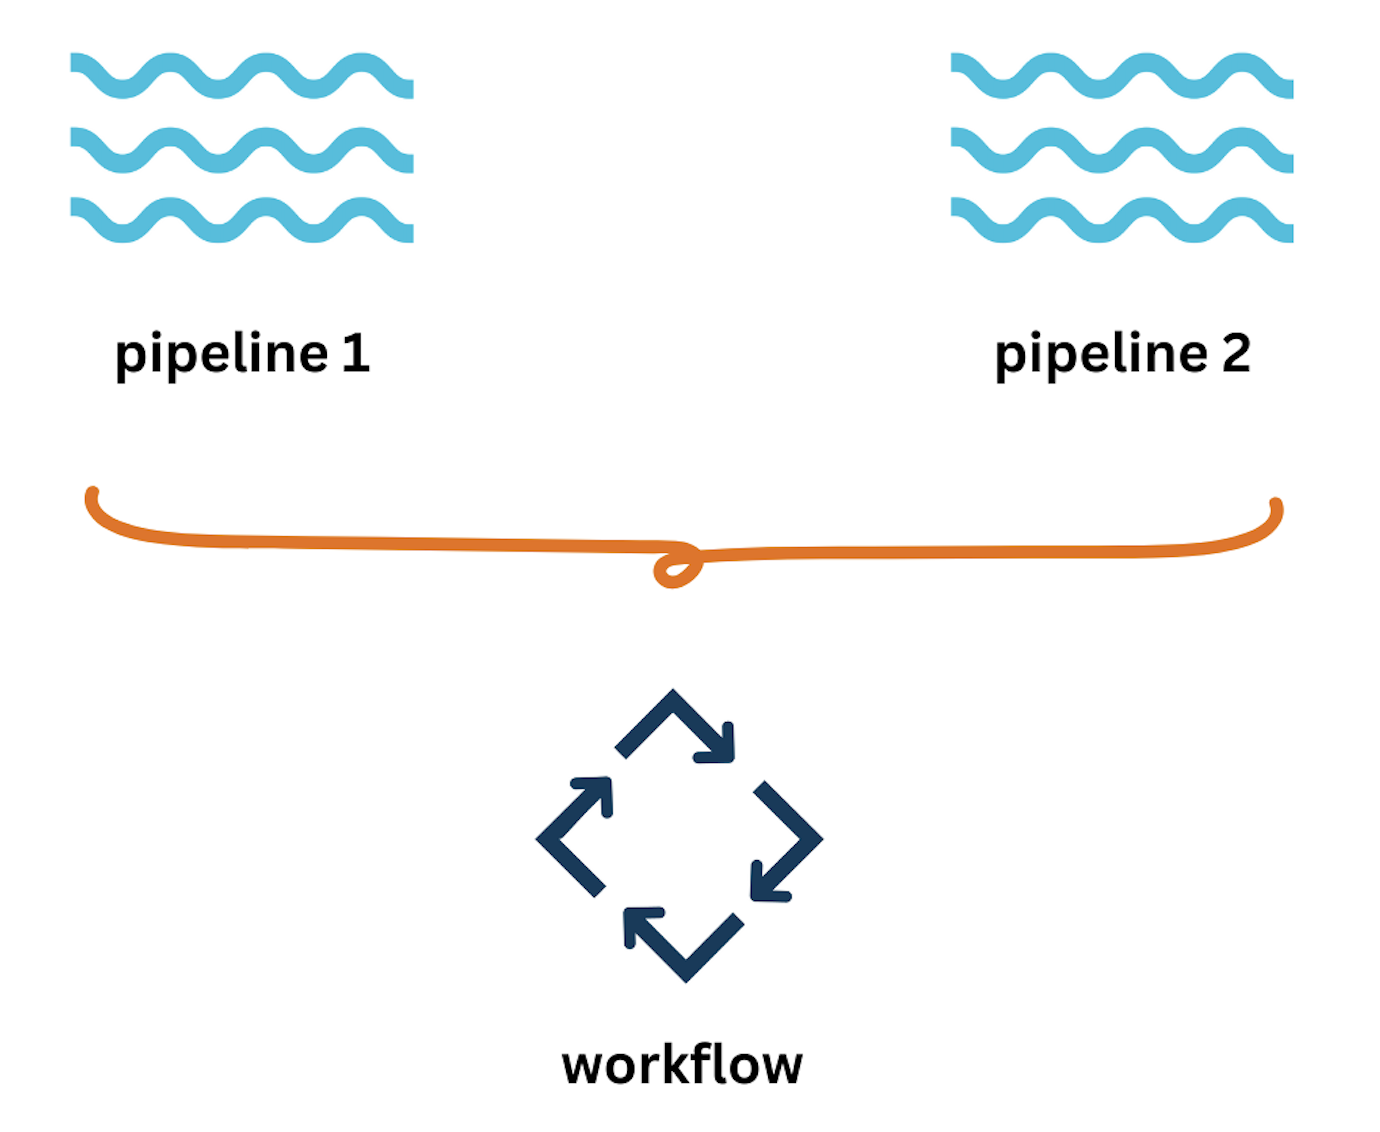
We'll be cleaning and transforming a flights dataset in pipeline 1 and then aggregating the transformed data in pipeline 2.
Finally, we'll bring it all together in a workflow that executes these pipelines in sequence.
So, let’s jump right in!
Pipeline 1: Clean and transform
First up, we have pipeline 1, which we're calling "clean-transform" This pipeline will handle the data cleaning and transformation for our flights dataset.

Step 1: Start by creating a new pipeline in the Hop GUI and name it "clean-transform".
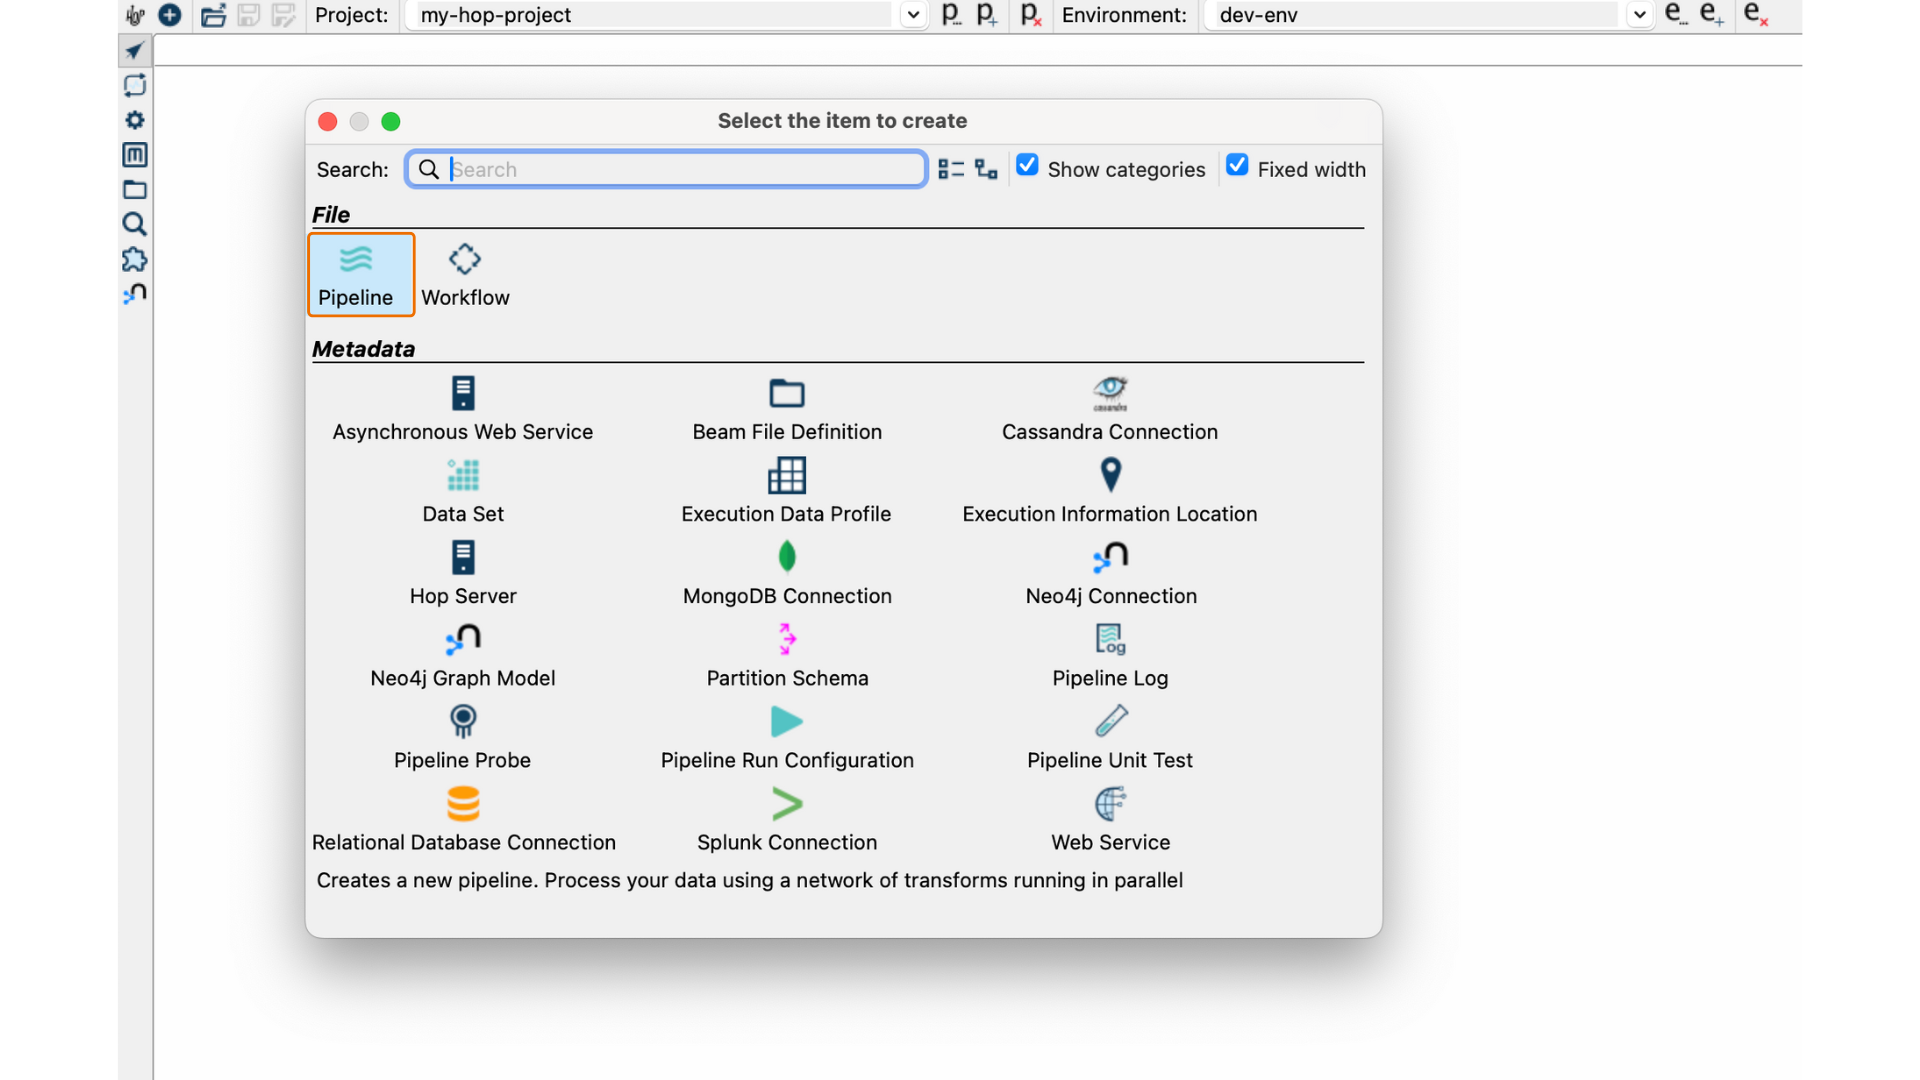
Keep in mind that each pipeline name in your project must be unique.

Step 2: The first step in this pipeline is to read our raw flights data. We’ll do this using the Text File Input transform.

In the Text File Input configuration, specify the path to your dataset.
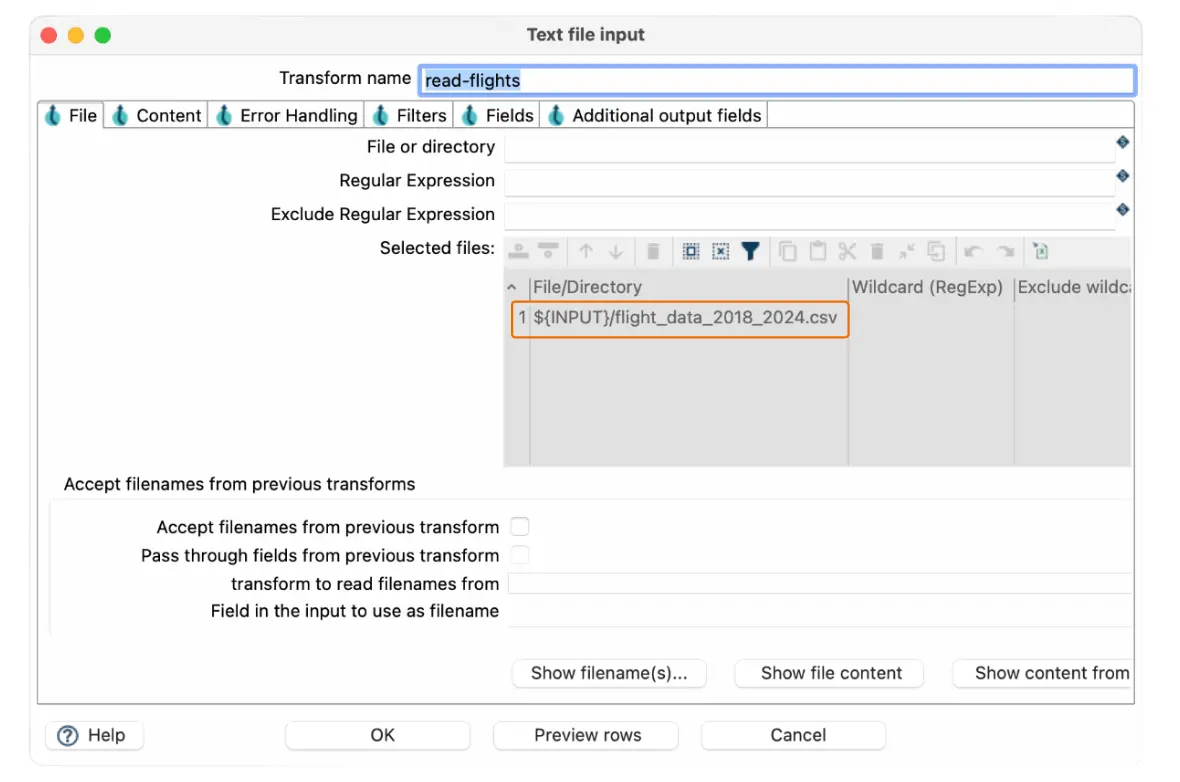
Make sure you get the fields correctly according to the dataset schema.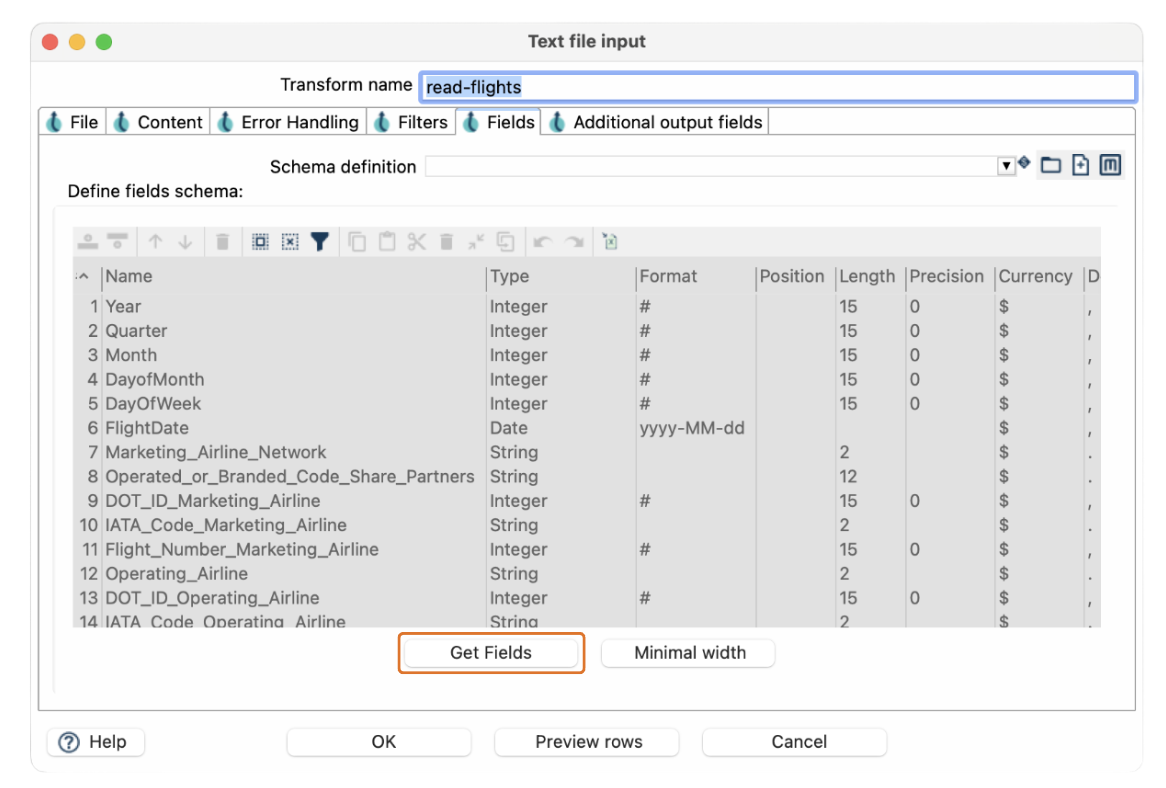
Step 3: Next, we need to calculate the week of the year from the flight date. For this, we’ll use the Calculator transform.

In the Calculator transform, add a new calculation to derive the week of the year. Choose the "FlightDate" field as the input, and select the calculation type. Save this result as "flight_year_week".
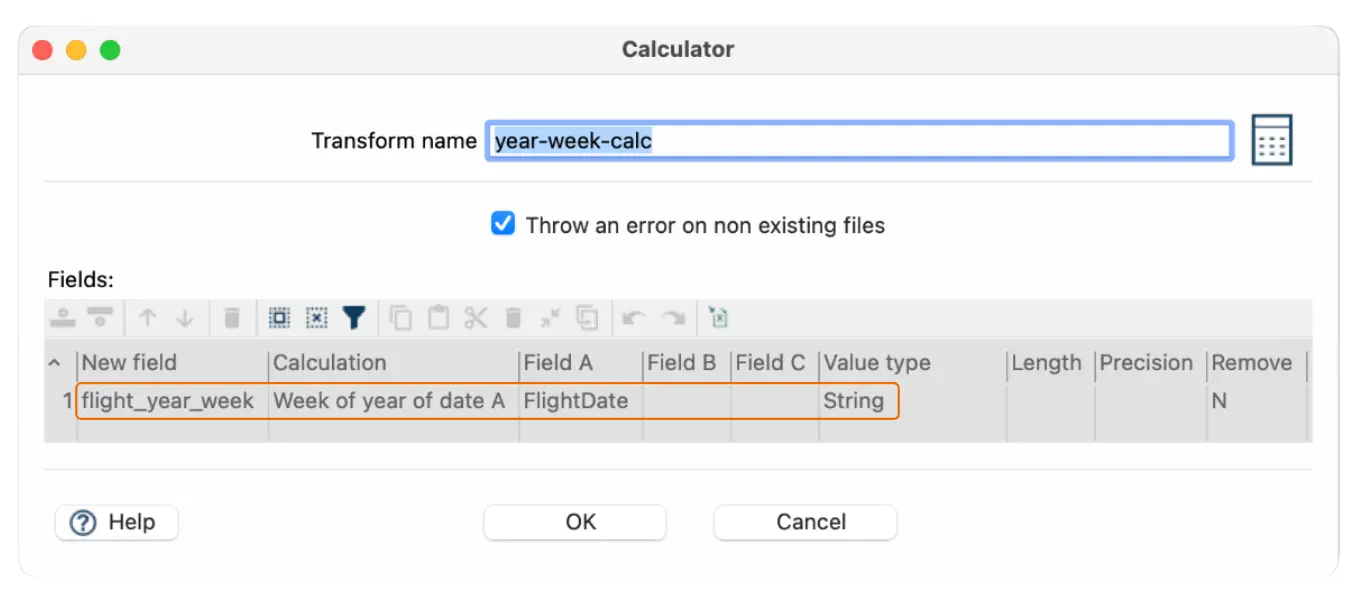
Step 4: Now, let’s add a JavaScript transform to create two new fields: "OnTimeDep" and "OnTimeArr". These fields will determine if a flight departed and arrived on time.

In the JavaScript editor, write a simple script that checks the "DepDelay" and "ArrDelay" fields. If the values are greater than zero, set "OnTimeDep" and "OnTimeArr" to 'No'; otherwise, set them to 'Yes'.
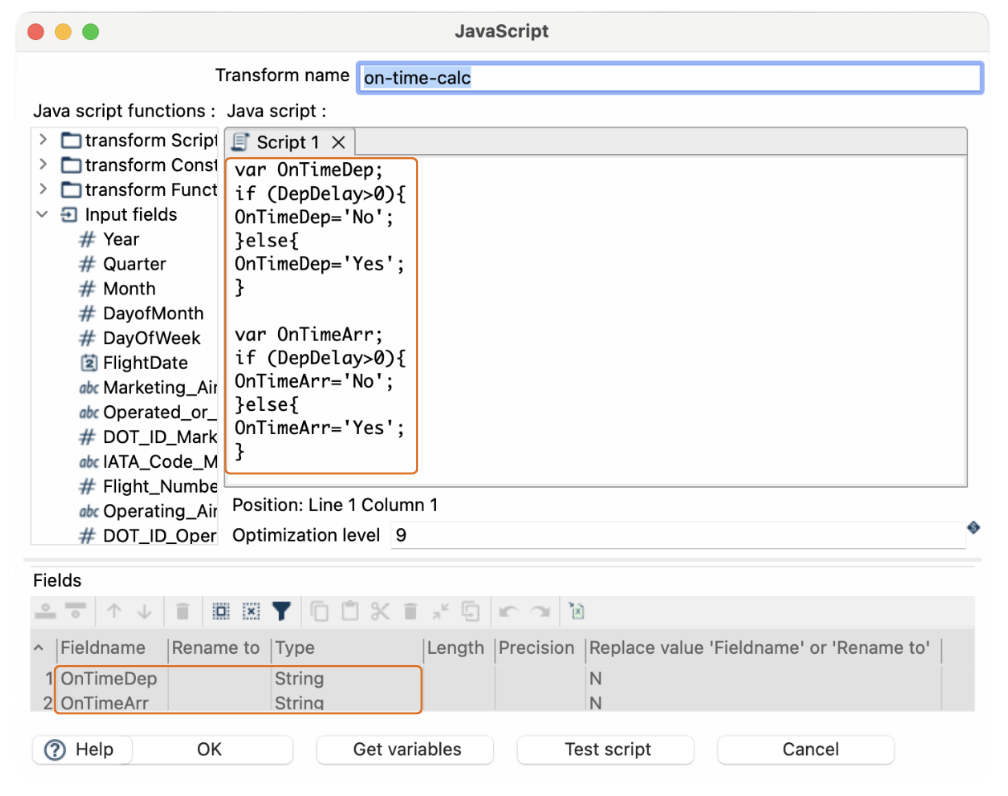
var OnTimeDep;
if (DepDelay>0){
OnTimeDep='No';
}else{
OnTimeDep='Yes';
}

var OnTimeArr;
if (DepDelay>0){
OnTimeArr='No';
}else{
OnTimeArr='Yes';
}
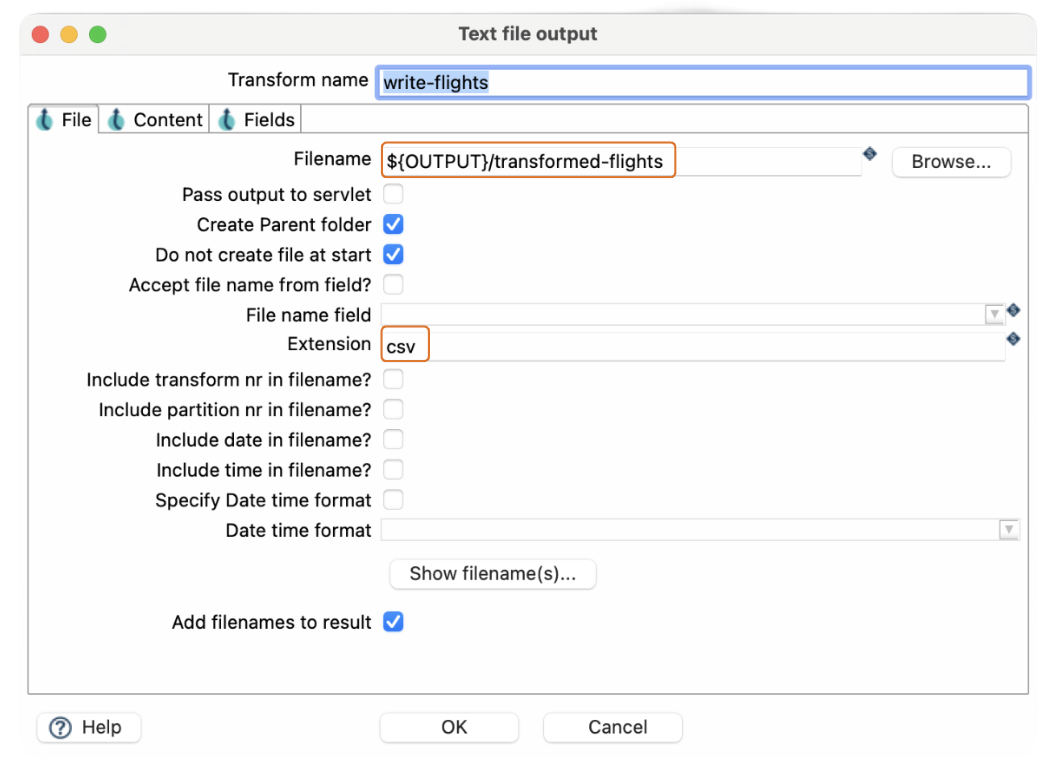
Step 5: Finally, we need to save our transformed data. Use the Text File Output transform to write the data to a new CSV file.

Name this file something like "transformed-flights", specify the output path and the extension csv.
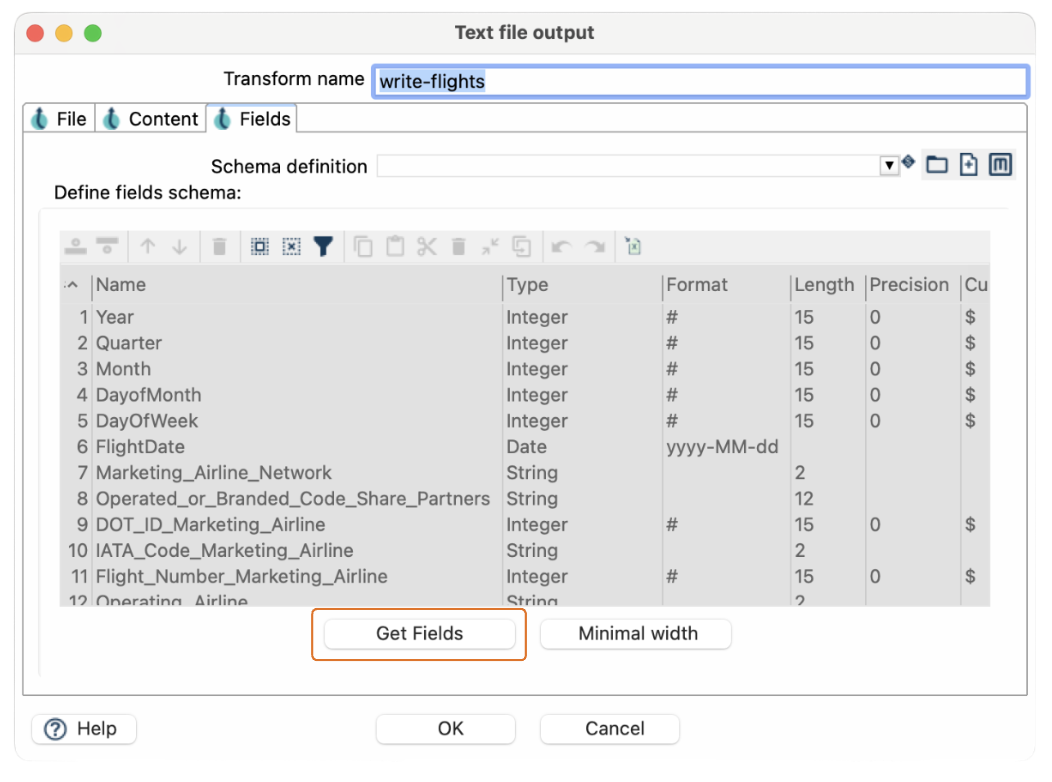
Make sure you get the fields correctly according to the dataset schema.
And that’s it for pipeline 1! Save your pipeline, and let's move on to pipeline 2.

Pipeline 2: Aggregate data
The second pipeline, named “aggregate” will read the transformed data, add a sequence ID, and then aggregate the data to generate insights.

Step 1: Create a new pipeline using the New option in the Hop GUI.

Remember that each pipeline name in your project must be unique.
Name this second pipeline "aggregate".

Step 2: Start by using the Text File Input transform to read the "transformed-flights.csv" file that we created in pipeline 1.

In the Text File Input configuration, specify the path to the transformed data.
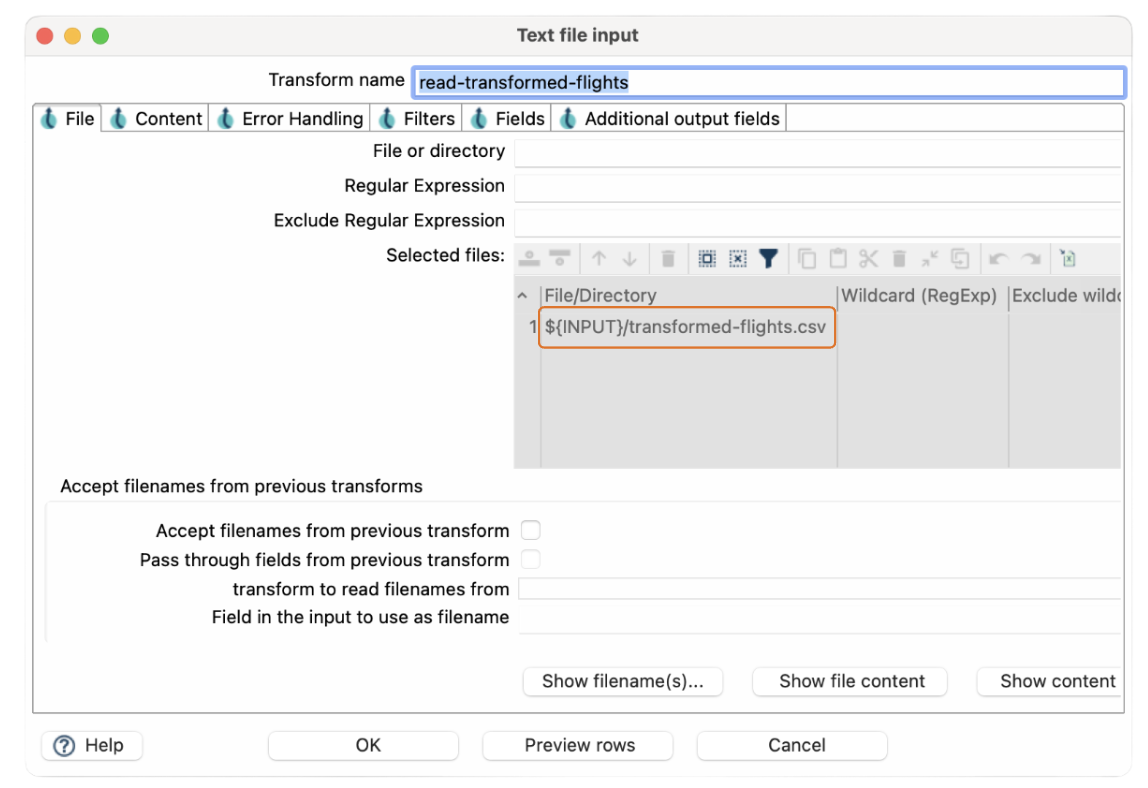
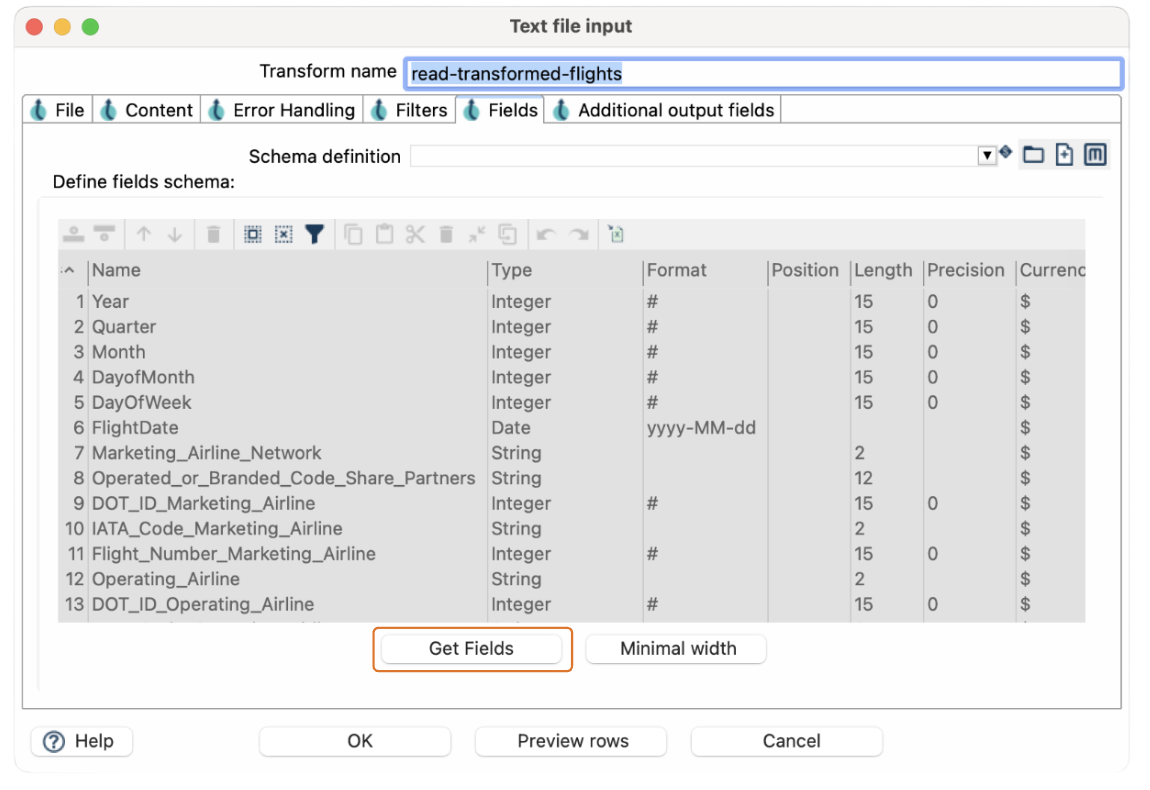
Make sure you get the fields correctly according to the dataset schema.
Step 3: Next, we need to add a unique identifier for each record.
 Use the Add Sequence transform to generate a sequence "id". This will help us uniquely identify each aggregated record.
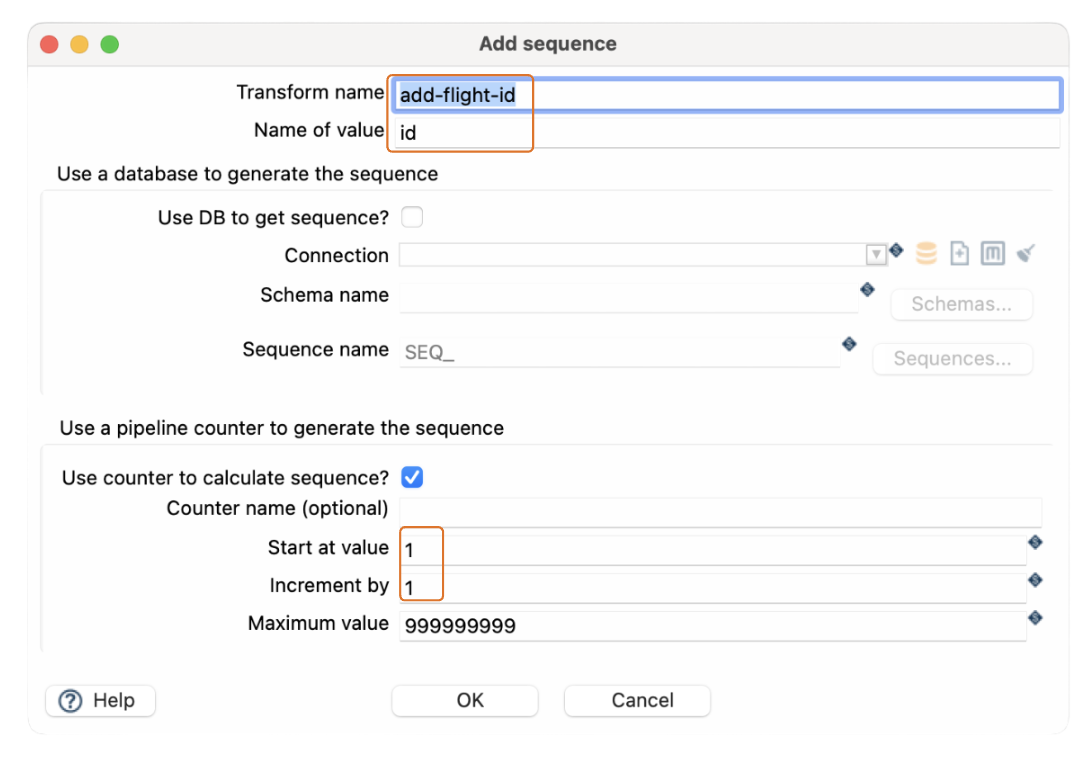
Specify the transform name and the name of the new field.
The sequence starts at value 1 by default and the increment is also 1 by default.
Step 4: Now, let’s aggregate the data. Use the Memory Group By transform for this task.
In the Memory Group By configuration, specify the fields you want to group by, such as "Operating_Airline", "OriginStateName" and "OriginCityName".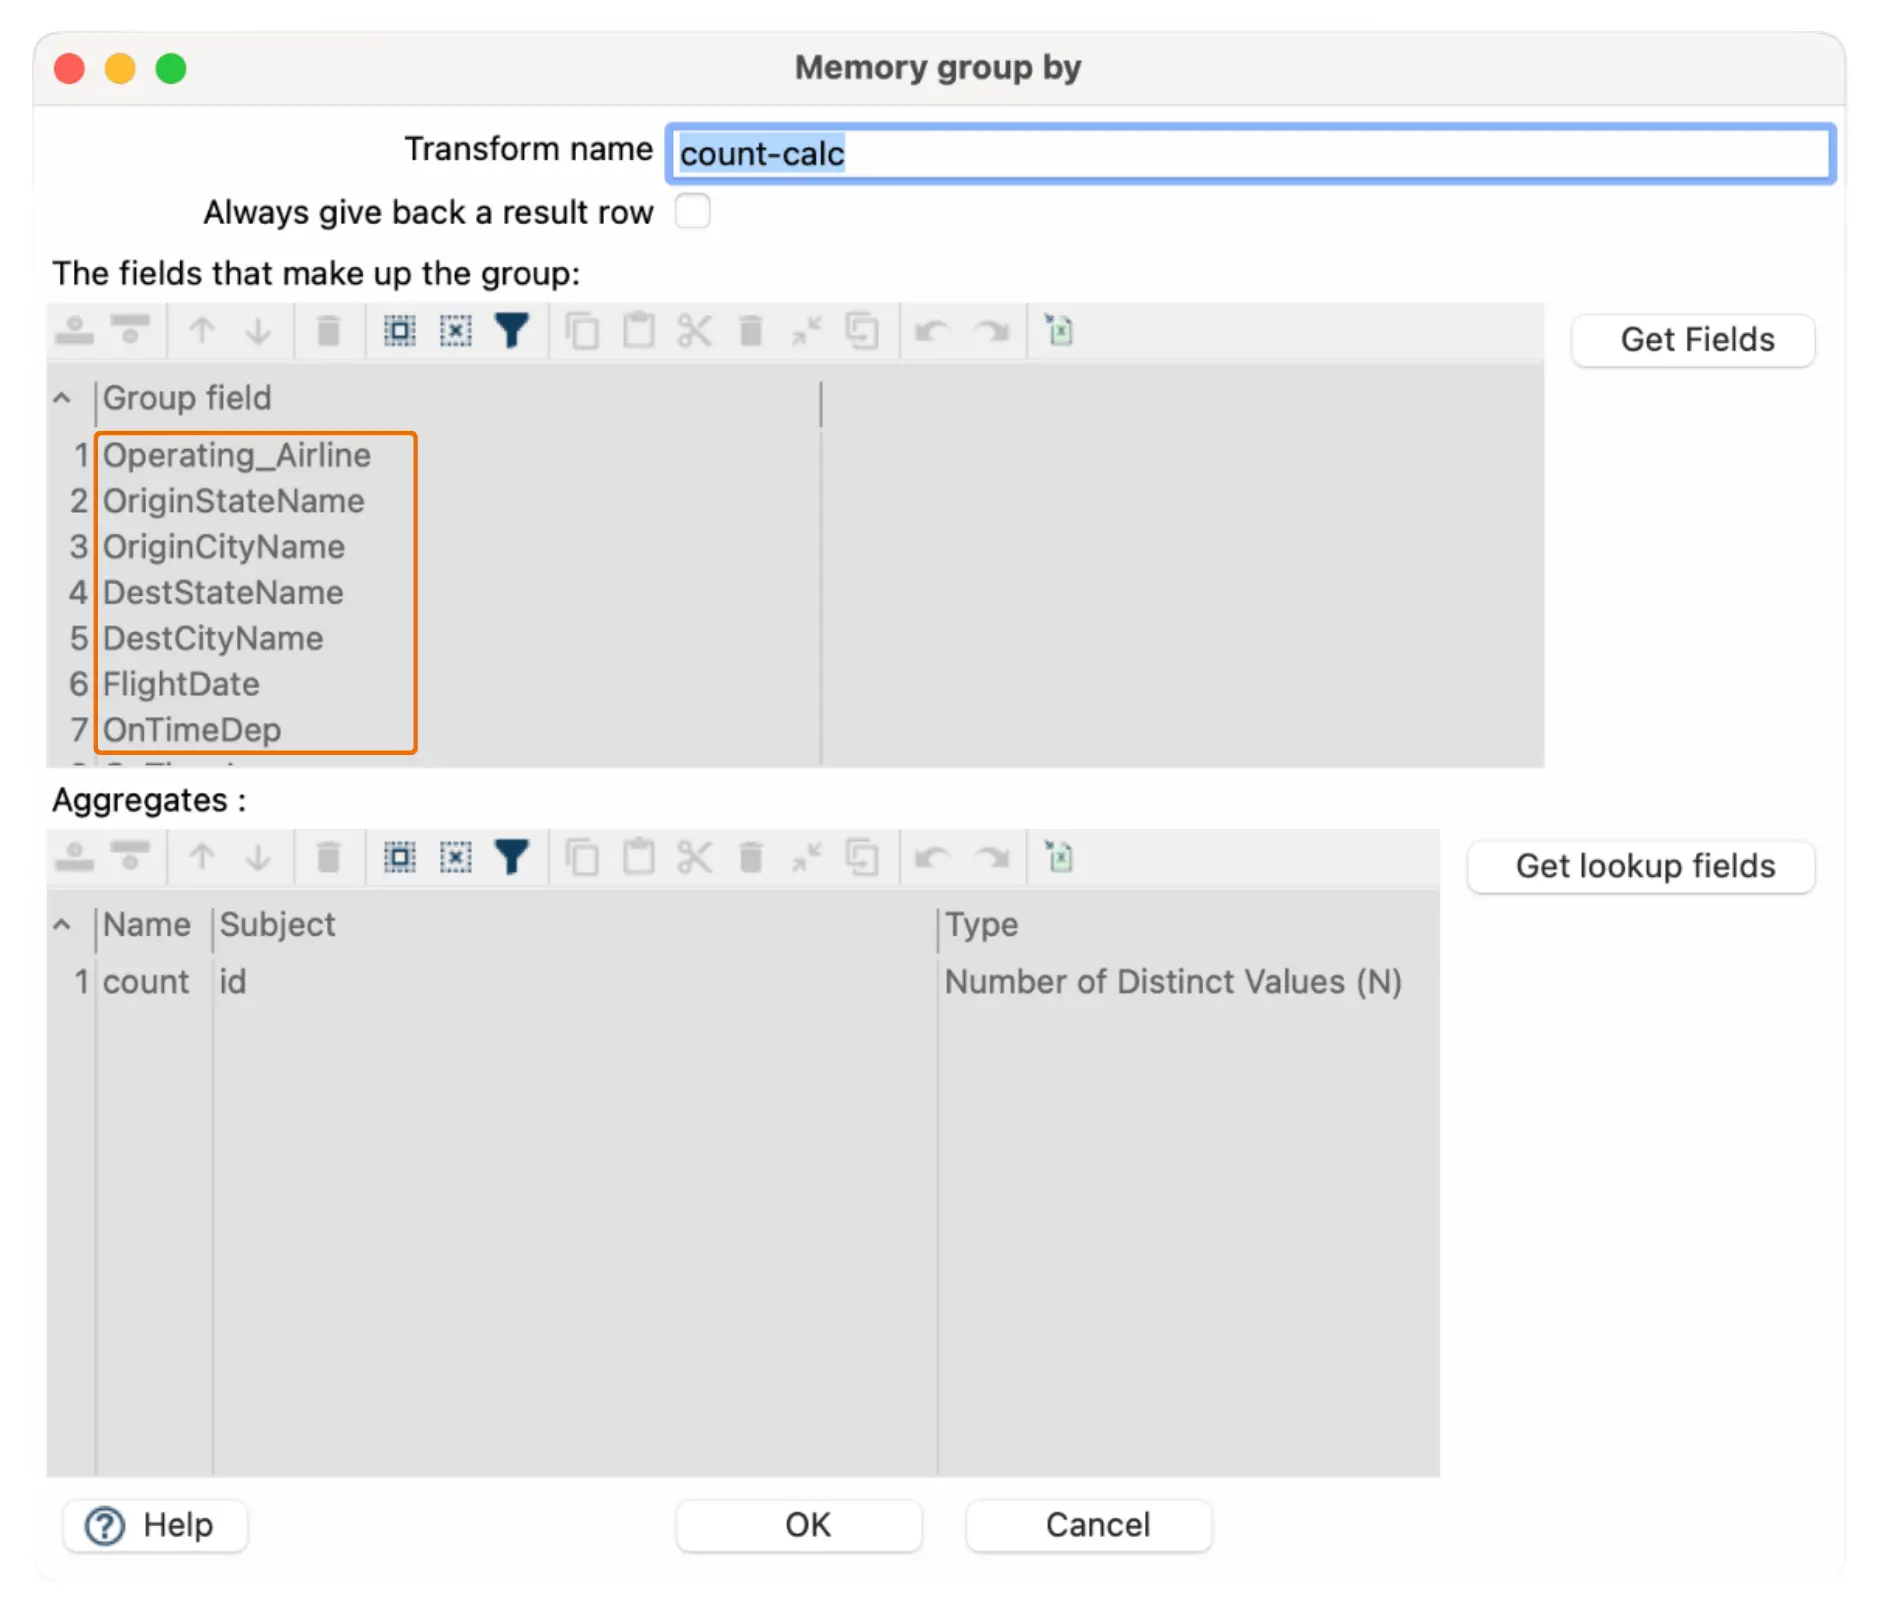
Define the name of the aggregated field, the field used to aggregate and the aggregation function, "Number of Distinct Values (N)" in this case.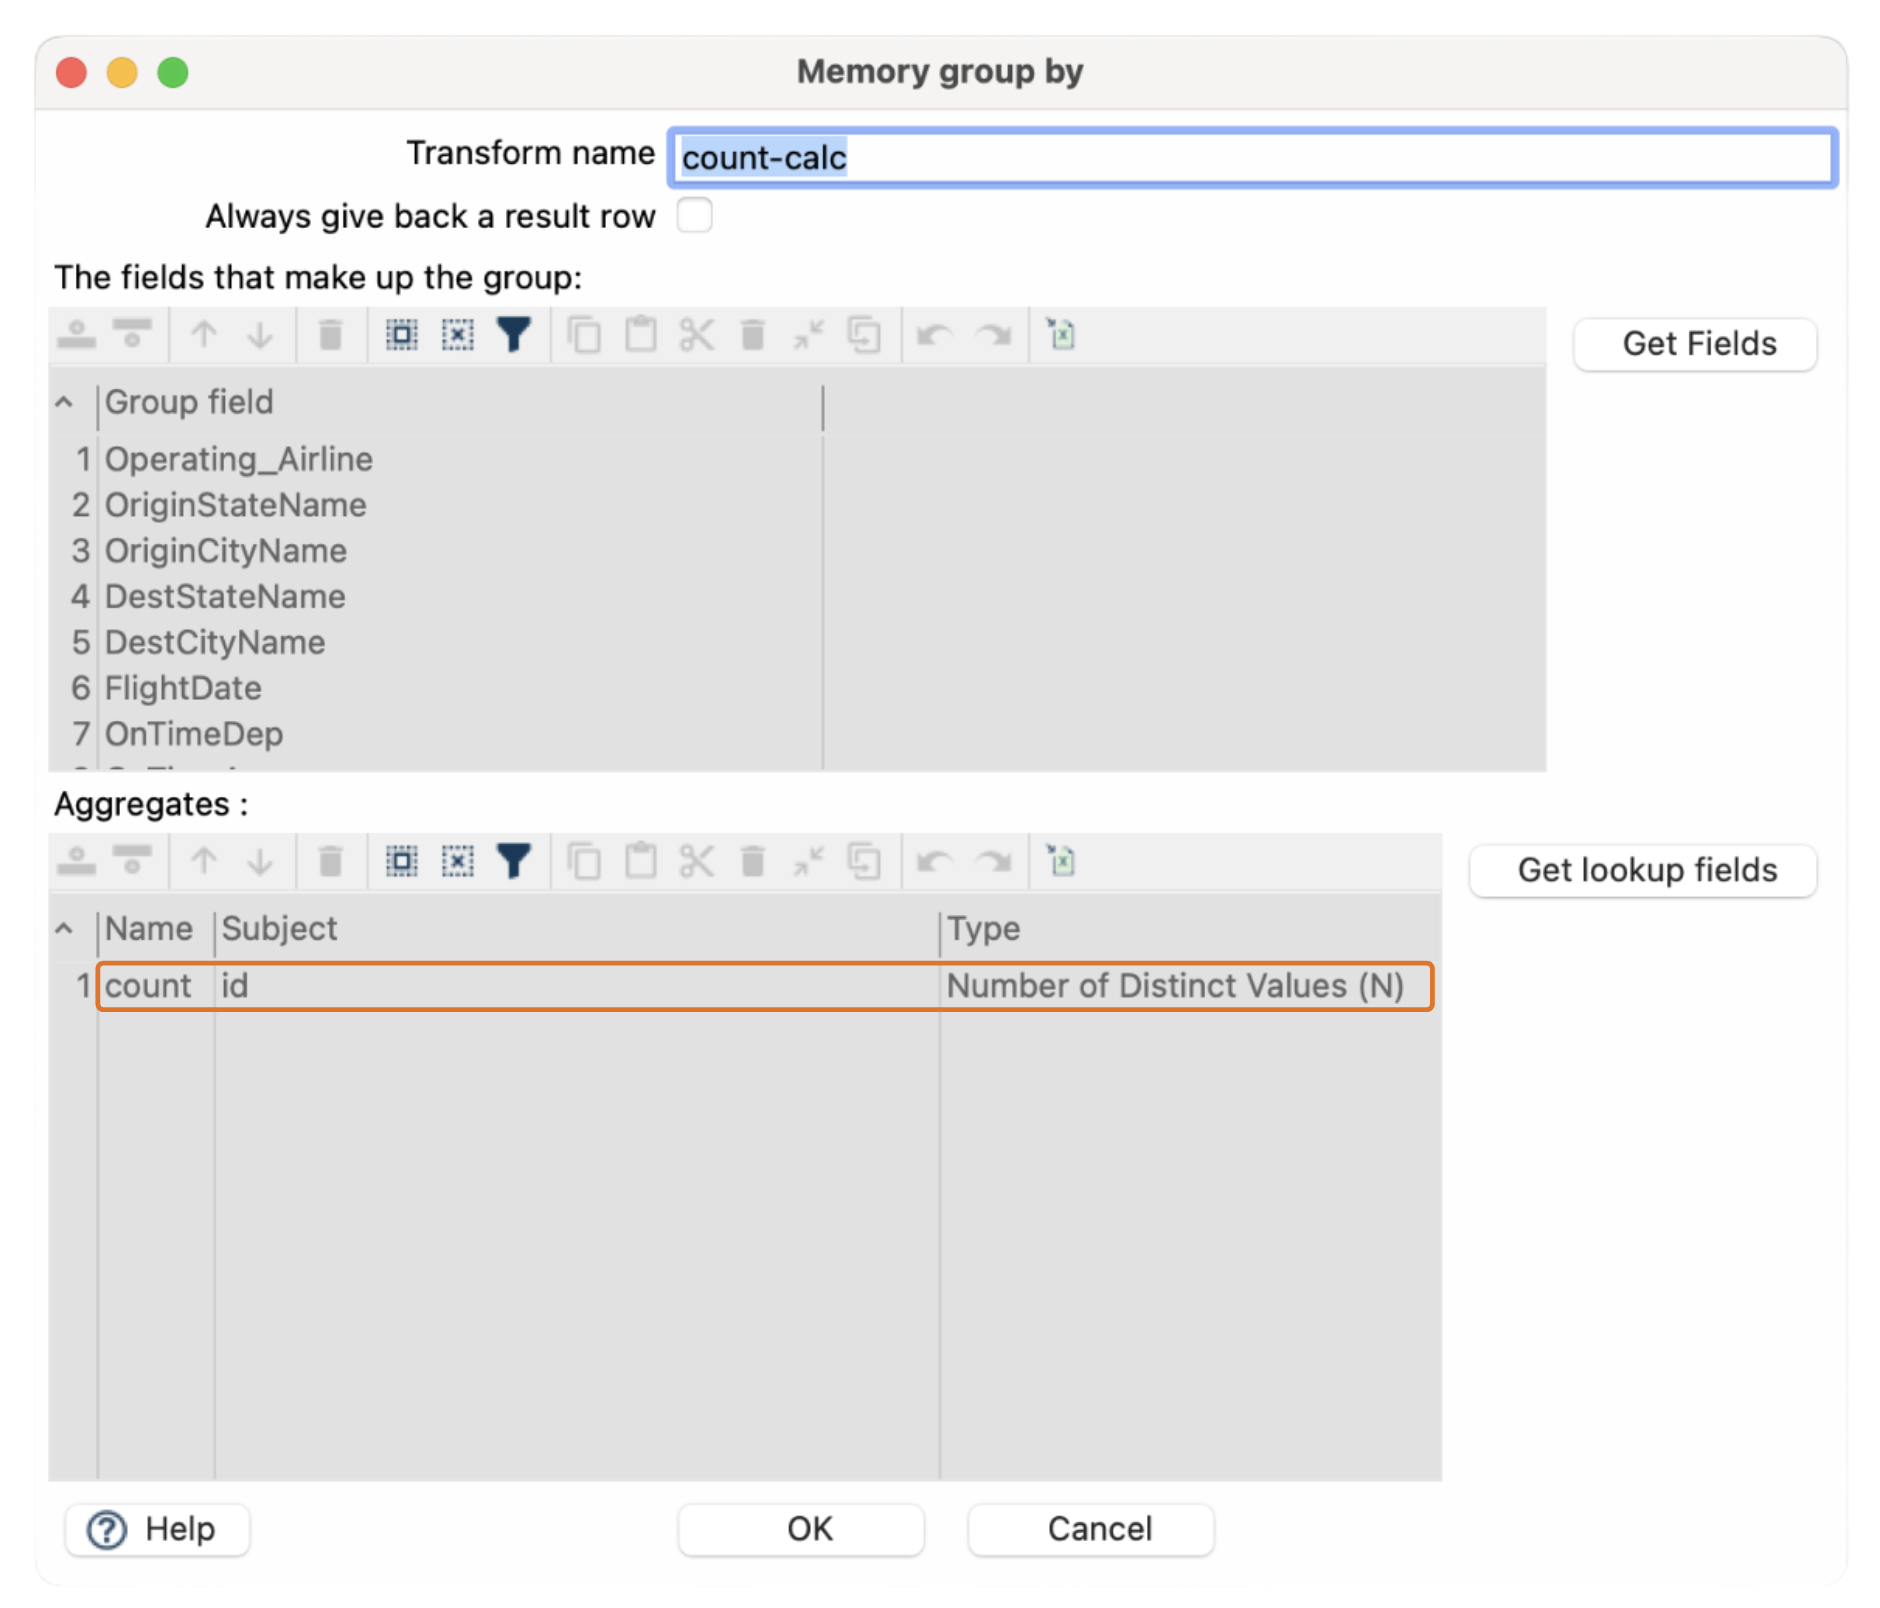
Step 5: Finally, output the aggregated results to a CSV file using the Text File Output transform.

Name this file "aggregated-flights.csv", specify the path and the extension csv.
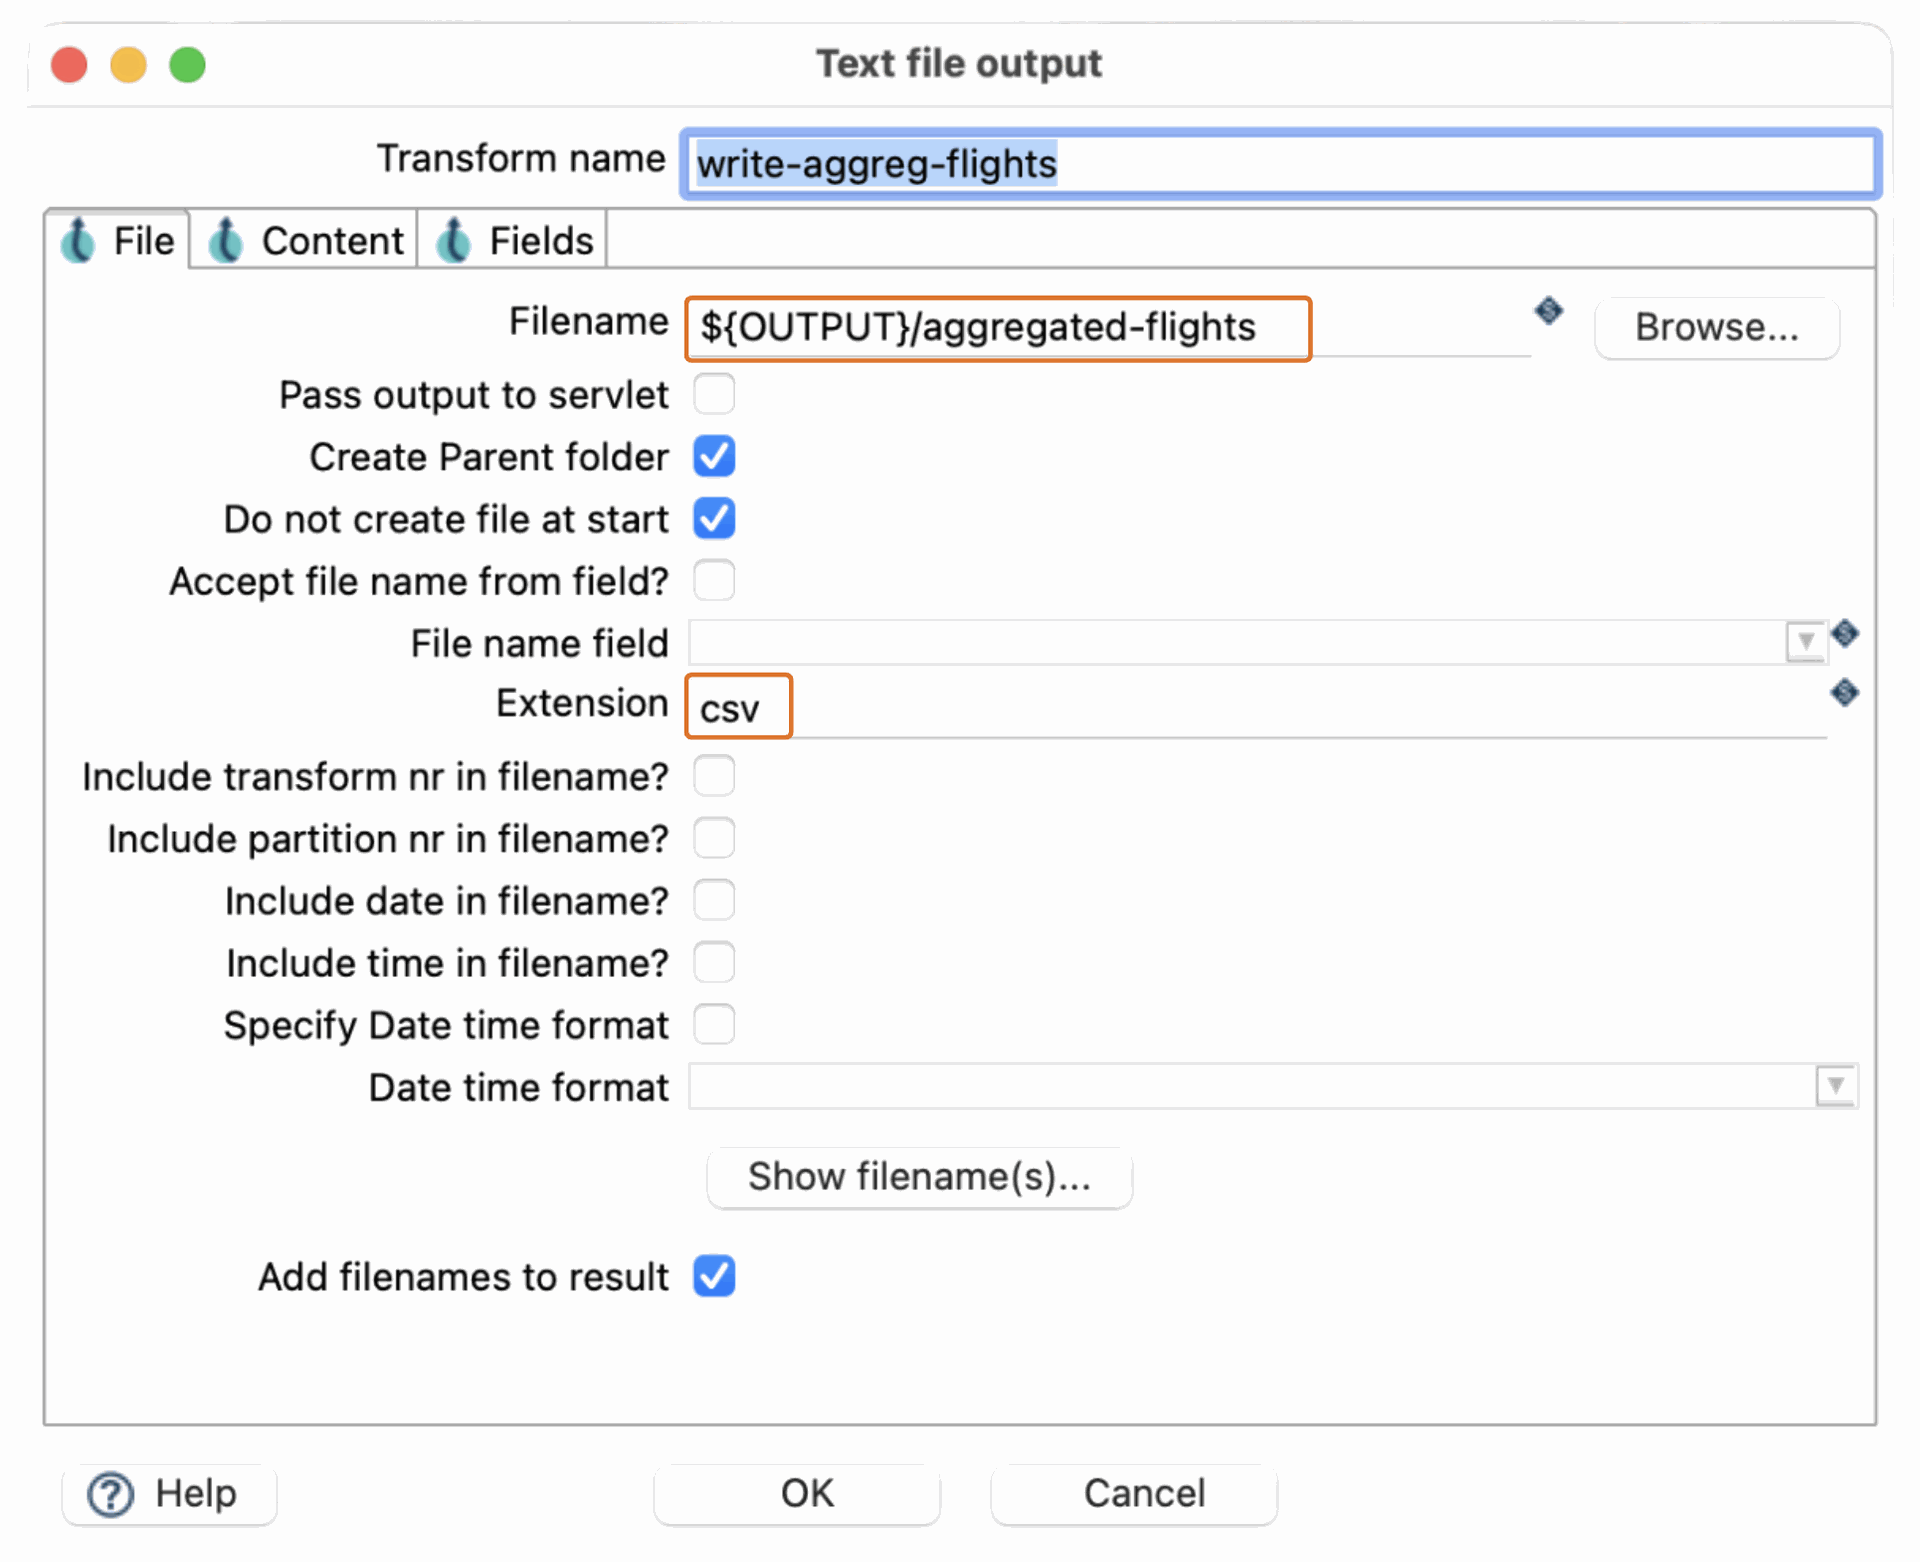
Make sure you get the fields correctly according to the dataset schema.
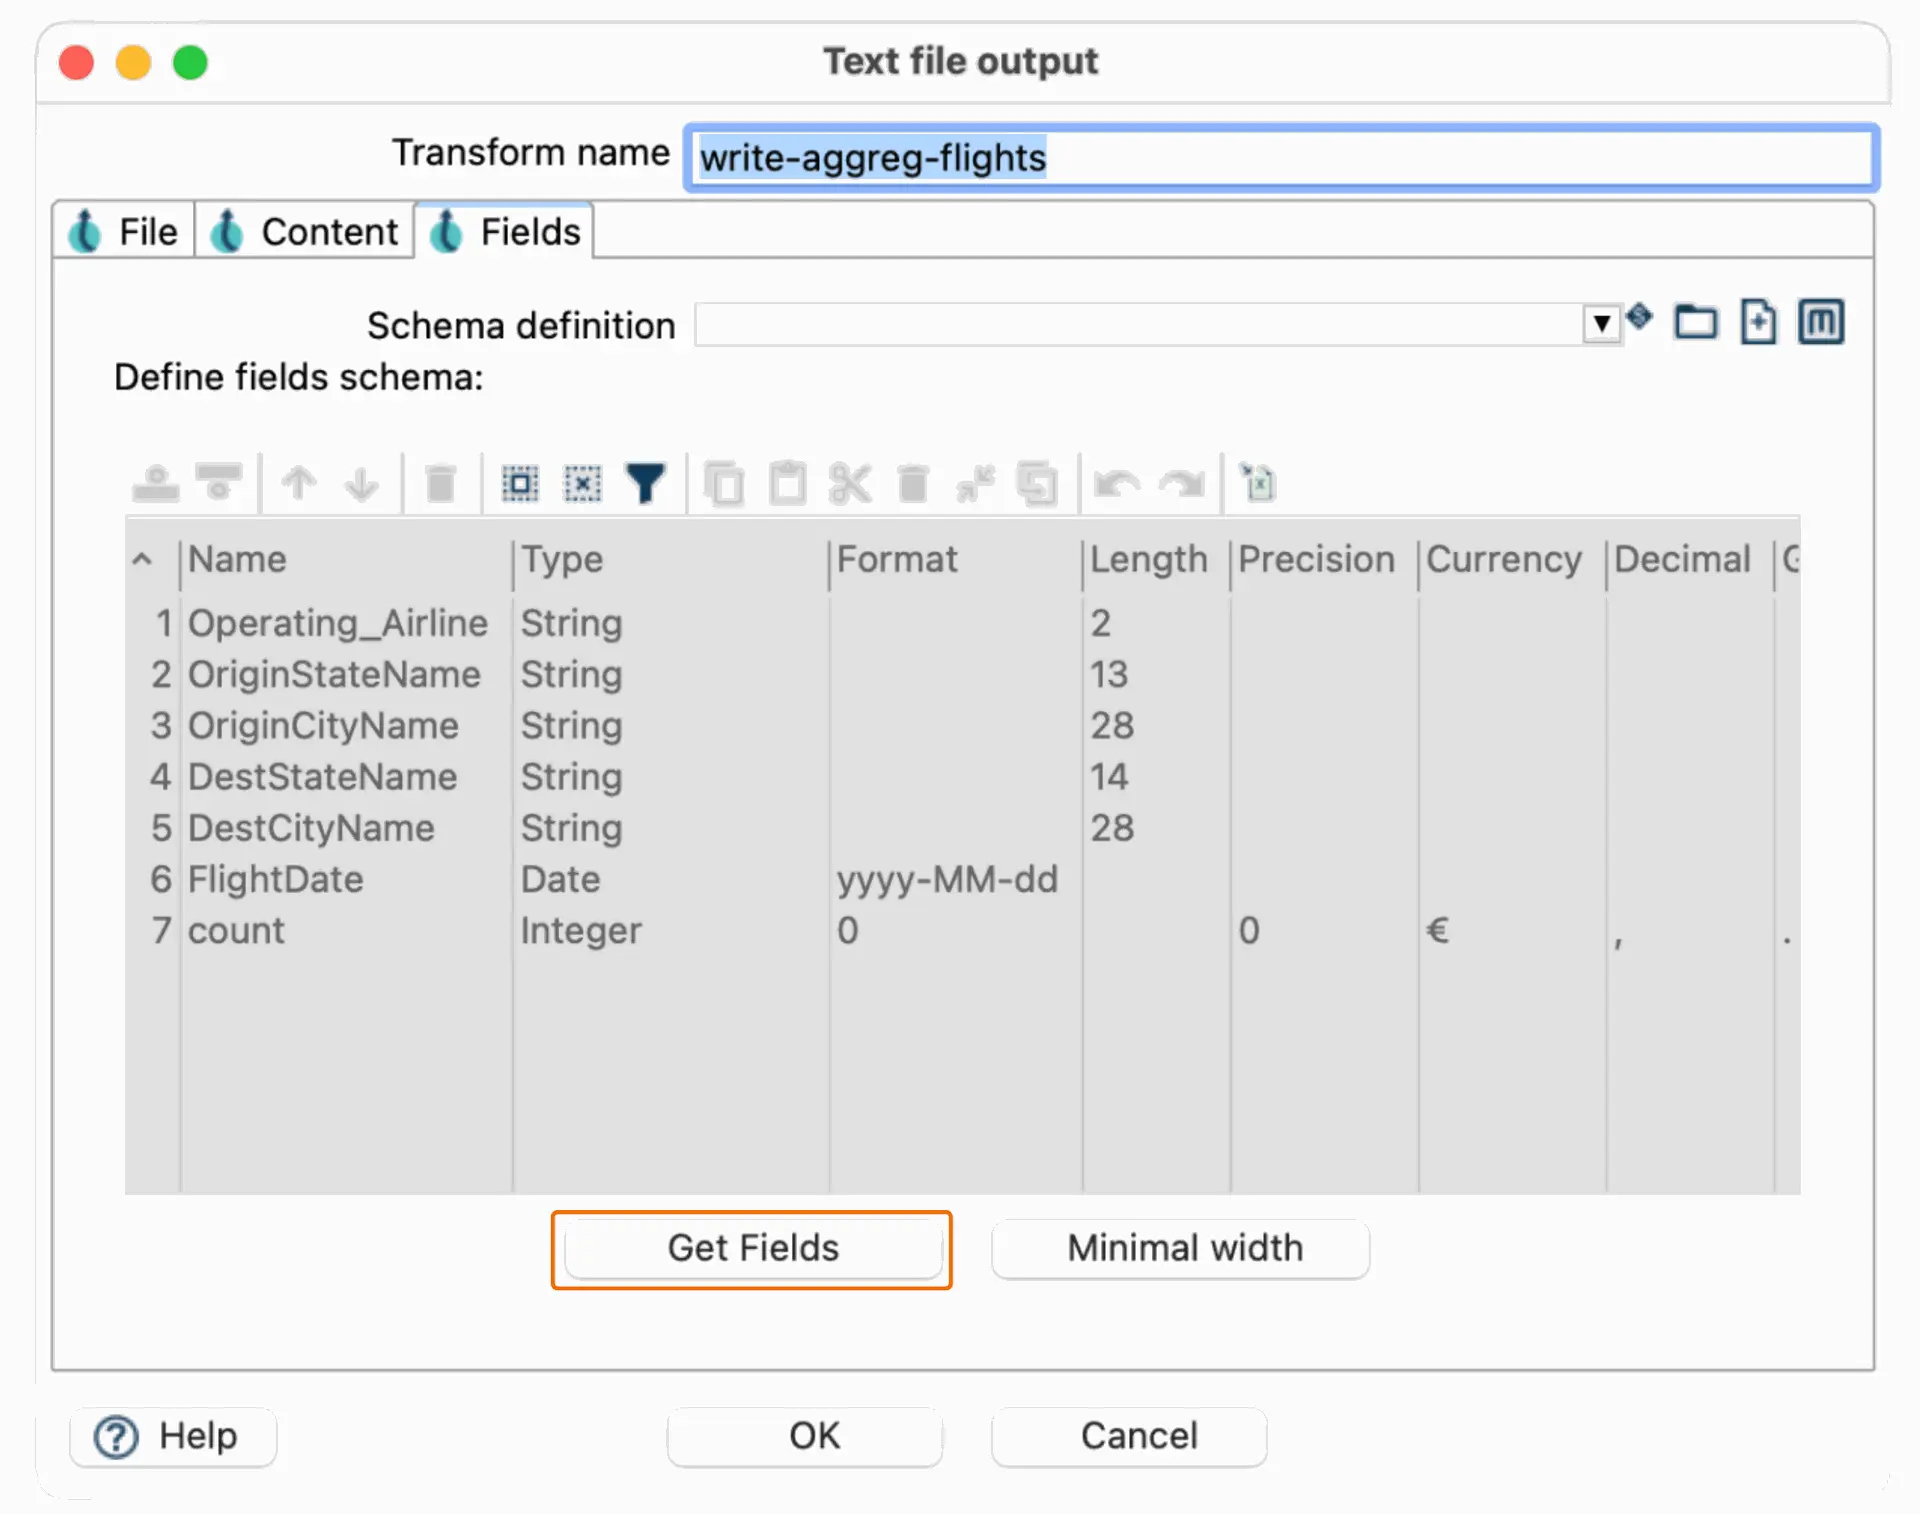
You can use the "Get Fields" option to retrieve all fields and then delete the ones you don't want to export.
Save the pipeline, and you're done with pipeline 2!

Creating the workflow
Now that our pipelines are ready, let's create a workflow to execute them in sequence.

Step 1: In the Hop GUI, create a new workflow and name it something like "flights-processing"
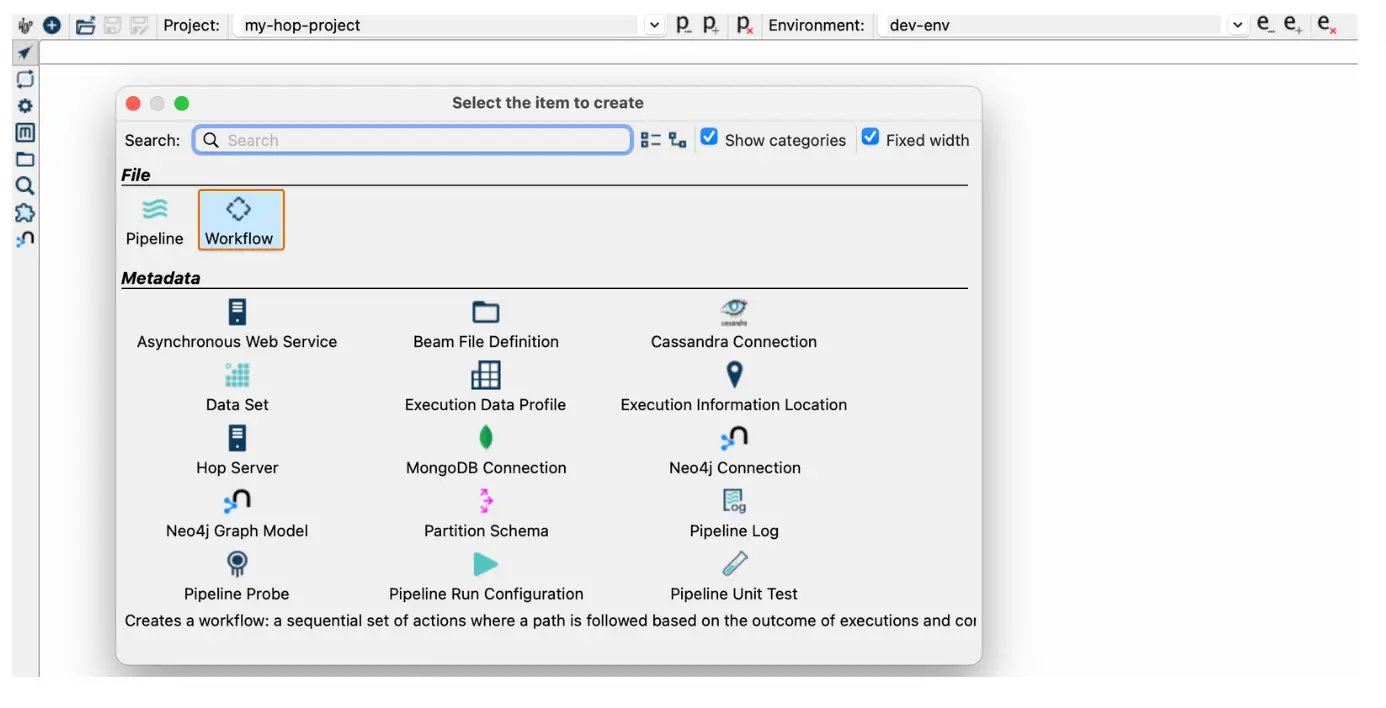
Step 2: Add two Pipeline Execution tasks to the workflow.

For the first task, link it to pipeline 1.
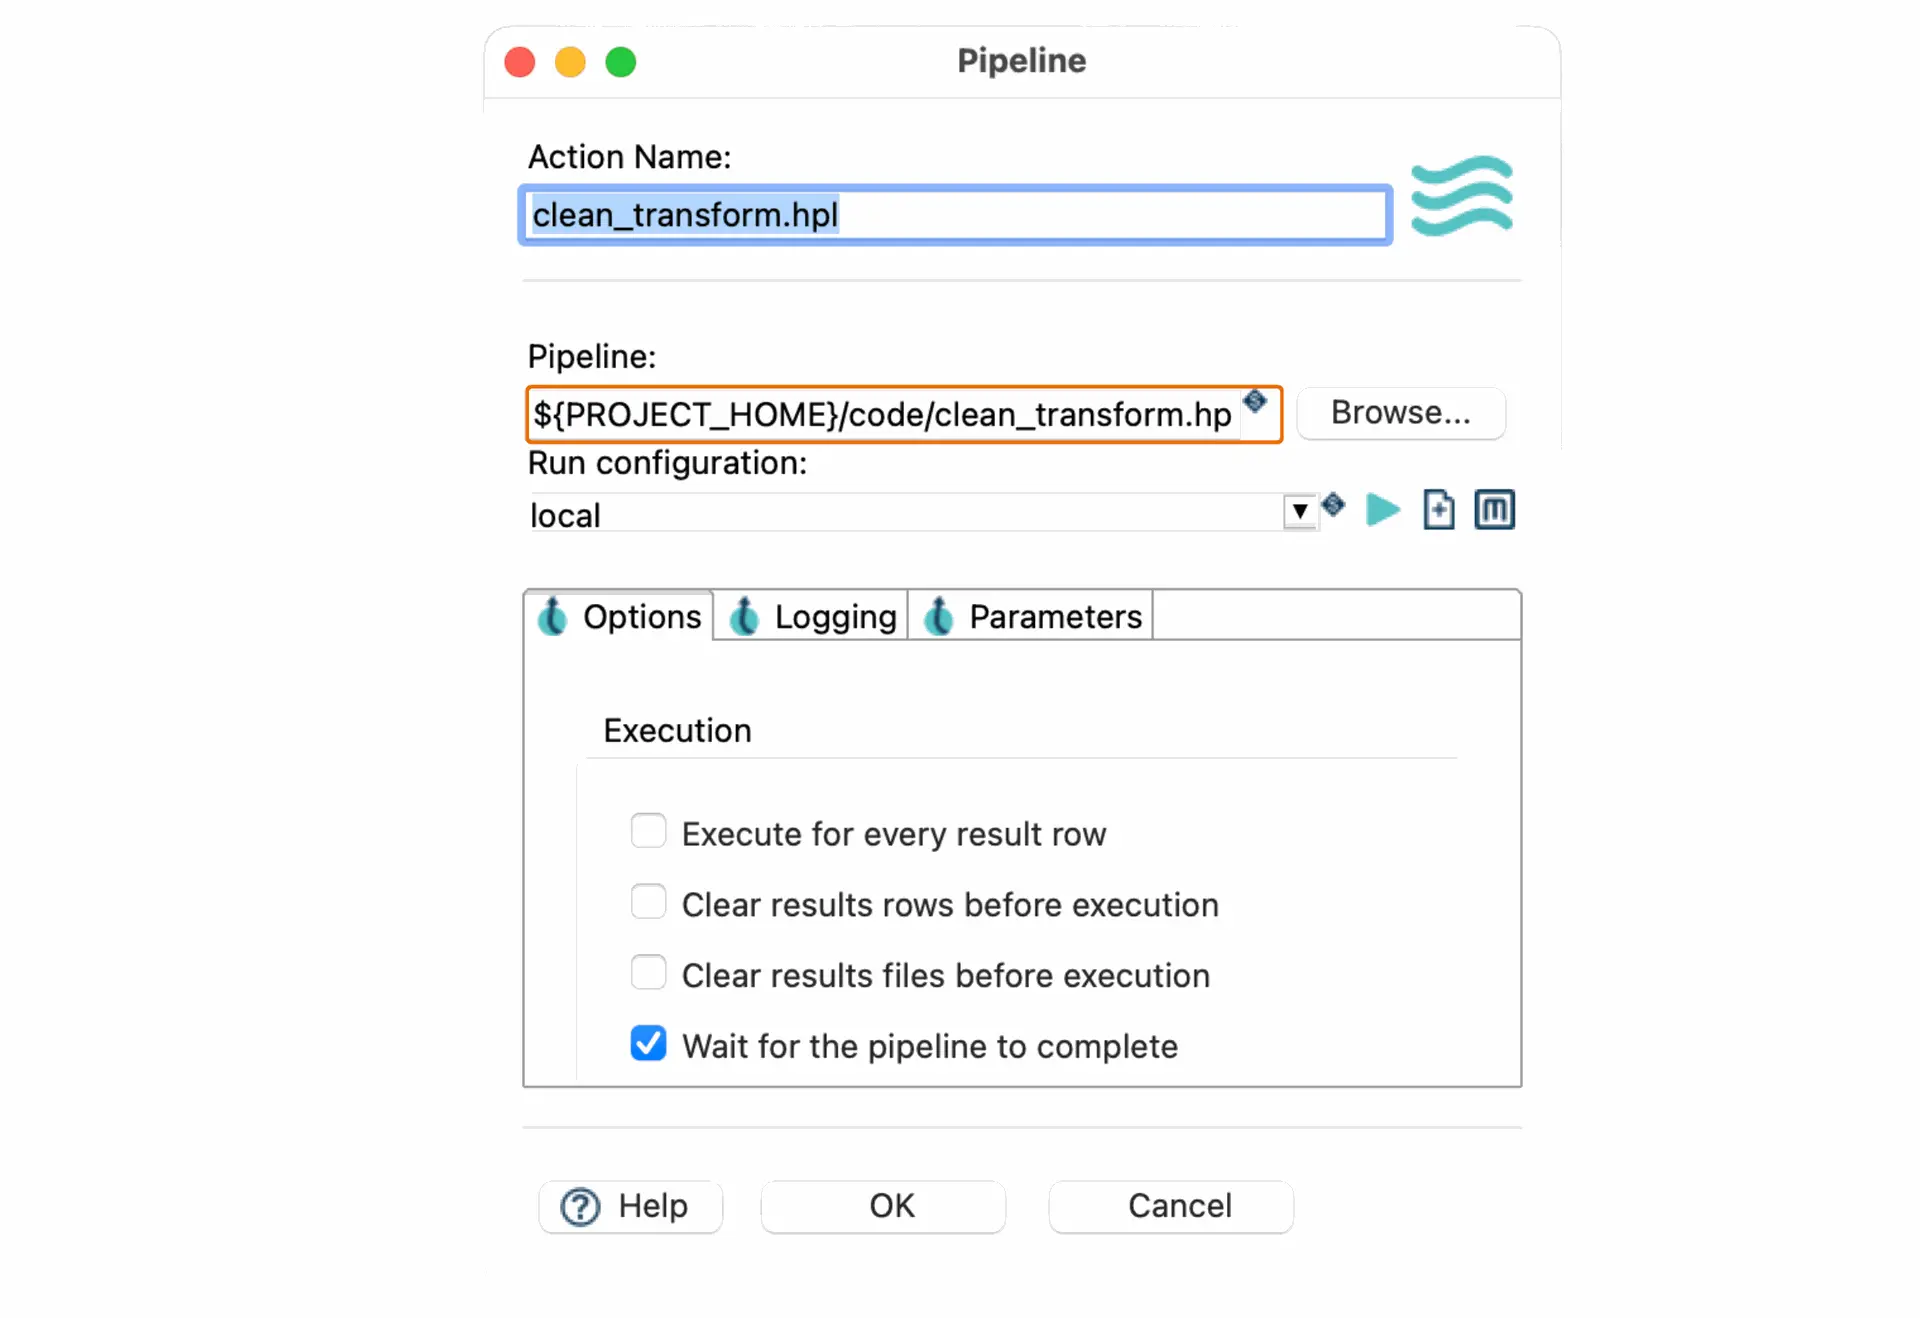
Then, set up the second task to execute pipeline 2.
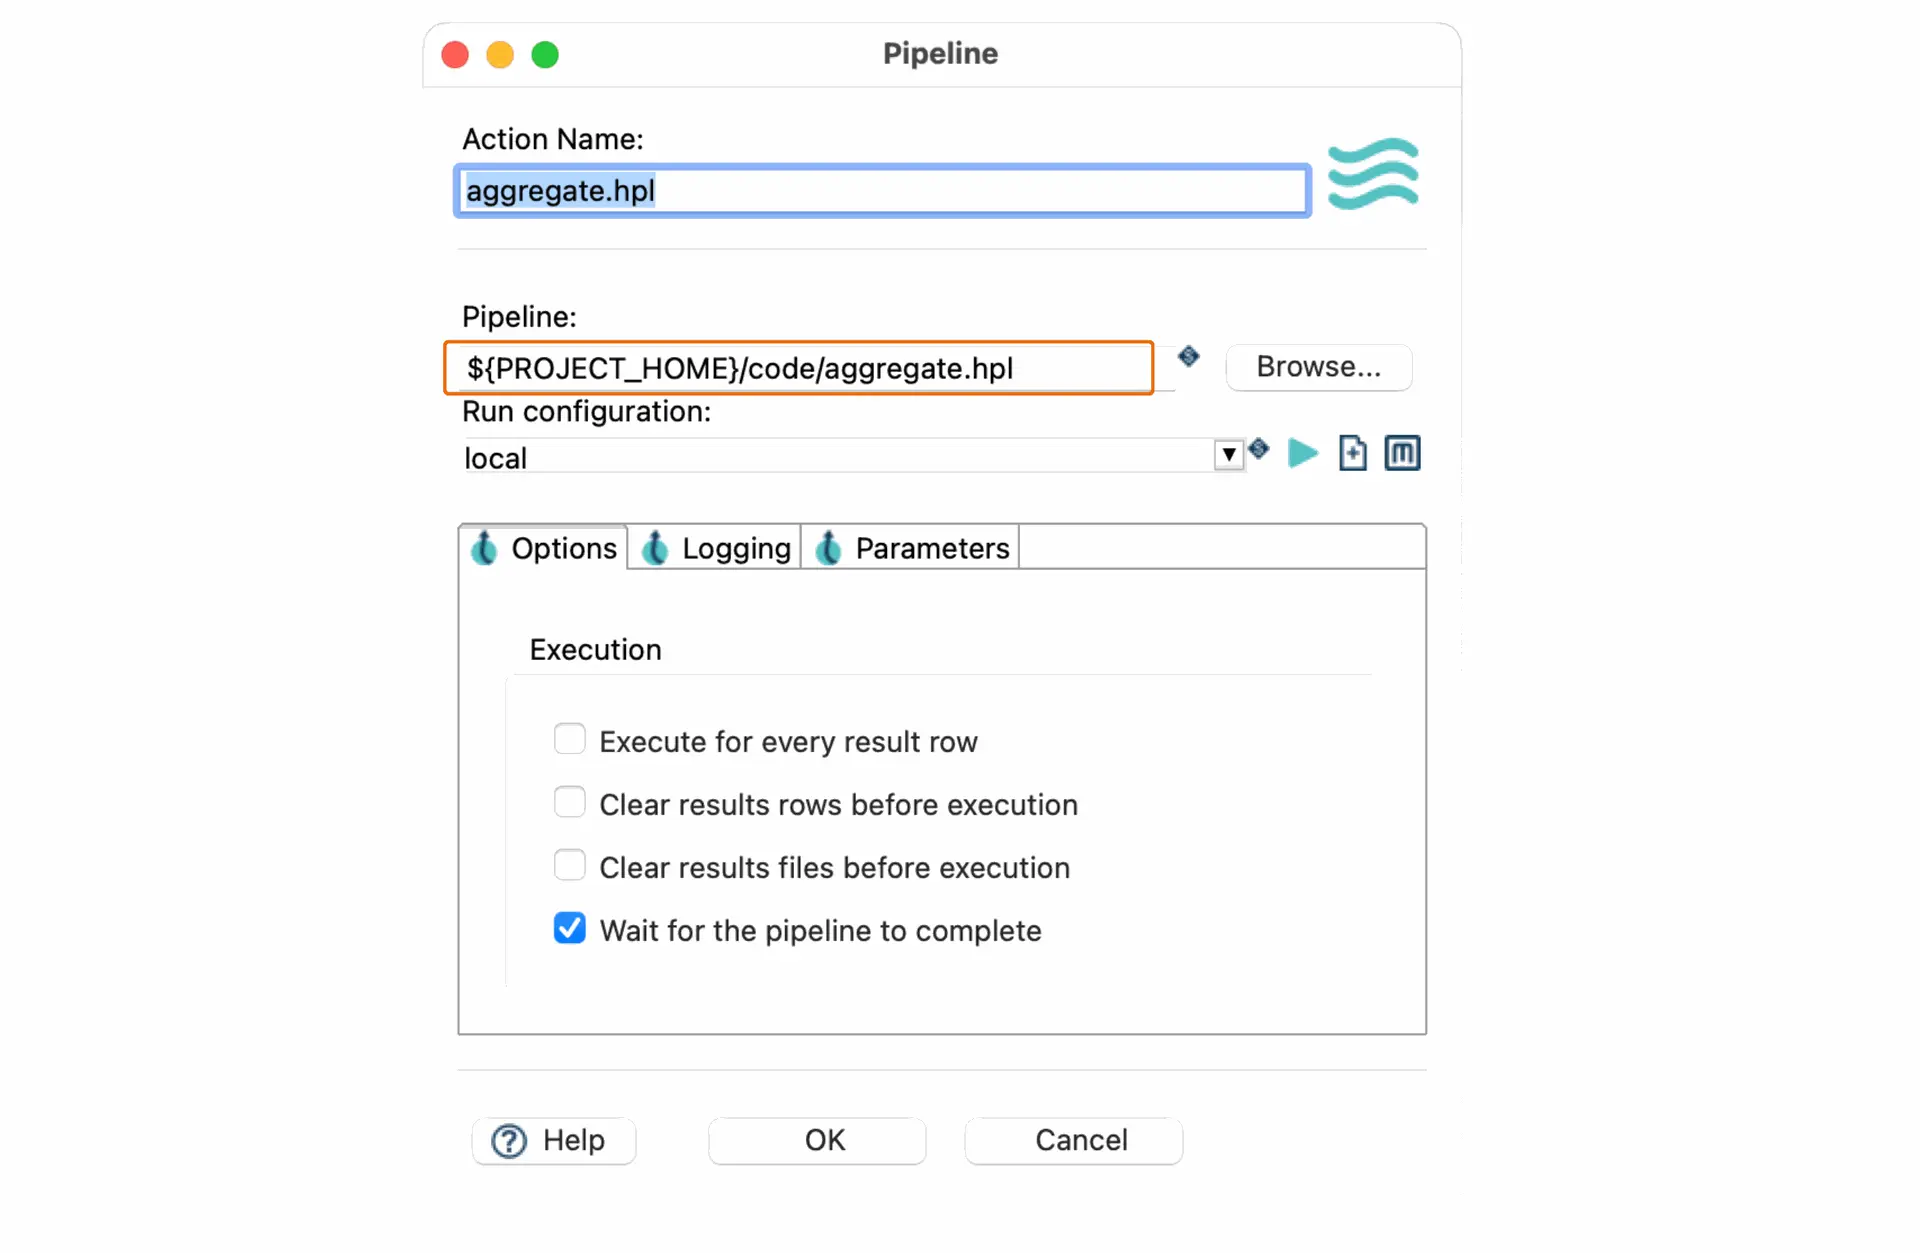
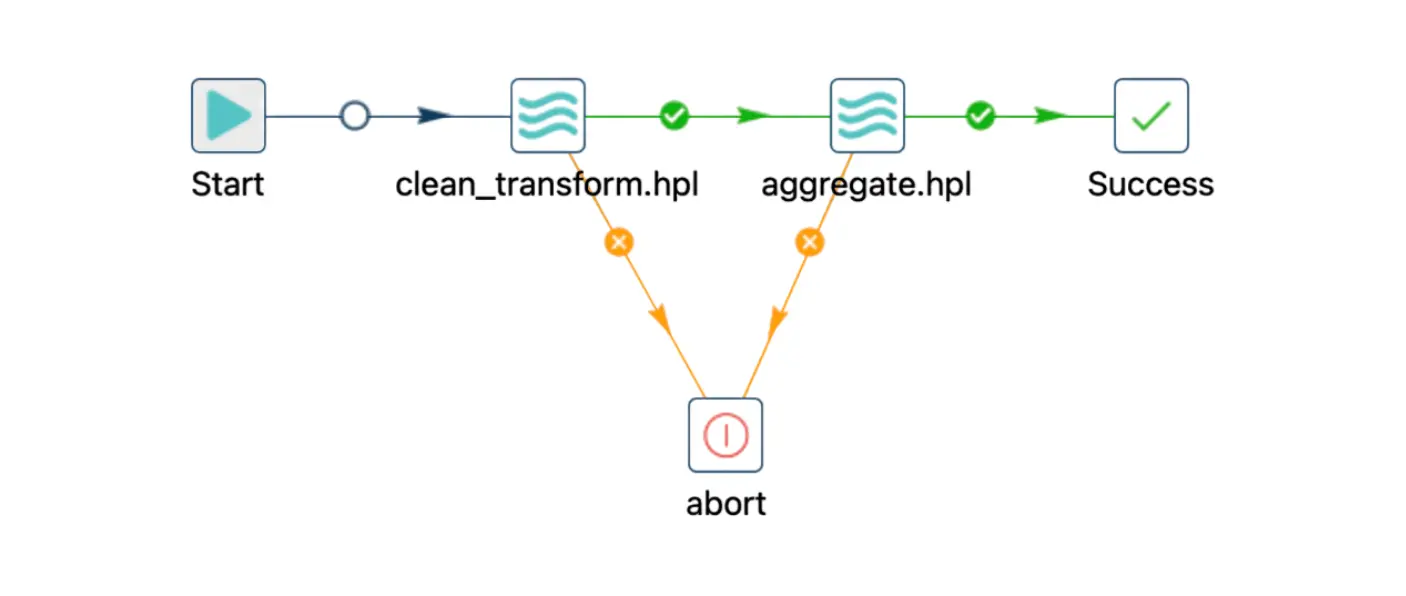
Step 3: Connect the actions, make sure the hop type from pipeline 1 and pipeline 2 is conditional, ensuring that pipeline 2 runs only after pipeline 1 completes successfully.

Step 4: Optionally, you can add notification steps or logging to track the workflow's execution and handle any errors.
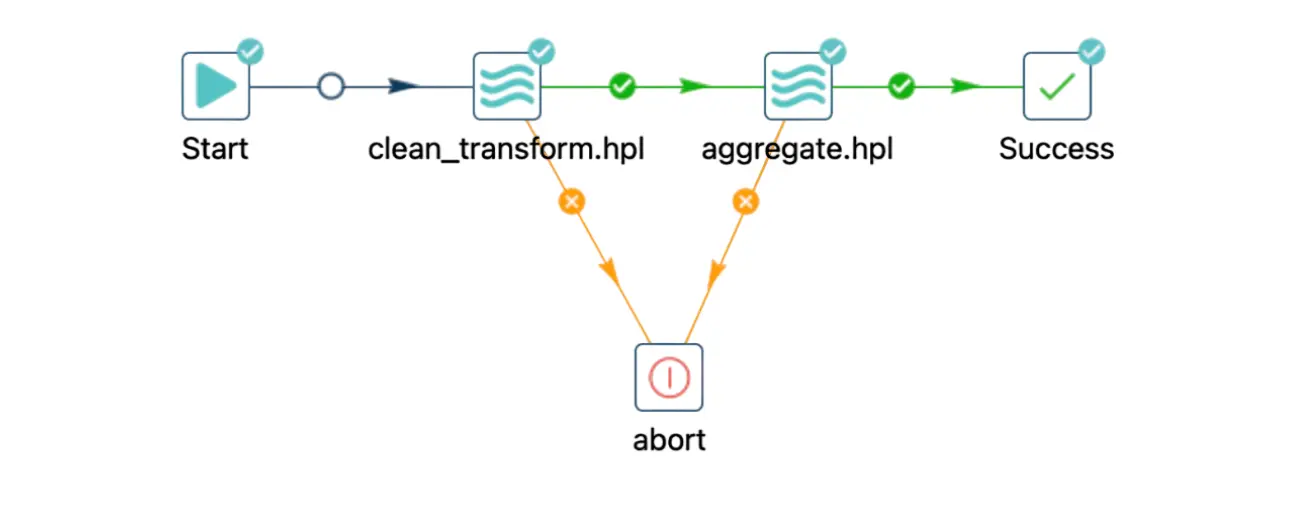
Once everything is configured, save your workflow and execute it.
Remarks
- Dataset access: The dataset used in this tutorial can be found in this link, so make sure to check it out if you want to follow along.
- Project setup: Remember that the dataset is stored in the folder set as the input in the INPUT environment variable. Ensure your environment is configured correctly to avoid issues.
In this small example, we use the same location for both the INPUT and OUTPUT environment variables, but feel free to configure them with different paths based on your project needs.
- Files naming: Each pipeline/workflow must have a unique name in your project. This will prevent conflicts during execution.
- Workflow execution: Don't forget to set up your workflow so that pipeline 2 only runs after pipeline 1 has successfully completed by using a conditional hop.
- Logging and notifications: Consider adding logging and notifications to your pipelines/workflow to track the execution process and handle any errors.
Conclusion
And there you have it! We've successfully built and executed two pipelines within a workflow using Apache Hop.
If you have any questions or run into any issues, feel free to leave a comment below, and I’ll be happy to help.
Don't miss the video below for a step-by-step walkthrough of the entire process!
Stay connected
If you have any questions or run into issues, contact us and we’ll be happy to help.