Welcome back to the final post in our “Build & deploy” series! In this post, we'll bring everything together by updating one of the pipelines from "Build & deploy 2", re-running the workflow, and exploring various ways to execute it—using the GUI, Hop Run, and Docker. We’ll also provide a recap of the entire series, helping you solidify your understanding of Apache Hop's key features.
Let’s kick off the final steps of our "Build & deploy" series!
Updating pipeline clean-transform.hpl
In "Build & deploy 2", we created two pipelines: one for cleaning and transforming flight data and another for aggregating it.
 Let’s revisit pipeline 1: clean-transform.hpl and make a small update to improve its functionality.
Steps by step
Step 1: Add a new field to capture delays:
- Open the clean-transform pipeline in the Hop GUI.
- Add a new field called TotalDelayMinutes to the Calculator transform, summing the departure and arrival delay fields (DepDelayMinutes + ArrDelayMinutes).
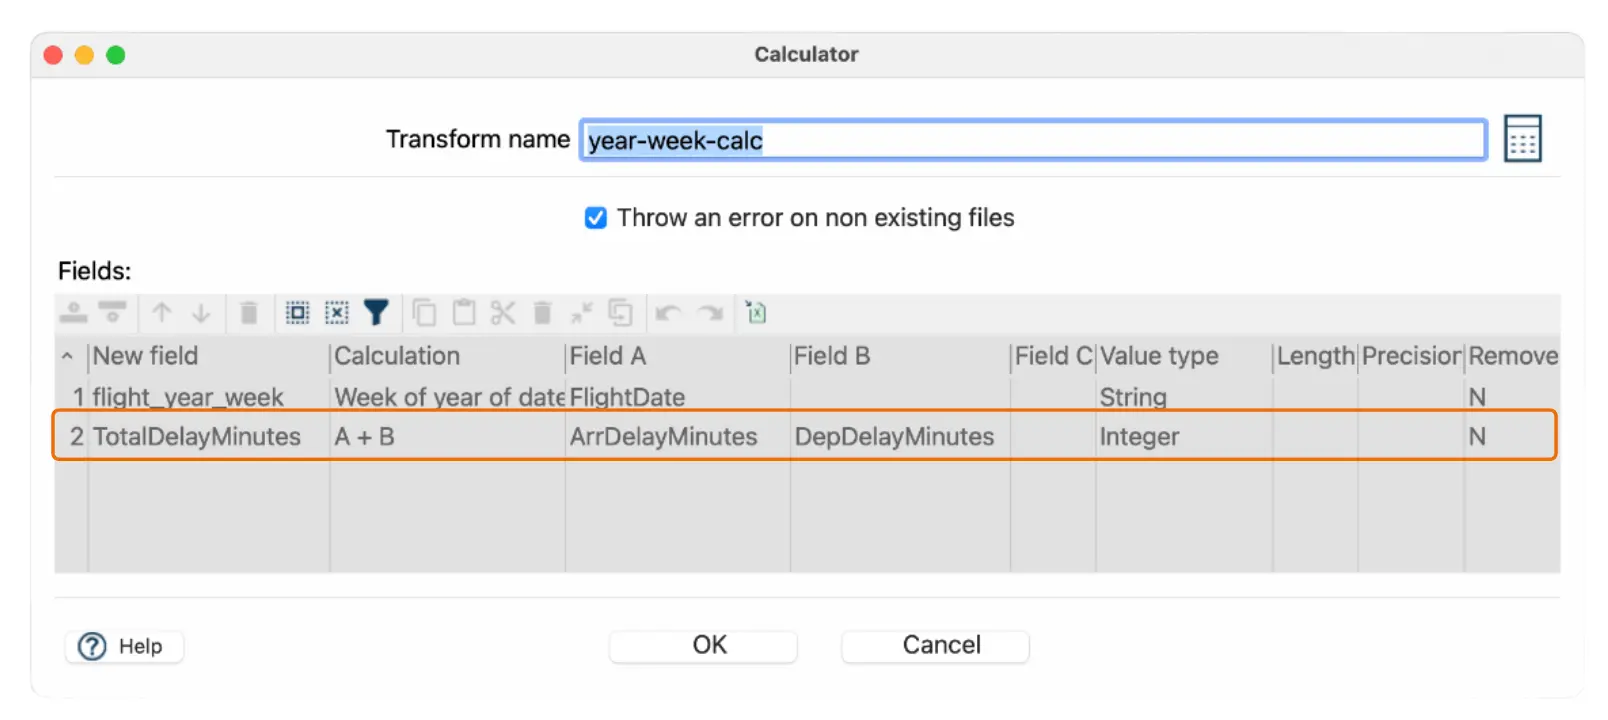
Step 2: Update JavaScript logic:
- Open the JavaScript transform.
- Modify the existing JavaScript code to also check if the total delay exceeds a certain threshold (e.g., 60 minutes) and flag the flight as "SeverelyDelayed" for further analysis.
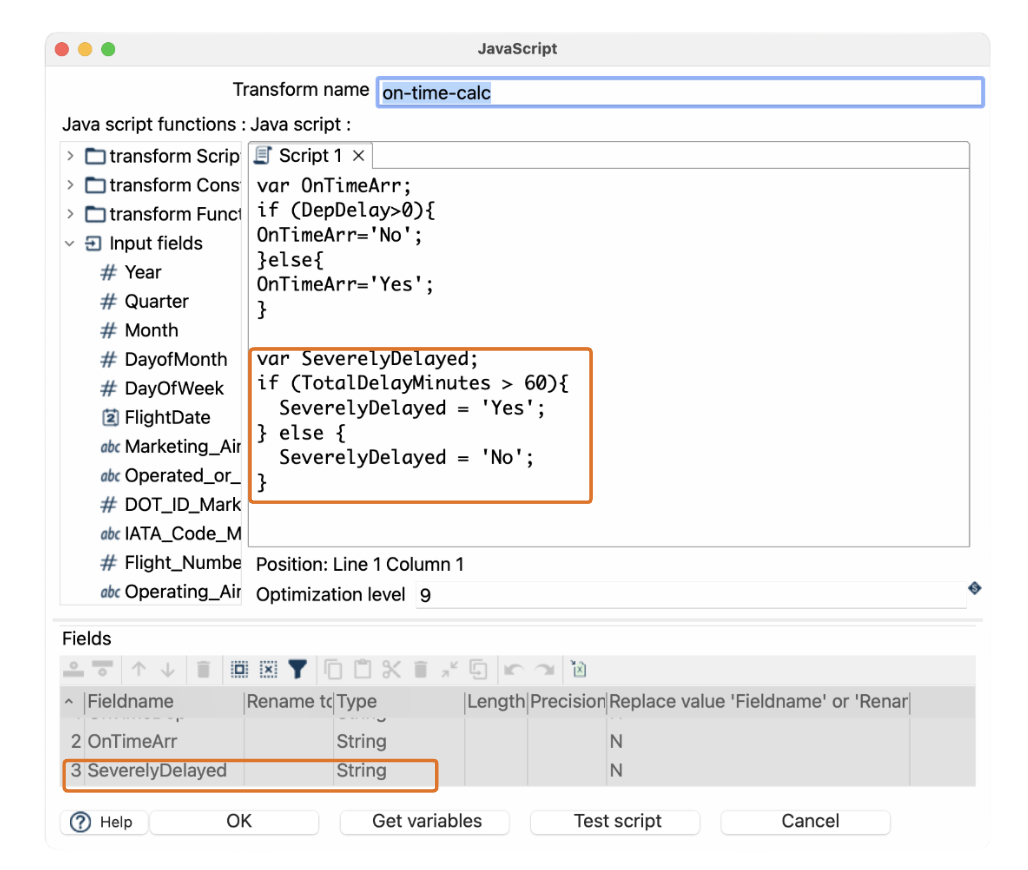
New script example:
javascript
var SeverelyDelayed;
if (TotalDelayMinutes > 60){
  SeverelyDelayed = 'Yes';
} else {
  SeverelyDelayed = 'No';
}
Step 3: Add output fields and save:
- Add the new two fields to the Text File output transform.
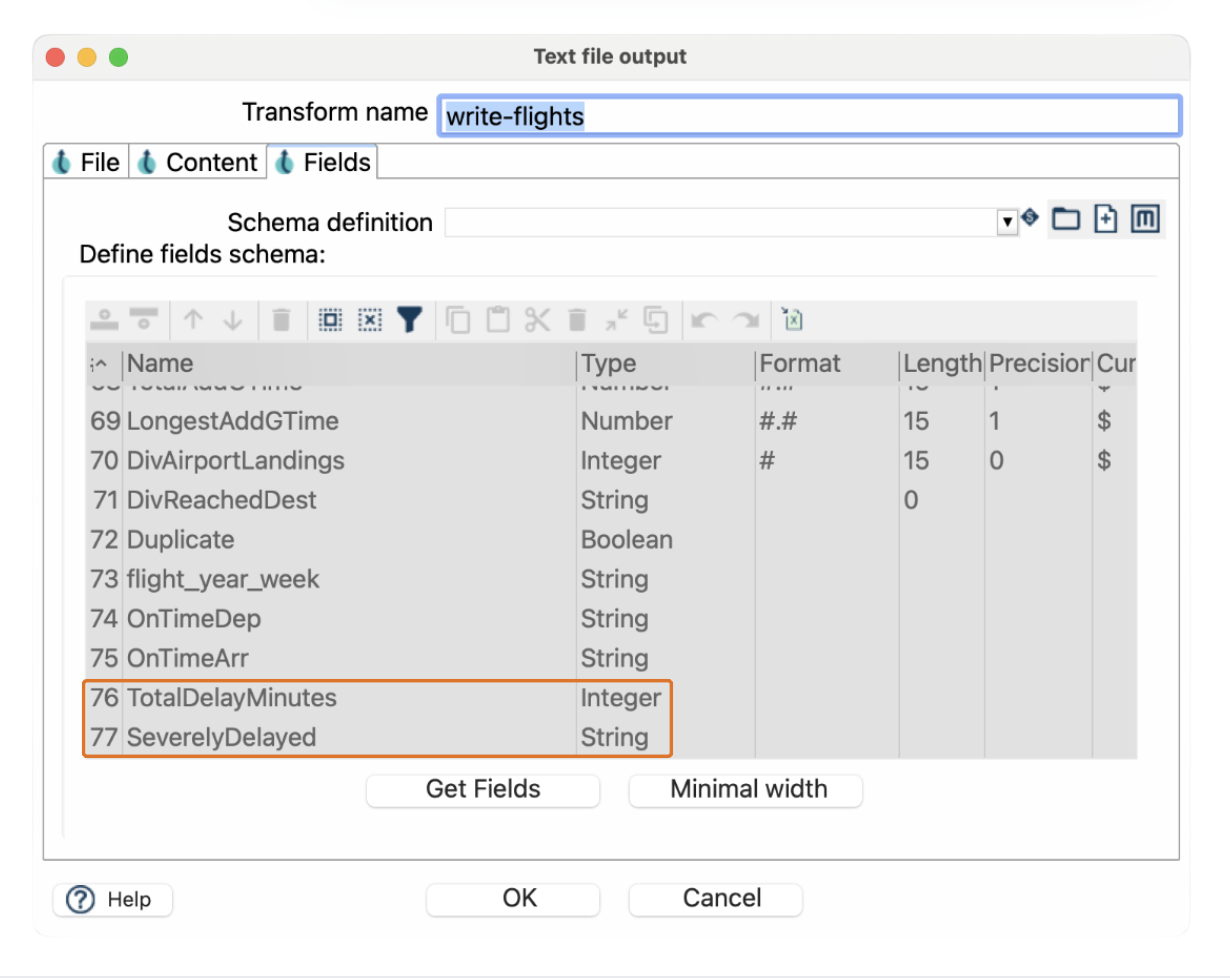
- Save your updated pipeline under the same name or as a new version if you want to preserve the original.
- Add the new two fields to the Text File output transform.
Adding changes to Git
Before rerunning the workflow, follow these steps to add your changes to Git:
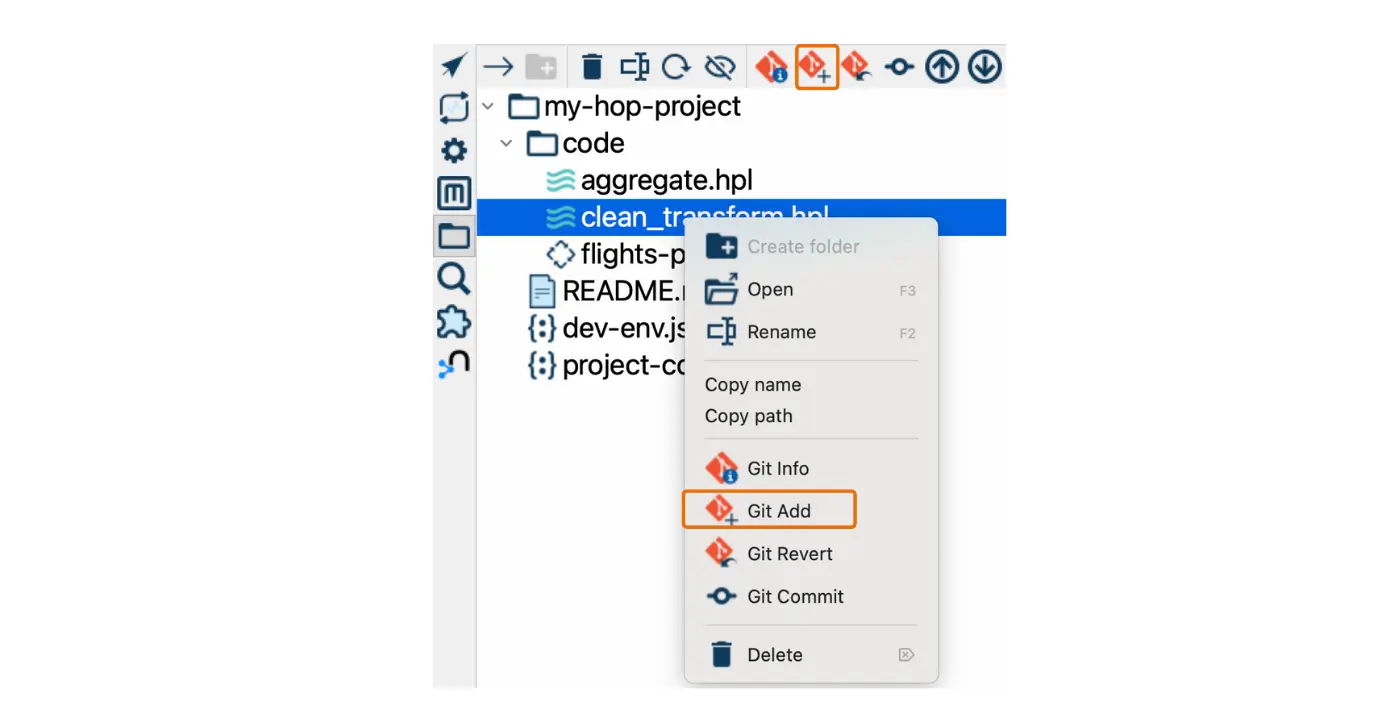
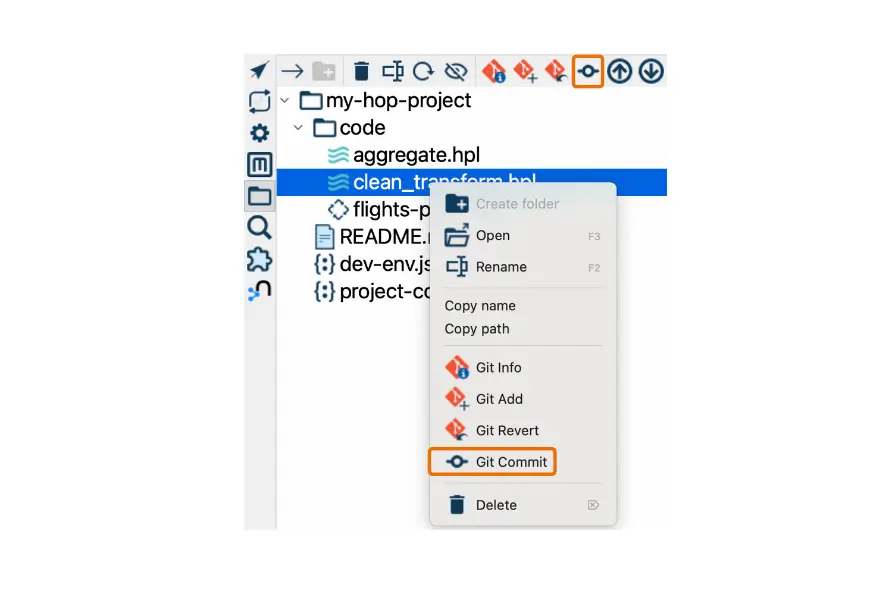
- Open File Explorer perspective: Press CTRL + Shift + E (or click the folder icon). Modified files will be highlighted in blue.
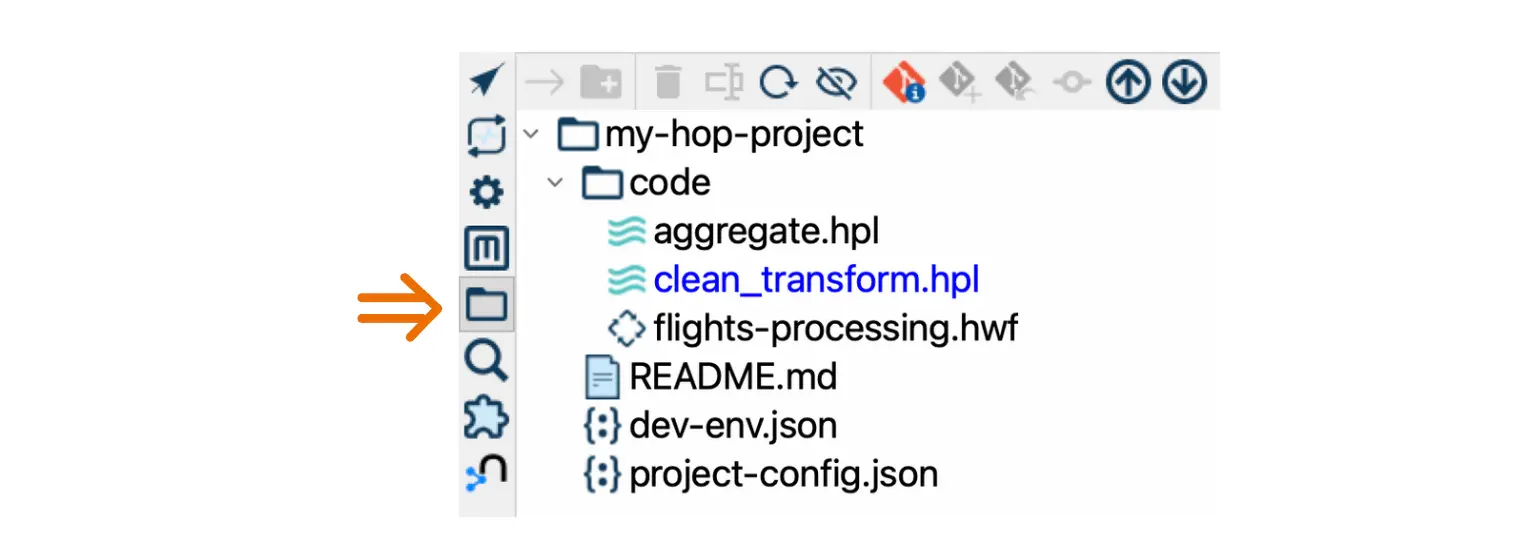
- Add changes: Select "Git Add" to include your changes.
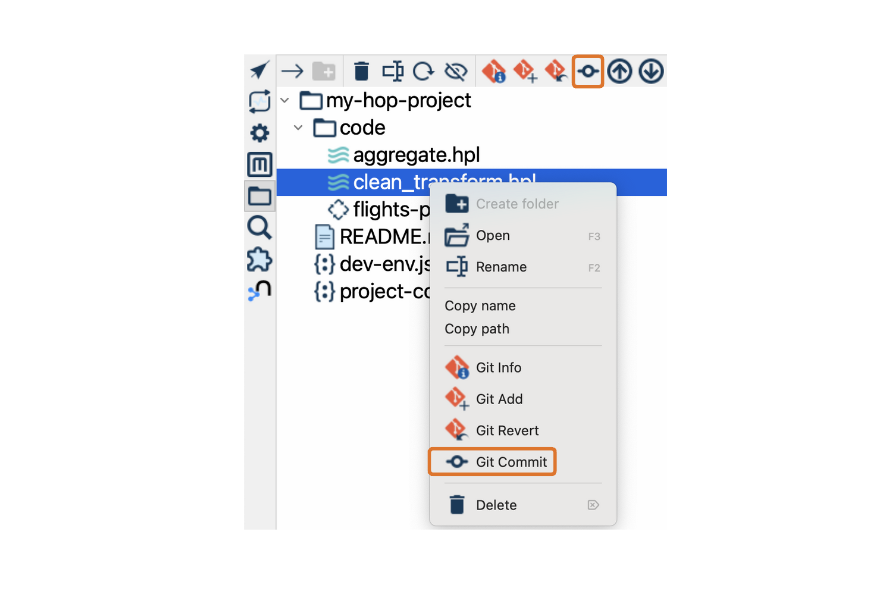
- Commit changes: Click "Git Commit" in the toolbar.
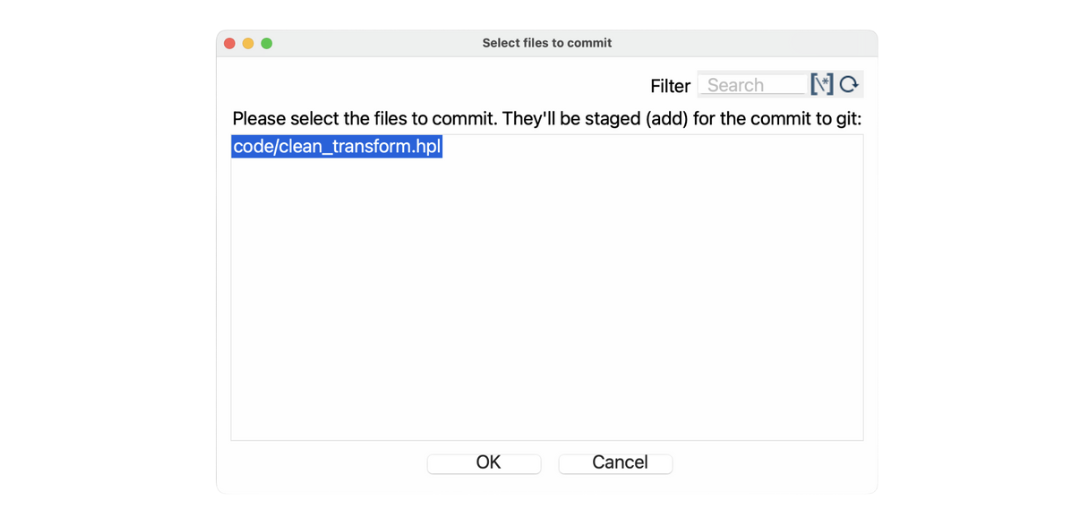
- Confirm the files you want to include in the commit.
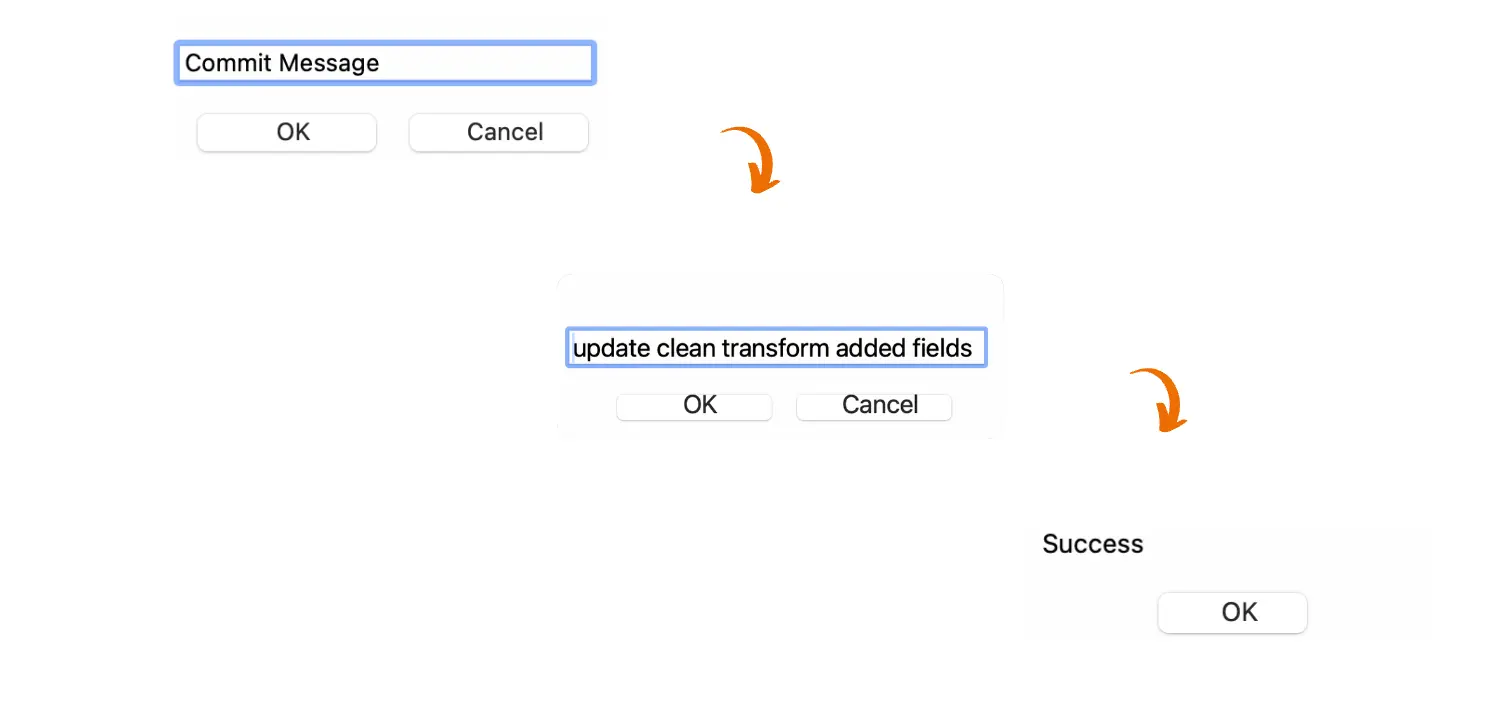
- Enter a descriptive message summarizing your changes, and confirm the commit. The files will revert to a neutral color.
- Push changes: Click "Git Push" in the Git toolbar, enter your username and password, and a confirmation message will indicate a successful push.
Re-running the workflow using different methods
Now that we’ve made updates to Pipeline 1, let’s re-run the entire workflow using three different methods: GUI, Hop Run, and Docker.
1. Running the workflow in the Hop GUI:
- Open the flights-processing workflow created in Build & Deploy 2.
- Verify that the workflow is linked to the updated version of Pipeline 1 and make sure the sequence of execution is correct.
- Click on the Start option to execute the workflow in the GUI, ensuring that both pipelines run successfully, with Pipeline 2 picking up the new SeverelyDelayed field for aggregation.
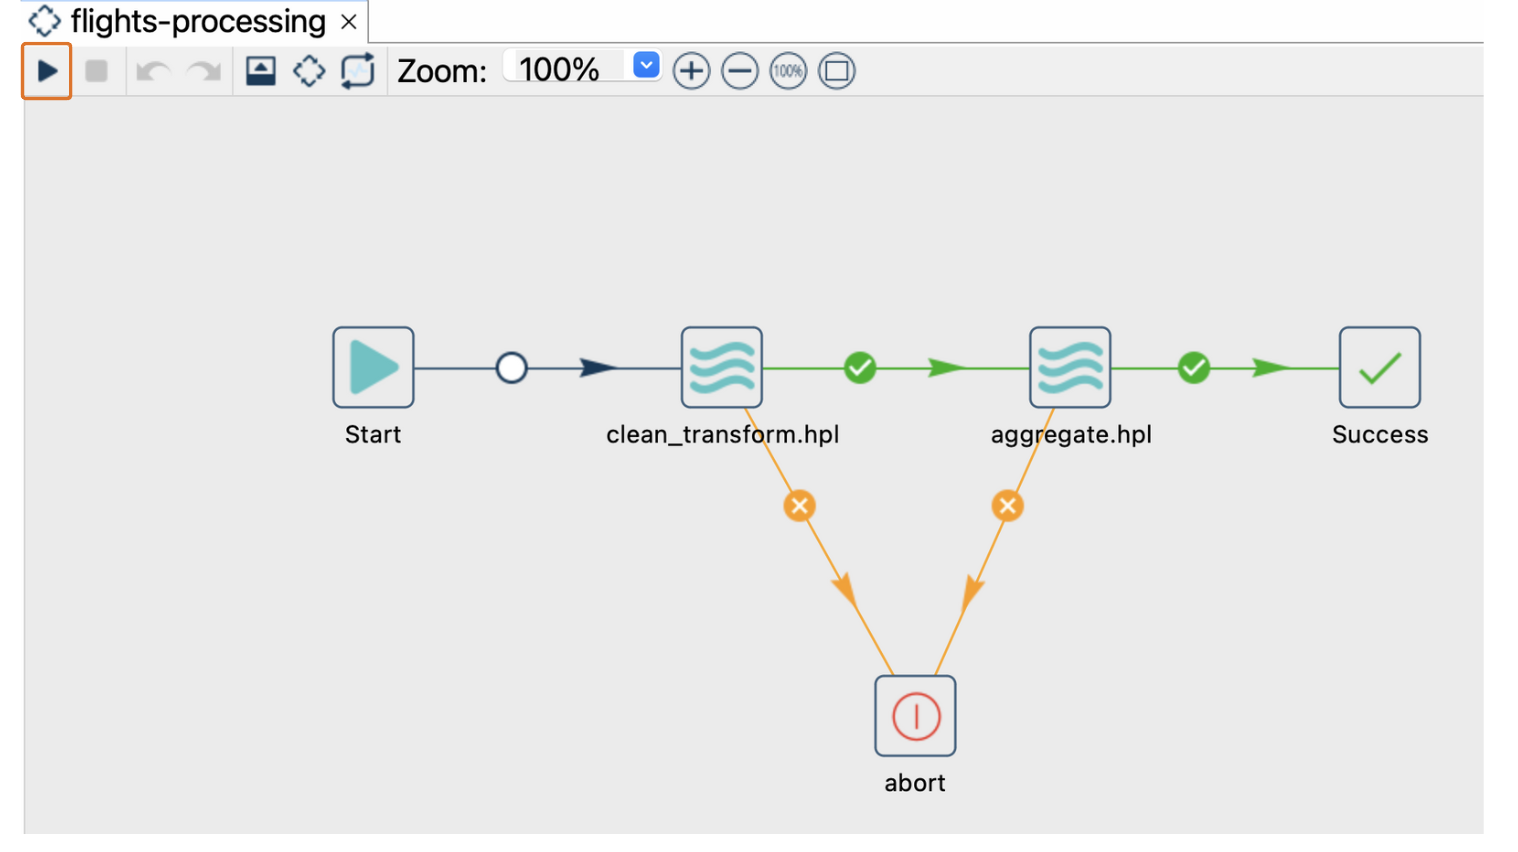
Result: You’ll see the workflow logs and status directly in the GUI as the workflow progresses, showing the successful completion of each step.
2. Running the workflow using Hop Run:
To execute the workflow from the command line, use the hop-run tool:
- First, locate hop-run in your hop directory.
Command for Windows:
cd C:\path\to\your\apache-hop-directory
Command for macOS/Linux:
cd /path/to/your/apache-hop-directory
Command for Windows:
bash
hop-run.bat -j my-hop-project -f C:\path\to\my-hop-project\code\flights-processing.hwf -r local -l=BASIC
Command for macOS/Linux:
bash
./hop-run.sh -j my-hop-project -f /path/to/my-hop-project/code/flights-processing.hwf -r local -l=BASIC
Command breakdown:
- -j my-hop-project: Specifies the project within which the workflow exists.
- -f <path>: Specifies the path to the workflow file .hwf.
- -r local: Tells Hop Run to use the local run configuration.
- -l=BASIC: Sets the log level to Basic, giving you enough detail to track the execution.
Result: The workflow runs from the terminal, with logs displayed according to the specified log level. You can monitor the progress and troubleshoot if necessary.
3. Running the workflow in Docker:
If you're using Docker to containerize and execute your Hop projects, here’s how to run the workflow:
Docker Command:
bash
docker run -it --rm \
  --env HOP_LOG_LEVEL=Basic \
  --env HOP_FILE_PATH='${PROJECT_HOME}/code/flights-processing.hwf' \
  --env HOP_PROJECT_FOLDER=/files \
  --env HOP_PROJECT_NAME=my-hop-project \
  --env HOP_RUN_CONFIG=local \
  --name hop-workflow-container \
  -v /path/to/my-hop-project:/files \
  apache/hop:latest
Command breakdown:
- --env HOP_LOG_LEVEL=Basic: Sets the logging level to "Basic."
- --env HOP_FILE_PATH='${PROJECT_HOME}/code/flights-processing.hwf': Specifies the path to the pipeline file.
- --env HOP_PROJECT_FOLDER=/files: Maps the project folder inside the container.
- --env HOP_PROJECT_NAME=my-hop-project: Defines the project within Apache Hop.
- --env HOP_RUN_CONFIG=local: Tells Docker to run the pipeline using the "local" configuration.
- -v /path/to/my-hop-project:/files: Maps your local project folder to the container.
- apache/hop:latest: Runs the latest Apache Hop image from Docker Hub.
Result: The workflow runs inside the Docker container, with logs and status displayed in the terminal. This method is ideal for deploying workflows in a production environment.
Recap of the "Build & deploy" series
As we conclude the series, let's recap the key steps and lessons from each post:

- Build & deploy 1: Installation, first project, and environment
- Set up Apache Hop, create your first project, and configure environments.
- Build & deploy 2: Develop your first pipelines in a workflow
- Designed two pipelines for data cleaning and aggregation, and executed them in a workflow.
- Build & deploy 3: Manage your Apache Hop project with the Git integration
- Integrated Git for version control, enabling collaboration and proper project tracking.
- Build & deploy 4: Upgrade Apache Hop version without losing your configurations
- Explained how to safely upgrade Apache Hop while preserving your configurations and settings.
- Build & deploy 5: First project and environment using Hop Conf
- Managed projects and environments using the Hop Conf command-line tool for more advanced configurations.
- Build & deploy 6: Running Apache Hop pipelines and workflows using Hop Run
- Learned how to execute pipelines and workflows using the hop-run command-line tool, including setting log levels and configurations.
- Build & deploy 7: Running Apache Hop pipelines and workflows using Docker
- Explored how to run Apache Hop workflows and pipelines within Docker containers, ideal for deployment in production environments.
- Build & deploy 8: Updating and rerunning your Apache Hop project
- Updated and enhanced an existing pipeline, then ran the workflow using the GUI, Hop Run, and Docker, showcasing various execution methods.
Conclusion
And that wraps up our "Build & deploy" series for Apache Hop! We’ve covered everything from initial setup and pipeline development to managing projects with Git, upgrading Hop, and running workflows using different tools. With these foundational skills, you’re now equipped to build, manage, and deploy complex data workflows and pipelines using Apache Hop in a variety of environments.
Check the video below for a step-by-step walkthrough of the entire process!
Stay connected
If you have any questions or run into issues, contact us and we’ll be happy to help.